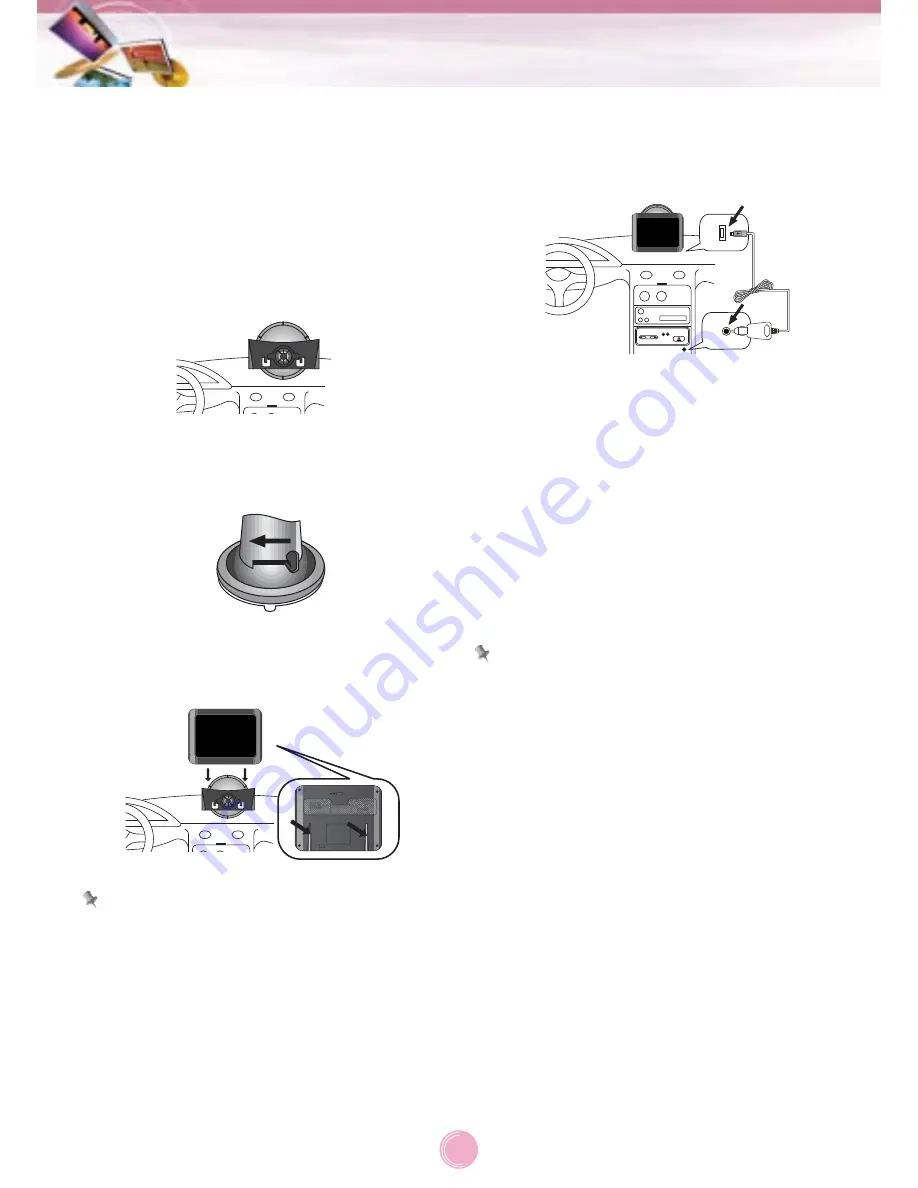
1.
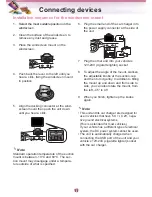
Select the most suitable position on the
windsc
reen.
2.
Clean the surface of the windscreen, to
remove any dust and grease.
3.
Place the windscreen mount on the
windscreen.
4.
Push back the lever to the left until you
hear a click, fixing the windscreen mount
in position.
5.
Align the docking connector at the wind-
screen mount then push the unit down
until you hear a click.
Note
Standard operation temperature of the suction
mount is between -10
q
C and 60
q
C. The suc-
tion mount may disengage under a tempera-
ture outside of what is specified.
6.
Plug the small end of the car charger into
the power supply connector at the side of
the unit.
7.
Plug the other end into your vehicle’s
12V-24V (cigarette lighter) socket.
8.
To adjust the angle of the mount, slacken
the adjustable knobs at the suction-cup
and then turn it gently. In addition to tilting
the mount up and down and from side to
side, you can also rotate the mount, from
the left, -45
q
to 45
q
9.
When you finish, tighten up the knobs
again.
Note
• This unit and its car charger are designed for
use in vehicles that have 5.0 +/- 0.2V, nega-
tive ground electrical systems.
(This is a standard for most vehicles.)
If your vehicle has a different type of electrical
system, the DC power system cannot be used.
• The unit is automatically charged when
connecting the USB port of the unit and your
vehicle’s 12V-24V (cigarette lighter) socket
with the car charger.
Connecting devices
11
Installation sequence for the windscreen mount


