background image

Power Source

BEFORE OPERA

TION

7

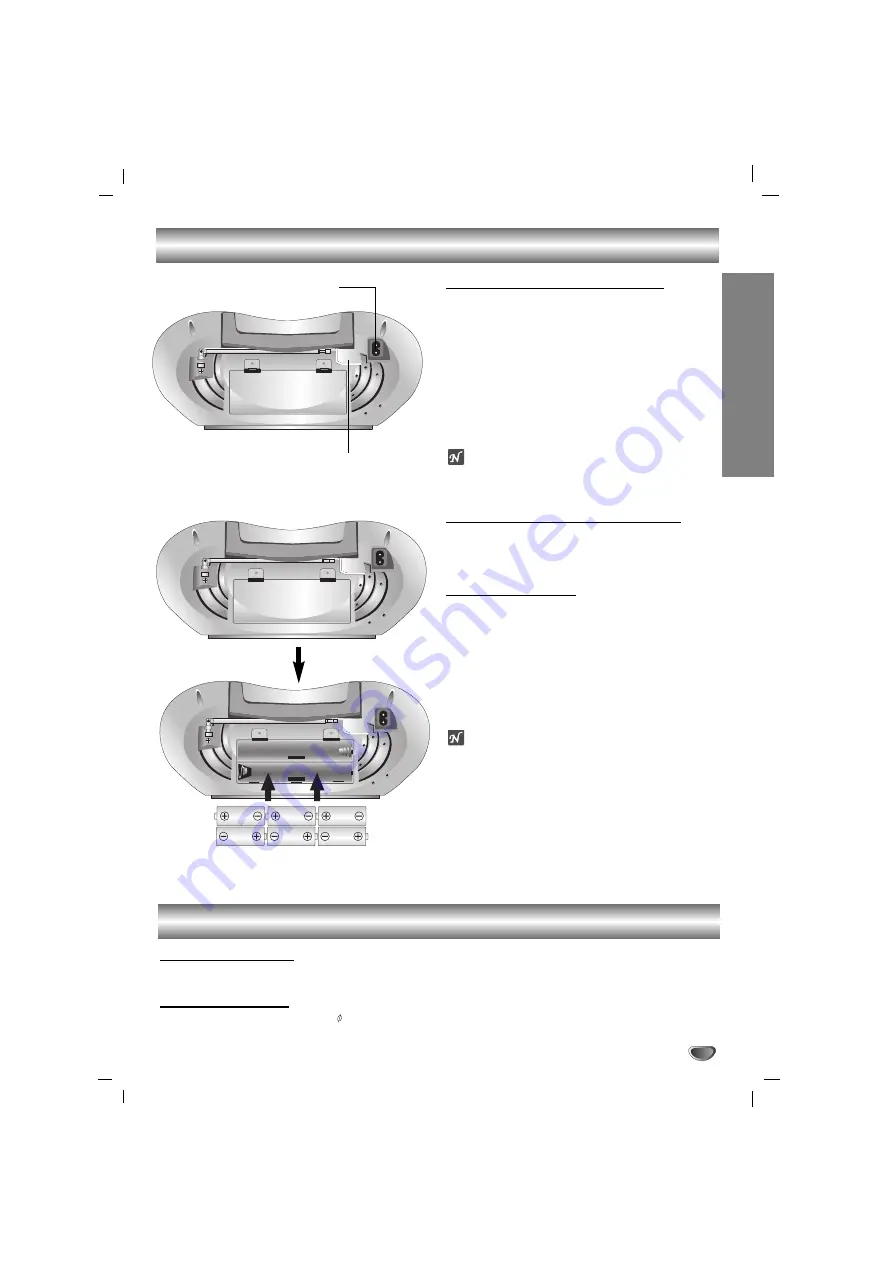
The AC Power Cord Connection

11

Before connecting the AC power cord, check
that the  operating voltage of your unit is 
identical with the voltage of your local power
supplied.

2

2

Connect one end of the AC power cord 
(supplied) to the AC IN socket located at the
backside of your unit.

3

3

Plug the other end into the wall outlet.

Note

Unplug the AC power cord from the wall outlet if you
do not to use for an extended period of time.

Adjusting the voltage (OPTIONAL)

If your unit is equipped with a voltage selector at the
back side, be sure to set it to your local power supplied
before connecting the AC power cord.

Battery Installation

11

Press and open the battery cover.

2

2

Put six “C”(R14) batteries (not supplied) into
the compartment making sure the + and - are
correctly positioned.

3

3

Replace the battery cover.

Note

To avoid damage from possible battery leakage,
remove the batteries if you do not plan to use the unit
for an extended period of time.

When the batteries are weak, replace all the batteries
with new ones.

During the AC power cord connect to the wall outlet,
the batteries are not worn out.

To mains (wall outlet) 

Audio Adjustment

Volume Adjustment

Turn 

VOLUME CONTROL DIAL 

clockwise to increase the sound level, or counterclockwise to decrease it.

Headphone Socket

• Connect a stereo headphone plug ( 3.5mm) into the headphone jack.
• The speakers are automatically disconnected when you plug in the headphones (not supplied).

VOLTAGE SELECTOR 

Summary of Contents for LPC-130A

Page 1: ...ORDER OWNER S MANUAL MODEL LPC 130A X Please read this manual carefully before operating your set Retain it for future reference Designs and specifications are subject to change without notice for improvement ES_LPC 130 ENG 25K ...

Page 2: ...ok case or similar unit This label is located on the interior This Compact Disc player is classified as a CLASS 1 LASER product The CLASS 1 LASER PRODUCT label is located on the exterior CAUTION Use of controls or adjustments or performance of procedures other than those specified herein may result in hazardous radiation exposure Laser component in this product is capable of emit ting radiation ex...

Page 3: ...Operation 8 Listening to the radio 8 Setting STEREO MONO 8 Tape Operation 8 Basic Playback 8 To Pause Play 8 To Stop Play 8 To Play Rewind or Fast Forward 8 CD Operation 9 Basic Playback 9 To Pause Play 9 To Stop Play 9 To Skipping the Track 9 To Searching the Track 9 To Repeat Play 9 Recording 10 Basic Recording 10 CD Synchronized Recording 10 REFERENCE Specifications 11 About the symbols for ins...

Page 4: ... touch the playback side of the disc Hold the disc by the edges so that fingerprints will not get on the surface Do not stick paper or tape on the disc Storing discs After playing store the disc in its case Do not expose the disc to direct sunlight or sources of heat or leave it in a parked car exposed to direct sunlight as there may be a considerable temperature increase inside the car Cleaning d...

Page 5: ...ton TAPE PLAY button REWIND button FAST FORWARD button TAPE STOP EJECT button TAPE PAUSE button 7 TAPE DOOR 8 CD FUNCTION buttons CD REPEAT button CD BACKWARD SKIP SEARCH button CD PLAY PAUSE button CD FORWARD SKIP SEARCH button CD STOP button 9 CD DOOR OPEN PUSH OPEN button 10 STEREO indicator 11 TUNING DIAL 12 FREQUENCY indicator 1 2 3 4 5 6 7 5 8 11 12 Up Panel Front Panel 9 10 ...

Page 6: ...indow 1 FM ANTENNA 2 VOLTAGE SELECTOR OPTIONAL 3 AC POWER INPUT SOCKET 4 HEADPHONE SOCKET 3 5mm 5 RIF FM MODE SWITCH ST MONO 6 BATTERY COMPARTMENT 7 CD REPEAT PLAY indicator 8 CD PLAY indicator 9 CD PAUSE indicator 10 CD TRACK NUMBER indicator 11 CD SYNCHRONIZED RECORDING indicator 11 ...

Page 7: ...ower cord Battery Installation 1 1 Press and open the battery cover 2 2 Put six C R14 batteries not supplied into the compartment making sure the and are correctly positioned 3 3 Replace the battery cover Note To avoid damage from possible battery leakage remove the batteries if you do not plan to use the unit for an extended period of time When the batteries are weak replace all the batteries wit...

Page 8: ... for better reception FM antenna Pull the telescopic antenna out and adjust the angle and direction for better reception Tape Operation Basic Playback 1 1 Set FUNCTION SWITCH to TAPE 2 2 Open the cassette door by pressing TAPE STOP EJECT button 3 3 Insert a cassette and push close the TAPE door 4 4 Press TAPE PLAY to playback To Pause Play Press TAPE PAUSE button to pause Press the button again to...

Page 9: ...er returns to the start of that track When it is pressed again a track is skipped each time the button is pressed To Searching the Track After pressing and holding CD SKIP SEARCH button during playback press CD PLAY PAUSE button at the point you want Notes Do not tilt or move your unit with discs loaded If you do you may damage the discs and your unit Do not touch the playing side of CD the side w...

Page 10: ...ly 4 4 The synchronized recording is started automatically after about 7 seconds To pause recording Press TAPE PAUSE button Press TAPE PAUSE button again to resume recording To stop recording Press TAPE STOP EJECT button Your cassette deck will automatically stop at the end of the tape Notes If you wish to record from the desired track select the desired track with CD SKIP SEARCH button before com...

Page 11: ...ency response 100 18000 Hz Signal to noise ratio 55 dB T H D 0 5 Tuning Range 87 5 108 MHz 87 5 108 MHz 65 108 MHz Intermediate Frequency 10 7 MHz Antenna Telescopic antenna Tuning Range 522 1611 kHz or 530 1610 kHz Intermediate Frequency 455 kHz Antenna Ferrite bar antenna Recording System 4 Tracks 2 channel stereo Frequency Response 125 8000Hz Signal to Noise Ratio 35 40dB REC PLAY Designs and s...

Page 12: ...P NO 3834RC0025K ...

Reviews: