background image

- 30 -

English

Français

MAINTENANCE

CARE & CLEANING

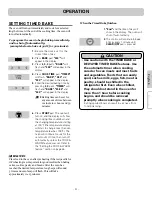
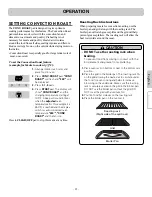
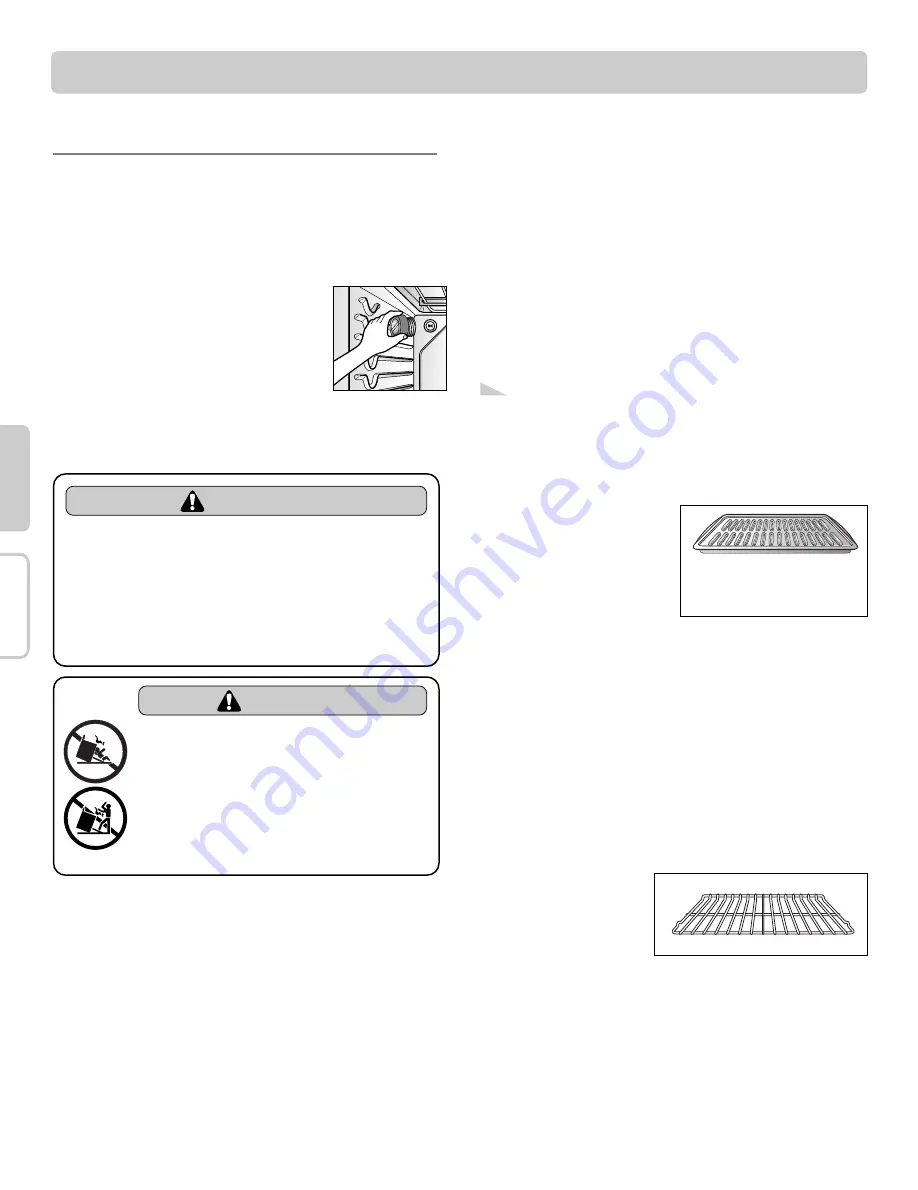
Changing the Oven Light

The oven light is a standard 40-watt appliance bulb. It will
come on when the oven door is open. When the oven door is
closed, press LIGHT to turn it on or off. It will not work
during the Self-Clean cycle.

To replace: 

1. 

Unplug range or disconnect power.

2. 

Turn the glass bulb cover in the back of
the oven counterclockwise to remove.

3. 

Turn bulb counterclockwise to remove
from socket.

4. 

Replace bulb and bulb cover by turning clockwise.

5. 

Plug in range or reconnect power.

Painted and Body Parts, and
Decorative Trim

For general cleaning, use a cloth with hot and soapy water.
For more difficult soils and built-up grease, apply a liquid
detergent directly onto the soil. Leave on soil for 30 to 60
minutes. Rinse with a damp cloth and dry. 

DO NOT

use

abrasive cleaners on any of these materials; they can scratch. 

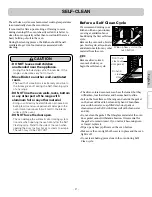
Broiler Pan and Grid

Do not clean the broiler
pan or grid in a self-
cleaning mode.

After broiling, remove the
broiler pan from the oven.
Remove the grid from the pan.
Carefully pour out the grease
from the pan into a proper container. 

Wash and rinse the broiler pan and grid in hot
water with a soap-filled or plastic scouring pad.

If food has burned on, sprinkle the grid with cleaner while
hot and cover with wet paper towels or a dishcloth. Soaking
the pan will remove burned-on foods.

Both the broiler pan and grid may be cleaned with a
commercial oven cleaner.

Both the broiler pan and grid can also be cleaned in a
dishwasher.

Oven Racks

Remove the oven racks
before the Self-Clean cycle
for cleaning. If left, clean
by using a mild, abrasive
cleaner. Rinse with clean
water and dry.

If the racks are cleaned in the Self-Clean cycle, their color
will turn slightly blue and the finish will be dull. After the
Self-Clean cycle is complete, and the oven has cooled, rub
the sides of the racks with wax paper or a cloth containing a
small amount of oil (this will make the racks glide easier into
the rack tracks)).

Do not store a soiled broiler

pan and grid anywhere in the

range.

If a mineral oil-based stainless steel appliance cleaner
has been used before to clean the appliance, wash the
surface with dishwashing liquid and water prior to
using the Stainless Steel Appliance Cleaner or polish. 

Note:

Stainless Steel Surfaces 

(on some

models)

Do not use a steel-wool pad; it will scratch the
surface.

1. 

Shake bottle well. 

2. 

Place a small amount of Stainless Steel Appliance Cleaner
or polish on a 

damp

cloth or 

damp 

paper towel.

3. 

Clean a small area, rubbing with the grain of the stainless
steel if applicable.

4. 

Dry and buff with a clean, dry paper towel or soft cloth.

5. 

Repeat as necessary.

WARNING

• Before replacing your oven light bulb,

DISCONNECT the electrical power to the
range at the main fuse or circuit breaker
panel.

- Failure to do so can result in severe personal

injury,death or electrical shock.

• Make sure oven and bulb are cool.

WARNING

• DO NOT step or sit on the door and install

the Anti-Tip Bracket packed with range.

- The range could be tipped and injury might result

from spilled hot liquid, food, or the range itself.

- If the range is pulled away from  the wall for

cleaning, service, or any other reason, ensure that
the Anti-Tip Device is properly reengaged when
the range is pushed back against the wall.

Summary of Contents for LSB5611SB

Page 1: ...ELECTRIC RANGE OWNER S MANUAL COOKING GUIDE PLEASE READ THIS OWNER S MANUAL THOROUGHLY BEFORE OPERATING LSB5611SW SB SS Printed in Korea P NO 3828W5A8377 Website http ca lge com ...

Page 2: ...re Setting convection auto conversion feature Thermostat adjustment Please record the model number and serial number of this unit for future reference We also suggest that you record the details of any contact with LG LG Electronics Canada Inc concerning this unit Staple your receipt here to verify your retail purchase Model No Serial No Dealer Dealer Phone No Thank you for purchasing an LG electr...

Page 3: ...forward Verify that the anti tip devices are engaged Warming drawer or Storage drawer Remove drawer and visually inspect that the rear leveling leg is fully inserted into the anti tip bracket Refer to the installation manual for proper anti tip bracket installation SURFACE COOKING UNITS Use Proper Pan Sizes This appliance is equipped with one or more surface units of different size Select utensils...

Page 4: ...ood seal Care should be taken not to rub damage or move the gasket Do Not Use Oven Cleaners No commercial oven cleaner or oven liner protective coating of any kind should be used in or around any part of the oven Clean in the self clean cycle only parts listed in this manual Before self clean the oven remove the broiler pan and any utensils of foods from the oven Before Self Cleaning the Oven Remo...

Page 5: ...se the glass cooktop surface as a cutting board DO NOT place or store items that can melt or catch fire on the glass cooktop even when it is not being used Always turn the surface units on after placing cookware DO NOT store heavy items above the cooktop surface that could fall and damage it DO NOT place aluminum foil or plastic items such as salt and pepper shakers spoon holders or plastic wrappi...

Page 6: ...oking area to prevent a tough cleaning chore later If cabinet storage is provided directly above cooking surface limit it to items that are infrequently used and can be safely stored in an area subjected to heat Temperatures may be unsafe for items such as volatile liquids cleaners or aerosol sprays DO NOT touch surface elements until it has cooled down sufficiently The surface elements may still ...

Page 7: ...g so will destroy heat distribution produce poor baking results and cause permanent damage to the oven interior aluminum foil will melt to the interior surface of the oven DO NOT force the door open This can damage the automatic door locking system Use care when opening the oven door after the Self Cleaning cycle Stand to the side of the oven when opening the door to allow hot air or steam to esca...

Page 8: ...e outlets on your range are located on top of the control console They are rated for 15 amps that may trip if the appliance plugged into it exceeds 15 amps To reset the circuit breaker press the switch of located on the control console Appliance outlets Appliance Outlet Circuit Breakers Do not place portable appliances on the cooktop Damage to the portable appliance could result if the cooktop is ...

Page 9: ...been a power interruption to the appliance To clear the PF message press ON OFF control pad to reset and be sure to reset the clock with the correct time of day HS Hot Surface MESSAGE LIGHT WILL Come on when the unit is hot to touch after it is turned off Come on during Self Cleaning Cycle Stay on even after the unit is turned off Glow until the unit has cooled down to approximately 150 F single L...

Page 10: ...ight Front Recommended Surface Cooking Settings Recommended setting for the single dual elements Each time a pad is pressed a beep will sound The power level decreases or increases by 0 5 from 9 0 through 3 0 by 0 2 from 3 0 through 1 0 Lo is the lowest power level available Note Each time a pad is pressed a beep will sound The power level decreases or increases by 0 5 from 9 0 through 3 0 by 0 2 ...

Page 11: ...s Lo Hi HS will appear when the unit is hot to touch Note Setting Type of cooking Lo 2 4 Hi Breads Pastries Casseroles Dinner Plate with Food Soups Cream Vegetables Fried Foods Soups Liquid Gravies Eggs Sauces Stews Meats Hot Beverages CAUTION Use only cookware and dishes recommended as safe for oven and cooktop use Always use oven mitts when removing food from the warming center as cookware and p...

Page 12: ...vent damage If a spillover occurs while cooking immediately clean the spill from the cooking area while it is hot to prevent a tough cleaning chore later Using extreme care wipe spill with a clean dry towel Do not allow spills to remain on the cooking area or the cooktop trim for a long period of time Do not use abrasive cleansing powders or scouring pads which will scratch the cooktop Do not use ...

Page 13: ...ruler 1 Place a ruler across the bottom of the pan 2 Hold it up to the light 3 Little or no light should be visible under the ruler Recommended Incorrect Flat bottom and straight sides Heavy gauge pans Pan sizes match the amount of food to be prepared and the size of the surface element Weight of handle does not tilt pan Pan is well balanced Tight fitting lids Flat bottom woks Curved grooved or wa...

Page 14: ...erial number plate Roast rack Grid Broiler pan Oven racks 2ea Storage drawer Oven door Gasket Oven racks 2ea Self clean latch Automatic oven light switch Dual element Single element Warming zone element Appliance outlet Appliance outlet circuit breaker Template Cleaner Cleaning pad Anchors 6ea Screws 6ea Anti tip bracket ...

Page 15: ...u want your food to cook The oven will shut off when the cooking time has run out START TIME PAD Use along with BAKE CONV BAKE CONV ROAST COOK TIME and SELF CLEAN pads to set the oven to start and stop automatically at a time you set COOK WARM PAD Press to keep cooked foods warm See the how to set the oven for warming section PROOF PAD Press to select a warm environment useful for rising yeast lea...

Page 16: ... pad The time will count down with 5 00 and TIMER will show in the display 4 When the set time has run out End will show in the display The clock will sound with 3 beeps every 15 seconds until TIMER ON OFF pad is pressed 1 Press TIMER ON OFF pad once The display will return to the time of day To set the Timer example for 5 minutes To cancel the Timer before the set time has run out SETTING THE TIM...

Page 17: ...sound DOOR LOCKED will flash in the display Once the oven door is locked the DOOR LOCKED indicator will stop flashing and remain on along with the lock icon light To activate the Oven Lockout feature 1 Press and hold START for 3 seconds A beep will sound 2 times The DOOR LOCKED will continue to flash until the oven door has completely unlocked and the lock icon light will clear 2 The oven is again...

Page 18: ...s CLEAR OFF to reject the change if necessary To decrease the oven temperature THERMOSTAT ADJUSTMENT The temperature in the oven has been preset at the factory When first using the oven be sure to follow recipe times and temperatures If you think the oven is too hot or too cool the temperature in the oven can be adjusted Before adjusting test a recipe by using a temperature setting that is higher ...

Page 19: ... be programmed to bake at any temperature from 170 F to 550 F Default temperature is 350 F 175 C 1 Press BAKE pad 350 will appear in the display 2 Press 3 7 5 BAKE will flash 3 Press START pad The display will show BAKE and the changing temperature starting at 100 F Place food in the oven after preheating if the recipe calls for it Preheating is so important for good results when baking cakes cook...

Page 20: ...ectly on the supports those will stop before coming completely out To remove racks 1 Pull the rack straight out unitl it stops 2 Lift up the front of the rack and pull it out To replace racks 1 Place the end of the rack on the support 2 Tilt the front end up and push the rack in Fig 1 Fig 2 Standard Rack Type of Food Rack Position Angel food cake Frozen pies Bundt or pound cakes Biscuits muffins b...

Page 21: ...mediately and cook for a selected length of time At the end of the cooking time the oven will turn off automatically 1 End and the time of day will show in the display The oven will shut off automatically 2 The control will continue to beep 3 times every 1 minute until CLEAR OFF pad is pressed OPERATION Place food in the oven after preheating if the recipe calls for it Preheating is so important f...

Page 22: ...n the display 7 Press START TIME pad Enter the desired start time using the number pads 4 3 0 8 Press START pad At the set time a short beep will sound The oven will begin to Bake When the oven has reached the desired temperature a long beep will sound 5 times and oven lamp will flash The display will show 300 and BAKE To program the oven for a Delay Start and to shut off automatically example for...

Page 23: ...ired Increase time 5 to 10 minutes per side for 11 2 thick or home cured ham Slash fat Slash fat Grease pan Brush steaks with melted butter 1 lb 4 patties 1 2 to 3 4 thick 1 thick 1 to 11 2 lbs 11 2 thick 2 to 21 2 lbs 1 whole cut up 2 to 21 2 lbs split lengthwise 2 Breasts 2 4 10 to 12 oz each 1 4 to 1 2 thick 1 2 thick 2 1 2 thick 2 1 thick about 1 lb 2 1 thick about 10 to 12 oz 2 11 2 thick abo...

Page 24: ...ith no sides or very low sides to allow heated air to circulate around the food Food baked on pans with a dark finish will cook faster When using Convection Bake with a single rack place oven rack in position D If cooking on multiple racks place the oven racks in positions B and D for 2 racks Place in positions B D and F for 3 racks Cakes have better results when baked using the BAKE pad you can s...

Page 25: ...t pad combines a cook cycle with the convection fan and element to roast meats and poultry Preheating is not necessary for meats and poultry Heated air circulates around the food from all sides sealing in juices and flavors Foods are crispy brown on the outside while staying moist on the inside Convection Roast is especially good for large tender cuts of meat uncovered Press to CLEAR OFF pad to st...

Page 26: ... CONV BAKE CONV ROAST 1 Press COOK WARM pad 2 Press START pad 3 To turn Cook Warm OFF press CLEAR OFF pad at any time To set Cook Warm 1 Set the cooking feature that you want to use TIMED BAKE CONV BAKE CONV ROAST DELAY TIMED BAKE CONV BAKE CONV ROAST refer to the relevant previous page 2 Press START pad 3 Press COOK WARM pad COOK WARM mode is set to turn on automatically after completing the TIME...

Page 27: ...rid of normal odors associated with cleaning Before a Self Clean Cycle We recommend venting your kitchen with an open window or using a ventilation fan or hood during the first self clean cycle Remove the oven racks broiler pan broiler grid all cookware and aluminum foil or any other material from the oven Wipe up heavy soil on the oven bottom Do hand clean door Don t hand clean oven door gasket S...

Page 28: ...le due to excessive smoke or fire in the oven Stopping or Interrupting a Self Clean cycle IMPORTANT NOTES when using the Self Clean feature A Self Clean cycle cannot be started if Oven Lockout feature is active If your clock is set for normal 12 hours display mode the Delayed Self Clean can never be set to start more than 12 hours in advance To set for a delayed Self Clean cycle 12 24 hours in adv...

Page 29: ...to the front of the chassis glide 3 Align the glide on each side of the drawer with the glide slots on the range 4 Push the drawer into the range until levers click approximately 2 inch Pull the drawer open again to seat bearing glides into position If you do not hear the levers click or the bearing glides do not feel seated remove the drawer and repeat steps 2 4 This will minimize possible damage...

Page 30: ...racks before the Self Clean cycle for cleaning If left clean by using a mild abrasive cleaner Rinse with clean water and dry If the racks are cleaned in the Self Clean cycle their color will turn slightly blue and the finish will be dull After the Self Clean cycle is complete and the oven has cooled rub the sides of the racks with wax paper or a cloth containing a small amount of oil this will mak...

Page 31: ...sier 2 Daily use of Ceramic Cooktop Cleaner or included cleaner will help keep the cooktop looking new 3 Shake the cleaning cream well Apply a few drops of Cleaner directly to the cooktop 4 Use a paper towel or Cleaning Pad for Ceramic Cooktops to clean the entire cooktop surface 5 Use a dry cloth or paper towel to remove all cleaning residue No need to rinse Burned On Residue 1 Allow the cooktop ...

Page 32: ...al To clean the cooktop seal around the edges of the glass lay a wet cloth on it for a few minutes then wipe clean with nonabrasive cleaners Glass surface potential for permanent damage Sugary spillovers such as jellies fudge candy syrups or melted plastics can cause pitting of the surface of your cooktop not covered by the warranty unless the spill is removed while still hot Special care should b...

Page 33: ...ully seated into the bottom of the slot Step 3 Fully open the door If the door will not fully open the indentation is not seated correctly in the bottom edge of the slot Step 4 Push the hinge locks up against the front frame of the oven cavity to the locked position Step 5 Close the oven door Read the following recommendations 1 Do not close the oven door until all the oven racks are fully in plac...

Page 34: ...cuit breaker tripped Replace the fuse or reset the circuit breaker Cooktop controls improperly set Check to see the correct control is set for the surface unit you are using This is normal the unit is still on and hot Food spillovers not cleaned before next use See the Cleaning the glass cooktop section Hot surface on a model with a light colored cooktop This is normal The surface may appear disco...

Page 35: ...nt Reposition the rack to provide proper clearance between the meat and the element Preheat broil element for searing Meat not properly prepared Remove excess fat from meat Cut remaining fatty edges to prevent curling but do not cut into lean Insert on broiler pan wrong side up and grease not draining Always place grid on the broiler pan with ribs up and slots down to allow grease to drip into pan...

Page 36: ...s cooktop in the MAINTENANC section Mineral deposits from water and food Remove using a ceramic glass cooktop cleaning creme Use cookware with clean dry bottoms The oven temperature is too high to set a self clean operation Allow the range to cool and reset the controls Oven controls improperly set See the using the self cleaning oven section A Self Clean cycle cannot be started if Oven Lockout fe...

Page 37: ... self clean cycle for a minimum of 3 hours See the Using the self cleaning oven section A convection fan may automatically turn on and off This is normal The shiny silver colored racks were cleaned in a self clean cycle Apply a small amount of vegetable oil to a paper towel and wipe the edges of the oven racks with the paper towel Do not spray with Pam or other lubricant sprays Convection fan stop...

Page 38: ...modifications made to the appliance 7 Replacement parts or repair labor costs for units operated outside Canada 8 Any labor costs during the limited warranty period This warranty is extended to the original purchaser and any succeeding owner for products purchased for home use within Canada Some provinces do not allow the exclusion or limitation of incidental or consequential damages so this exclu...

Page 39: ... 39 English Français MEMO ...

Page 40: ... 40 English Français MEMO ...

Reviews: