56
MAINTENANCE
5
Press
START
.
NOTE
• It may become necessary to cancel or interrupt a
Self Clean cycle due to excessive smoke or fire in
the oven. To cancel the Self Clean function, turn
the oven mode knob to the
OFF
position.
Removing/Assembling Lift-Off
Oven Doors
Door Care Instructions
Most oven doors contain glass that can break.
CAUTION
• Do not close the oven door until all the oven
racks are fully in place.
• Do not hit the glass with pots, pans, or any other
object.
• Scratching, hitting, jarring, or stressing the glass
may weaken its structure causing an increased
risk of breakage at a later time.
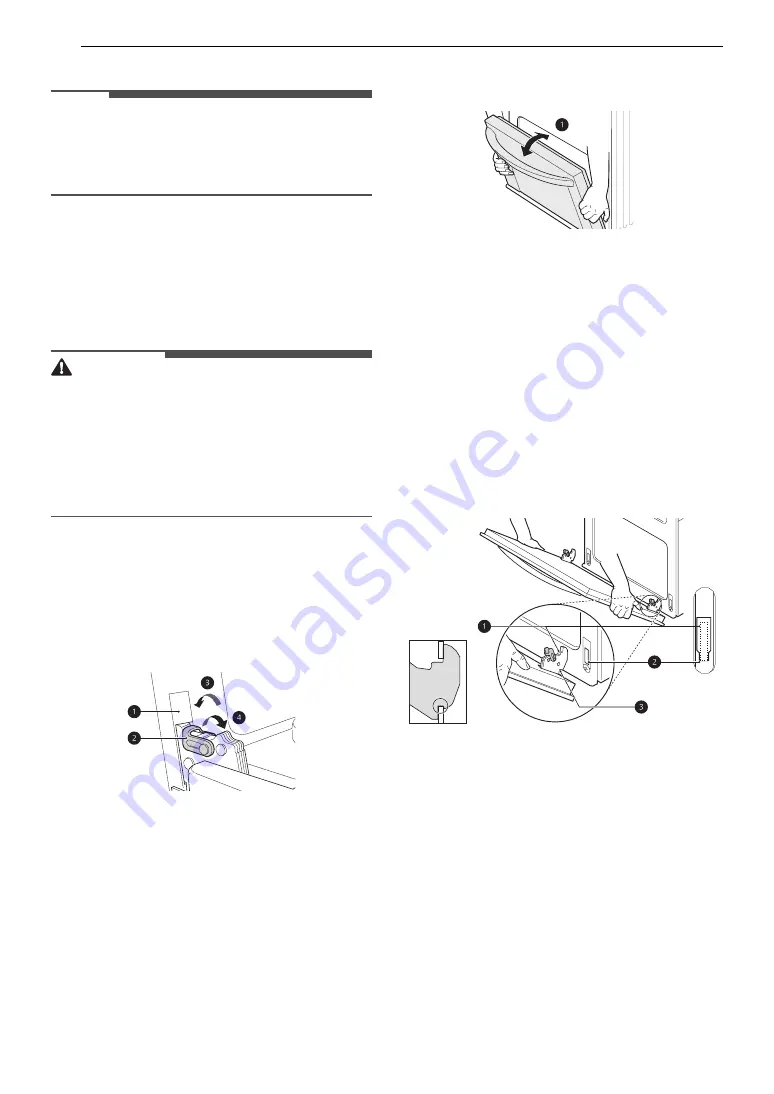
Removing Doors
1
Fully open the door.
2
Unlock the hinge locks, rotating them as far
toward the open door frame as they will go.
a
Slot
b
Hinge Lock
c
Lock
d
Unlock
3
Firmly grasp both sides of the door at the top.
4
Close the door to the removal position
(approximately five degrees) which is halfway
between the broil stop position and fully
closed. If the position is correct, the hinge
arms will move freely.
a
about 5°
5
Lift door up and out until the hinge arms are
clear of the slots.
Assembling Doors
1
Firmly grasp both sides of the door at the top.
2
With the door at the same angle as the
removal position, seat the indentation of the
hinge arms into the bottom edge of the hinge
slots. The notch in the hinge arms must be
fully seated into the bottom edge of the slots.
a
Hinge arm
b
Bottom edge of slot
c
Indentation
3
Open the door fully. If the door will not open
fully, the indentation is not seated correctly in
the bottom edge of the slots.
4
Lock the hinge locks, rotating them back
toward the slots in the oven frame until they
lock.


