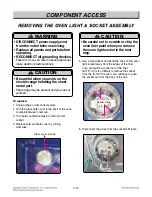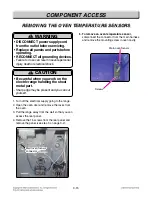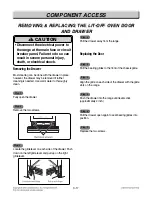
3-19
COMPONENT ACCESS
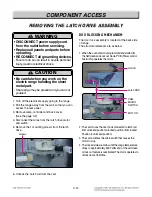
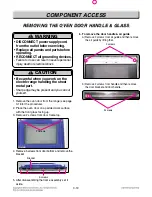
REMOVING THE OVEN DOOR HANDLE & GLASS
REMOVING THE OVEN DOOR HANDLE & GLASS
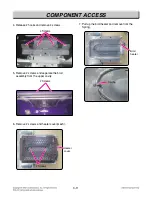
1. Remove the oven door from the range (see page
3-16 for the procedure).
2. Place the oven door on a padded work surface
with the front glass facing up.
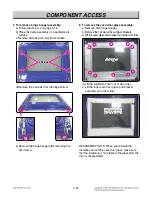
3. Remove 2 screws from door frame top.
4. Remove 5 screws from door bottom and remove the
bracket.
5. After disassembling the frame assembly set it
aside.
6. To remove the door handle & air guide
a) Remove 2 screws from air guide and then remove
the air guide by lifting that.
b) Remove 2 screws from handle and then remove
the door bracket and door handle.
WARNING
• DISCONNECT power supply cord
from the outlet before servicing.
• Replace all panels and parts before
operating.
• RECONNECT all grounding devices.
- Failure to do so can result in severe personal
injury, death or electrical shock.
!
CAUTION
• Be careful when you work on the
electric range handling the sheet
metal part.
- Sharp edge may be present and you can cut
yourself.
!
Bracket
5 screws
2 Screws
2 screws
2 screws
Summary of Contents for LSSE3026ST
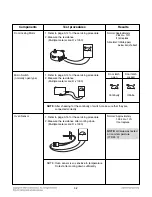
Page 55: ...5 3 OVEN LIGHT Warming Drawer CR Cook top Element RR Cook top Element For Model LSE3092ST ...
Page 56: ...5 4 LR Cook top Element RF Cook top Element LF Cook top Element For Model LSE3092ST ...
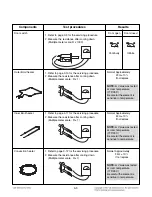
Page 57: ...5 5 Broil Speed broil Boke Speed roost Warm Proof Easy clean ...
Page 58: ...6 1 COMPOSITION OF CONTROL 6 1 Wiring Diagram ...
Page 92: ... EV COOKTOP PARTS 3056 3215 3079 3006 3016 330M 330H 3205 3022 3204 330S 330S 3014 ...
Page 95: ......


