2-7
GENERAL
uSING yOuR RANGE
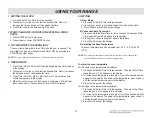
1. SETTING ThE CLOCk
1. Press and hold Cook Time for three seconds.
2. Press plus(+) or minus(-) to select the desired time. Plus(+) to
increase the time and minus(-) to decrease the time.
3. Press Start to enter the time and start the clock.
2 START, CLEAR OFF (FOR BOTh ThE uppER & LOwER
OvEN)
1. Press START button to start oven.
2. Press Upper or Lower CLEAR/OFF button
3. TO TuRN ON/OFF ThE OvEN LIGhT
The oven light automatically turns ON when the door is opened. The
oven light may also be manually turned ON or OFF by pressing the
START/Oven Light button
Note: The oven light cannot be turned on if self-clean feature is activated.
4. TImER ON/OFF
1. Press Timer On/Off. 0:00 with HR inside it appears and Timer flashes
in the display.
2. Press plus(+) or minus(-) to select the desired time. Plus(+) increases
the time and minus(-) decreases the time.
3. Press Timer On/Off or Start to start the Timer. The remaining time
countdown appears in the display.
4. When the set time runs out, End shows in the display. The indicator
tones sound every 15 seconds until Timer On/Off is pressed.
5. SETTING
1) Hour Mode
1. Press and hold Start Time for three seconds.
2. Press plus or minus to set the desired hour mode on the clock.
3.. Press Start to accept the desired change.
2) Convection Auto Conversion
1. Press and Hold the Start Time for three seconds. Then press Start
Time repeatedly until Auto appears in the display.
2. Press plus or minus to enable or disable the feature.
3. Press Start to accept the change.
3) Adjusting the Oven Temperature
The oven temperature can be adjusted from -35°F (-19°C) to 35°F
(19°C).
Note: The thermostat adjustments made with this feature will just change Bake,
Convection Bake and Convection Roast temperature.
To adjust the oven temperature
For the Lower oven temperature adjustment.
1. Press and hold Start Time for three seconds. Then press Start Time
repeatedly until L_AJ appears in the display.
2. To increase the temperature, press plus (+) until the desired amount
appears in the display. To decrease the temperature, press minus (-)
until the desired amount appears in the display.
3. Press Start to accept the change.
For the Upper oven temperature adjustment.
1. Press and hold Start Time for three seconds. Then press Start Time
repeatedly until U_AJ appears in the display.
2. To increase the temperature, press plus (+) until the desired amount
appears in the display. To decrease the temperature, press minus (-)
until the desired amount appears in the display.
3. Press Start to accept the change.
Summary of Contents for LUTE4619SN
Page 68: ...5 3 Lower Selfclean Oven Lamp Bridge Cook top Element CR Cook top Element ...
Page 69: ...5 4 RR Cook top Element RF Cook top Element Upper BROIL EASY Clean Lower Broil ...
Page 70: ...5 5 Upper BAKE WARM Clock Display On ...
Page 71: ...6 1 COMPOSITION OF CONTROL Wiring Diagram ...
Page 74: ...6 4 COMPOSITION OF CONTROL P N EBR80595411 Oven Relay PCB CN53 CN52 CN51 ...
Page 75: ...6 5 COMPOSITION OF CONTROL SMPS PCB Touch PCB P N EBR80595701 P N EBR82864102 CN02 CN01 CN1 ...
Page 107: ...COOKTOP PARTS EV 330M 3204 3204 3204 3204 3204 3215 3056 3079 3022 330H 330S 5700 3014 3016 ...
Page 110: ......


