


-2-4-
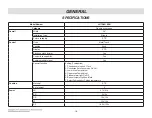
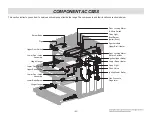
GENERAL
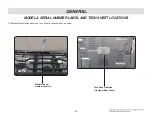
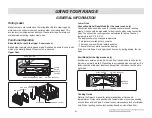
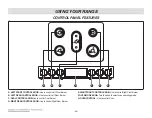
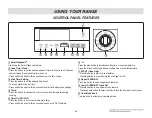
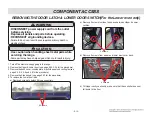
USING YOUR RANGE
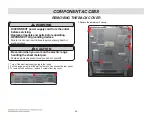
1. TO TURN ON THE SURFACE BURNER
1. Be sure all the surface burners are placed in their respective
positions.
2. Push the control knob in and turn it to the “LITE” positions.
3. You can hear a little CLICKING noise - the sound of the electric
spark igniting the burners.
4. To control the flame size, turn the knob. If the knob stays at “LITE”, it
will continue to click.
NOTE:
•
When turning a burner to LITE, all the burners spark. Do not attempt to
disassemble or clean around any burner while another burner is on. An
electric shock may result, which could cause you to knock over hot
cookware.
•
The medium (left rear) and the large (left front) burners are the primary
burners for most cooking. These general-purpose burners can be turned
down from “HI” to “LO” suit a wide range of cooking needs.
•
The extra large burner (right front) is the maximum output burner. Like
the other four burners, it can be turned down from “HI” to “LO” for a wide
range of cooking applications.
•
This burner is also designed to quickly bring large amounts of liquid to a
boil. It has a special “Ultra Heat” setting designed to be used with
cookware 10 inches or larger in diameter.
•
The oval burner (center) is for large pots/pans or for use with the griddle.
•
The extra large burner (dual) can be also turned down to “LO” for a low
simmer setting almost like the small burner.
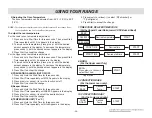
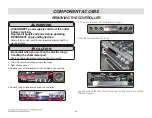
2. SETTING THE CLOCK
1. Press and hold Cook Time for three seconds.
2. Press plus(+) or minus(-) to select the desired time. Plus(+) to
increase the time and minus(-) to decrease the time.
3. Press Start to enter the time and start the clock.
3 START, CLEAR OFF
(FOR BOTH THE UPPER & LOwER OvEN)
1. Press START button to start oven.
2. Press Upper or Lower CLEAR/OFF button
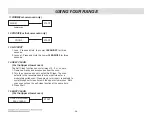
4. TO TURN ON/OFF THE OvEN LIGHT
The oven light automatically turns ON when the door is opened. The
oven light may also be manually turned ON or OFF by pressing the
START/Oven Light button
Note: The oven light cannot be turned on if self-clean feature is activated.
5. TIMER ON/OFF
1. Press Timer On/Off. 0:00 with HR inside it appears and Timer
flashes in the display.
2. Press plus(+) or minus(-) to select the desired time. Plus(+)
increases the time and minus(-) decreases the time.
3. Press Timer On/Off or Start to start the Timer. The remaining time
countdown appears in the display.
4. When the set time runs out, End shows in the display. The
indicator tones sound every 15 seconds until Timer On/Off is
pressed.
6. SETTING
1) Hour Mode
1. Press and hold Start Time for three seconds.
2. Press plus or minus to set the desired hour mode on the clock.
3.. Press Start to accept the desired change.
2) Convection Auto Conversion
1. Press and Hold the Start Time for three seconds. Then press
Start Time repeatedly until Auto appears in the display.
2. Press plus or minus to enable or disable the feature.
3. Press Start to accept the change.


