PREP
ARA
TION
11
Before Operation
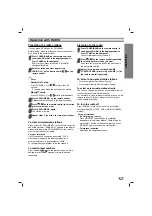
Setting the Clock
11
Press CLOCK.
(If the clock requires setting, press and hold CLOCK
for more than 2 seconds.)
- The hours display begins to blink.
2
2
Select a 24 hour cycle or 12 hour cycle by
pressing
.
.
/
>
>
on the front panel.
3
3
Press SET/CD
[[
to confirm the selected hour
cycle.
4
4
Use
.
.
/
>
>
on the front panel to set the
correct hours.
5
5
Press SET/CD
[[
.
6
6
.
Use
.
.
/
>
>
on the front panel to set the
correct minutes.
77
Press SET/CD
[[
and the correct time is shown in
the display window.
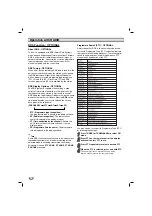
Sleep Timer Function
When the sleep timer is set, the unit automatically turns
off after the specified time has elapsed.
11
To specify the time delay before the power is
turned off, press SLEEP.
In the display window you can see
SLEEP 180
for
about 5 seconds. This means that the system turns
off automatically after 180 minutes.
2
2
Each time you press SLEEP the setting changes
in the following order.
SLEEP 180
→
150
→
120
→
90
→
80
→
70
→
60
→
50
→
40
→
30
→
20
→
10
→
OFF (No display)
→
SLEEP 180...
3
3
To check the remaining time until the power is
turned off.
While the sleep function is active press
SLEEP
briefly. The time remaining until the unit turns off is
displayed for about 5 seconds.
ote
If you press
SLEEP
while the sleep time is displayed,
the SLEEP time is reset.
To cancel Sleep Timer setting
If you wish to stop the function, press the
SLEEP
button
repeatedly until “
SLEEP 10
” appears, and then press
SLEEP
once again after “
SLEEP 10
” shows on the
display.
Using Microphone
You can sing to a music source by connecting a
microphone to the unit.
11
Connect your microphone to the MIC socket.
“
” will be shown in the display window.
2
2
Play the music you want.
3
3
Sing along with the accompaniment.
Adjust the microphone volume by turning MIC
VOLUME KNOB. (MIN,1 -14, MAX steps)
otes
• When not using the microphone, set the MIC volume
knob to minimum or turn off the MIC and remove the
microphone from the MIC socket.
• If the microphone is set too near the speaker, a
howling sound may be produced. In this case, move
the microphone away from the speaker or decrease
the sound level by using the MIC volume control.
• If sound through the microphone is extremely loud, it
may be distorted. In this case, turn the MIC volume
control toward minimum.
To Adjust ECHO Volume
You can give an echo effect to the sound from the
microphones.
Press the ECHO VOL. (
/
) on the remote control to
increase the echo volume or decrease it. (MIN,1 - 14,
MAX steps)
DEMO
Press
DEMO
in power off state to demonstrate the func-
tion in the display window.
To cancel, press
POWER (STANDBY/ON)
or
DEMO
again.
DIMMER
This function dims the LED (Light-emitting diode) of
front panel by half in power-on status.
Press
DIMMER
once. The LED (Light-emitting diode) of
front panel is turned off and the display window will be
darken by half. To cancel, press the button again.
(12HR)
(24HR)
or


