


Summary of Contents for M4214C
Page 88: ......
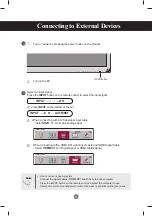
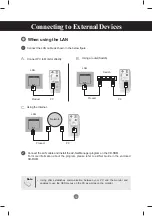
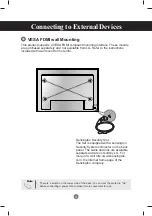
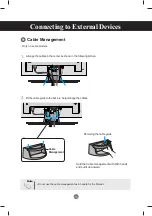
The LG M4214C is a versatile high-definition LCD display designed for seamless integration in various settings. Enhance your viewing experience with its exceptional picture quality and user-friendly features. Access the comprehensive Owner's Manual for this product, available for free download at 88.208.23.73:8080, to maximize your entertainment pleasure.
Page 88: ......


