background image

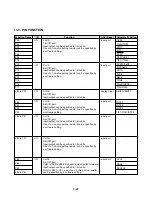
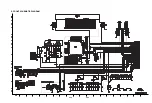
3-69

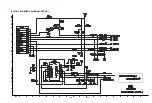
3-70

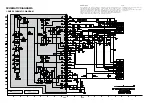
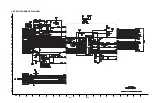
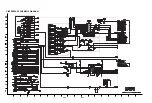
8. IPOD-1 SCHEMATIC DIAGRAM (OPTION)

Summary of Contents for MBD-D102X

Page 1: ...RSYSTEM SERVICE MANUAL MODEL MBD D102X MBS D102V CAUTION BEFORE SERVICING THE UNIT READ THE SAFETY PRECAUTIONS IN THIS MANUAL MODEL MBD D102X MBS D102V SERVICE MANUAL P NO AFN33894952 MAY 2007 http biz lgservice com ...

Page 2: ...ION WAVEFORM IN MD DEVICE 3 23 4 FOCUS WAVEFORM 3 24 5 AT POWER ON SPINDLE SIGNAL AT MD DECK 3 25 6 AT FIRST ACTION FOCUS SIGNAL A B C D 3 25 7 TRACKING SIGNAL 3 26 8 RF WAVEFORM 3 26 9 DISK TYPE JUGEMENT WAVEFORM 3 27 INTERNAL BLOCK DIAGRAM OF ICs 3 28 1 AK5358 3 28 2 EM639165 3 30 3 ES29LV160E 3 32 4 HT1000 3 34 5 IP9009 3 37 6 KS24L161 3 38 7 MC4580 3 39 8 PS9829B 3 40 9 PT6324 3 41 10 STR A625...

Page 3: ...e adjustment point and installation screws should absolutely never be touched 4 Laser beams may damage the eyes Absolutely never permit laser beams to enter the eyes Also NEVER switch ON the power to the laser output part lens etc of the pick up if it is damaged 5 Cleaning the lens surface If there is dust on the lens surface the dust should be cleaned away by using an air bush such as used for ca...

Page 4: ...t 2 Notes for repair 1 Before replacing a component part first disconnect the power supply lead wire from the unit 2 All equipment measuring instruments and tools must be grounded 3 The workbench should be covered with a conductive sheet and grounded When removing the laser pick up from its conductive bag do not place the pick up on the bag This is because there is the possibility of damage by sta...

Page 5: ...harges sufficient to damage ESD devices 5 Do not use freon propelled chemicals These can generate electrical charges sufficient to damage ESD devices 6 Do not remove a replacement ESD device from its protective package until immediately before you are ready to install it Most replacement ESD devices are packaged with leads electrically shorted together by conductive foam aluminum foil or comparabl...

Page 6: ...DEO OUT Y 1 0V p p 75ohms negative sync RCA jack x 1 Pb Pr 0 7V p p 75ohms RCA jack x 1 TUNER FM Tuning Range 87 5 108 0MHz or 65 74MHz 87 5 108 0MHz Intermediate Frequency 10 7MHz Signal to Noise Ratio 60 55dB Frequency Response 50 10000Hz AM Tuning Range 522 1620kHz or 520 1720kHz Intermediate Frequency 450kHz Signal to Noise Ratio 30dB Frequency Response 80 1800Hz AMPLIFIER Output Power 50W 50W...

Page 7: ...1 6 MEMO ...

Page 8: ...D D E E C F G A43 A50 272 259 256 258 A26 A47 275 A46 A44 277 463 463 463 463 463 463 463 463 463 463 463 461 461 274 276 300 250 273 461 257 461 CABLE3 2 1 2 2 SECTION 2 EXPLODED VIEWS 1 CABINET AND MAIN FRAME SECTION ...

Page 9: ...A26 439 018 014 001 002 003 A01 A02 020 013 017 012 019 015 435 012 432 030 010 439 024 431 435 025 036 430 021 A03 026 440 016 015A 012A 012A 015B 2 3 2 4 2 DECK MECHANISM SECTION DP 10A ...

Page 10: ...2 5 3 SPEAKER SECTION MBS D102V 750 751 752 754 755 757 A70A 758 A70 757A 759 756 753 ...

Page 11: ... 6 4 PACKING ACCESSORY SECTION Plug Ass y 1Way BLACK Antenna Loop 811 Microphone 827 Disc 832 824 Battery 808 Antenna 825 Remote control 900 Instruction Ass y 801 Packing 803 Box 802 803A Bag 804 Packing ...

Page 12: ...YES YES Check P7904 6PIN P SENS NO Refer to SMPS Troubleshooting YES YES Check power of both terminals of IC101 KIA7042 Check if IC101 KIA7042 input is over 5V YES NO Check the related part of IC101 KIA7042 NO YES Check if output voltage of IC101 KIA7042 is 4 3V Check IC100 78KO KF2 1PIN power NO Replace the related parts ...

Page 13: ...efer to SMPS Troubleshooting YES YES YES OK YES Check power of both terminals of D101 1SR35 YES YES Check the related part NO Check D101 1SR35 output is working on 5V YES YES YES YES Check the related part Check Q102 COLLECTOR OK Check output power of IC101 KIA7042 is over 4 3V OK NO Replace the related parts NO Replace the related parts YES Check the related part OK NO Replace the related parts 3...

Page 14: ...4PIN OK YES YES Refer to MICOM Troubleshooting Check MICOM power 5V 22 PIN DATA 24 PIN CLK NO NO YES Replace the related parts Check the related part NO YES OK 3 IC103 KS4CD21CS CHECK ELECTRICAL TROUBLESHOOTING GUIDE OF AUDIO PART ...

Page 15: ...2 assembly NO When 5V fails check D301SR35 input and output power YES Check P7302 connection condition and power F1 F2 both terminals over 3 7V Check power VKK over 28V Check 24 PIN 5 6V YES YES YES YES OK OK 76PIN DO DATA input NO IC100 75PIN STB 78PIN 1PIN CLK Check Data output Check IC100 IC301 DATA communication PIN PIN 75PIN 3PIN STB 76PIN 2PIN DO 78PIN 1PIN CLK Check IC301 PT6324 power 50PIN...

Page 16: ...01 12 288MHz is working YES YES YES OK Check IC604 PS9829 part OK NO Check output of IC100 78KOKF2 21 PWM_CLK 22 PWM_DATA 43 PWM_REST NO Check resistance output of LINE DATA R623 CLK R624 RST R619 Refer to DVD Troubleshooting NO NO Check IC604 PS9829 DATA input 78 PIN DATA 79 PIN CLK 96 PIN REST Check PWM MODULATOR output FL 75 74 FR 71 70 NO Check DVD ASS Y PS9829 communication condition DVD INTE...

Page 17: ... Refer to SMPS Troubleshooting YES YES YES NO P7905 3PIN 13 14 15PIN 23 5V YES Replace the related parts YES NO Check output LINE COIL Check PWM MODULATOR input 4 6 14 16PIN YES Check POWER IC 700 34 29 27 20PIN output Check input power IC700 34 29 26 21PIN OK 6 POWER AMP PART CHECK ELECTRICAL TROUBLESHOOTING GUIDE OF AUDIO PART ...

Page 18: ...2 4 11PIN input waveform Check IC200 BU4052 16PIN VDD 8PIN VSS power Refer to SMPS Troubleshooting NO NO YES Replace the related parts OK YES YES Check IC801 MC4580 2 6PIN input waveform Check IC801 MC4580 4PIN VSS 8PIN VDD power Check IC200 BU4052 3 13PIN output waveform Check if JK305 contacts with ELECTRICAL TROUBLESHOOTING GUIDE OF AUDIO PART ...

Page 19: ...ES YES Check IC200 BU4052 5 14PIN input waveform Check IC200 BU4052 16PIN VDD 8PIN VSS power Refer to SMPS Troubleshooting NO NO YES Replace the related parts OK YES Check IC801 MC4580 2 6PIN waveform Check IC801 MC4580 4PIN VSS 8PIN VDD power Check IC200 BU4052 3 13PIN output waveform YES Check Audio in ELECTRICAL TROUBLESHOOTING GUIDE OF AUDIO PART ...

Page 20: ...ES YES Check IC200 BU4052 1 12PIN input waveform Check IC200 BU4052 16PIN VDD 8PIN VSS power Refer to SMPS Troubleshooting NO NO YES Replace the related parts OK YES Check IC801 MC4580 2 6PIN input waveform Check TUNER module TUN800 is working Check IC801 MC4580 4PIN VSS 8PIN VDD power Check IC200 BU4052 3 13PIN output waveform ELECTRICAL TROUBLESHOOTING GUIDE OF AUDIO PART ...

Page 21: ...11 normal YES NO NO Check or Replace the IC911 IS the D965 normal Check line short YES NO Is the D962 Normal Replace the D962 YES NO Is the D963 Normal Replace the D963 YES NO Is the D964 5 Normal Replace the D964 5 YES NO Is the D966 Normal Replace the D966 YES NO Is the D967 Normal Replace the D967 YES NO Power Line of Main PCB is short 10 SMPS POWER TROUBLESHOOTING ELECTRICAL TROUBLESHOOTING GU...

Page 22: ...5V Is the Vcc 4 2V supplied to IC964 1PIN Check or Replace the D967 YES YES NO Is the IC964 4PIN H Check the P CTL H signal from u com YES NO Check or Replace the IC964 No 12V Is the Vcc 14V supplied to IC962 1PIN Check or Replace the D966 YES YES NO Is the IC962 4PIN H Check the P CTL H signal from u com YES NO Check or Replace the IC962 ELECTRICAL TROUBLESHOOTING GUIDE OF AUDIO PART ...

Page 23: ...ce the D963 YES YES NO Is the IC962 pin2 12V Check the PWR CTL H signal from u com YES NO Check or Replace the Q965 No VF Is the ZD960 961 Normal Replace the ZD960 961 YES YES NO Replace the R981 or Q962 Q963 ELECTRICAL TROUBLESHOOTING GUIDE OF AUDIO PART ...

Page 24: ...YES YES Check IC200 BU4052 2 15PIN input waveform Check IC200 BU4052 16PIN VDD 8PIN VSS power Refer to SMPS Troubleshooting NO NO YES Replace the related parts OK YES Check IC801 MC4580 2 6PIN input waveform Check IC801 MC4580 4PIN VSS 8PIN VDD power Check IC200 BU4052 3 13PIN output waveform ELECTRICAL TROUBLESHOOTING GUIDE OF AUDIO PART ...

Page 25: ... YES OK Check u COM IC100 3PIN 6PIN communication NO NO YES Replace the related parts YES YES Check IC200 BU4052 2 15PIN input waveform Check IC200 BU4052 16PIN VDD 8PIN VSS power Refer to SMPS Troubleshooting NO NO YES Replace the related parts OK YES Check IC801 MC4580 2 6PIN input waveform Check IC801 MC4580 4PIN VSS 8PIN VDD power Check IC200 BU4052 3 13PIN output waveform ELECTRICAL TROUBLESH...

Page 26: ...FACE NO NO YES Reconnect it YES YES YES Does DVD appear at FLD Does it appear DVD ERROR at FLD YES Check Connector P400 P401 Refer to SMPS Troubleshooting NO NO YES Check DVD MD Module OK YES Does No DISC or Time are appeared at FLD Check the voltage of each pin on P7905 3 5 7 9 10PIN Select the DVD Mode ...

Page 27: ...Check the related circuit of ES8380 IC501 PIN133 134 137 138 139 140 NO YES ES8380 VIDEO outputs properly Check the cable connection between DVD PCB and MD MECHA Check the MD mecha NO NO YES Does tray move inside when it is at closed position OPEN CLOSE signals on P401 are OK Check the output signal of ES8380 to IC401 for control OPEN CLOSE NO YES OPEN CLOSE signals on IC401 are OK Check the tray ...

Page 28: ...it of SLED and motor driver IC IC401 SLED signal is OK NO A B Check the cable connection with MECHA Check focus connection on ES8380 and motor driver IC Optical Lens is moving for searching Focus Proper focus outputs to motor driver NO NO YES YES YES YES Check the motor driver IC401 Proper F F outputs NO Check cable connection with pick up head ELECTRICAL TROUBLESHOOTING GUIDE OF DVD PART ...

Page 29: ... power transistor Collector voltage of power transistor is OK Q405 Q406 NO YES YES YES B C Check cable connection between P400 and pick up head Check the SPINDLE related circuit on ES8380 Does SPINDLE rotate Proper SPINDLE signal on ES8380 NO Check the SPINDLE control of motor driver SPIN SPIN output properly NO NO YES YES YES Check the cable connection between P400 and MD ELECTRICAL TROUBLESHOOTI...

Page 30: ...IC401 NO NO YES YES YES C D Check cable connection between P400 and MD Check the related circuit between IC401 and ES8380 Check the tracking control on motor driver IC401 Track on OK Disc play Proper TRO signal on IC401 NO T T output properly NO NO NO YES YES YES YES Check cable connection on pick up head Check RF signal waveform ELECTRICAL TROUBLESHOOTING GUIDE OF DVD PART ...

Page 31: ... DISK Audio signal data on DVD INTERFACE is OK NO NO YES YES D Check the MAIN PCB For example composite video check the video mute TR Q411 output of video buffer IC IC407 and ES8380 video signal data TEST END Picture signal data on ES8380 is OK NO NO ELECTRICAL TROUBLESHOOTING GUIDE OF DVD PART ...

Page 32: ...ignal Check the USB PART and DVD PART line YES YES Check the USB DATA LINE P5301 Check the IC501 ES8380 Check DATA LINE PIN 97 USB No 98 USB Po OK YES Checking or USB display check NO YES Check the USB JACK POWER supply Check P5301 Reading OK check NO ELECTRICAL TROUBLESHOOTING GUIDE OF DVD PART ...

Page 33: ...3 22 WAVEFORMS 1 WHEN POWER ON RESET DATA ETC WAVEFORM 1 RESET DVD 2 RX 3 TX 4 LCS3 FLASH Playing at USB function 1 HRST 2 5V 3 D 4 D ...

Page 34: ...3 23 2 OPEN CLOSE WAVEFORM AT POWER ON 1 Limit SW 2 OPEN 3 CLOSE 3 STARTING ACTION WAVEFORM IN MD DEVICE 1 SLO from MPEG 2 SLED 3 SLED At Power on ...

Page 35: ...3 24 4 FOCUS WAVEFORM 1 FDO 2 F 3 F INSERT CD INSERT DVD 1 FDO 2 F 3 F ...

Page 36: ...3 25 5 AT POWER ON SPINDLE SIGNAL AT MD DECK 1 Spind 2 Spin 3 Spin 6 AT FIRST ACTION FOCUS SIGNAL A B C D 1 A 2 B 3 C 4 D ...

Page 37: ...3 26 7 TRACKING SIGNAL 1 Tro 2 Tr 3 Tr 8 RF WAVEFORM ...

Page 38: ...3 27 9 DISK TYPE JUGEMENT WAVEFORM 1 F 2 FDO 3 SVRRF DVD CD ...

Page 39: ... AGND VA Top View 8 7 6 5 4 3 2 1 9 10 11 12 13 14 15 16 DIF PDN LRCK MCLK SCLK CKS2 CKS0 SDTO 1 2 BLOCK DIAGRAM VA AGND VD DGND MCLK Clock Divider Serial I O Interface Decimation Filter Decimation Filter Modulator Voltage Reference LRCK SCLK SDTO DIF PDN CKS0 CKS1 CKS2 VCOM AINR AINL Modulator ...

Page 40: ... Ground Pin 9 SDTO O Audio Serial Data Output Pin L Output at Power down mode 10 LRCK I O Output Channel Clock Pin L Output in Master Mode at Power down mode 11 MCLK I Master Clock Input Pin 12 SCLK I O Audio Serial Data Clock Pin L Output in Master Mode at Power down mode 13 PDN I Power Down Mode Reset Pin H Power up L Power down Reset The AK5358 must be reset once upon power up 14 DIF I Audio In...

Page 41: ... A 1 A 10 A P A0 A1 A2 A3 V DD 1 2 3 4 5 6 7 8 9 1 0 1 1 1 2 1 3 1 4 1 5 1 6 1 7 1 8 1 9 2 0 2 1 2 2 2 3 2 4 2 5 2 6 2 7 54 53 52 51 50 49 48 47 46 45 44 43 42 41 40 39 38 37 36 35 34 33 32 31 30 29 28 V SS DQ15 V SSQ DQ14 DQ13 V DDQ DQ12 DQ11 V SSQ DQ10 DQ9 V DDQ DQ8 V SS N C DQM U CLK CK E N C A 11 A 9 A 8 A 7 A 6 A 5 A 4 V SS ...

Page 42: ...e co der 2MX16 CELL ARRAY BANK C Column Decoder De co der 2MX16 CELL ARRAY BANK D Column Decoder De co der 2MX16 CELL ARRAY BANK B CONTROL SIGNAL GENERATOR MODE REGISTER CLOCL BUFFER COMMAND DECODER CLOCK CKE CS RAS CAS WE UDQM LDQM COLUMN COUNTER ADDRESS BUFFER A0 A11 BA0 BA1 REFRESH COUNTER CLOCK BUFFER ...

Page 43: ...10 11 12 13 14 15 16 17 18 19 20 21 22 23 24 48 47 46 45 44 43 42 41 40 39 38 37 36 35 34 33 32 31 30 29 28 27 26 25 48 Pin Standard TSOP ES29LV160 3 2 BLOCK DIAGRAM Command Register Analog Bias Generator Address Latch BYTE CE OE A 0 19 RESET Vcc Vss Chip Enable Output Enable Logic Vcc Detector Timer Counter Y Decoder X Decoder Y Decoder Cell Array Data Latch Sense Amps Input Output Buffers Sector...

Page 44: ...SB Address Input Byte Mode CE Chip Enable OE Output Enable WE Write Enable RESET Hardware Reset Pin Active Low BYTE Selects 8 bit or 16 bit mode RY BY Ready Busy Output N A SO 044 Vcc 3 0 volt only single power supply see Product Selector Guide for speed options and voltage supply tolerances Vss Device Ground NC Pin Not Connected Internally ...

Page 45: ...6 35 34 33 32 31 30 29 28 27 26 25 24 23 22 21 20 19 GVDD_B OTW SD PWM_A RESET_AB PWM_B OC_ADJ GND AGND VREG M3 M2 M1 PWM_C RESET_CD PWM_D VDD GVDD_C GVDD_A BST_A PVDD_A OUT_A GND_A GND_B OUT_B PVDD_B BST_B BST_C PVDD_C OUT_C GND_C GND_D OUT_D PVDD_D BST_D GVDD_D DKD PACKAGE TOP VIEW ...

Page 46: ...e Control PVDD GVDD 12 V VDD 12 V GND Hardwire OC Limit M1 M3 PVDD Power Supply Decoupling 35 V 12 V GND VAC PWM_A PWM_C PWM_D PWM_B VALID M2 Left Channel Output Right Channel Output Input H Bridge 1 Input H Bridge 2 GVDD VDD VREG Power Supply Decoupling 4 PVDD_A B C D GND_A B C D GVDD_A B C D 4 4 VDD GND VREG AGND OC_ADJ Bootstrap Capacitors 2nd Order L C Output Filter for Each Half Bridge SD OTW...

Page 47: ...T_CD 4 Protection and I O Logic PWM_C OUT_C GND_C PVDD_C BST_C Timing Gate Drive Ctrl PWM Rcv GVDD_C PWM_B OUT_B GND_B PVDD_B BST_B Timing Gate Drive Ctrl PWM Rcv GVDD_B PWM_A OUT_A GND_A PVDD_A BST_A Timing Gate Drive Ctrl PWM Rcv GVDD_A Ctrl BTL PBTLConfiguration Pulldown Resistor BTL PBTLConfiguration Pulldown Resistor BTL PBTLConfiguration Pulldown Resistor BTL PBTLConfiguration Pulldown Resis...

Page 48: ... 10K 10K 10K 5 3 PIN DESCRIPTION No SYMBOL I O SYMBOL 1 FWD I Loading motor forward input 2 REV I Loading motor reverse input 3 CTL I Loading motor speed control 4 PS I Power save 5 IN1 I CH1 input 6 IN2 I CH2 input 7 SVCC Signal power supply 8 PVCC1 Power supply 1 9 VOL O Loading driver output 10 VOL O Loading driver output 11 VO2 O CH2 driver output 12 VO2 O CH2 driver output 13 VO1 O CH1 driver...

Page 49: ... connection VSS Ground pin Bi directional data pin forthe I2 C bus serial data interface Schmitt tigger input and SDA I O open drain output An external pull up resistor must be connected to VDD Typical values 3 for this pull up resistor are 4 7KΩ 100kHz and 1KΩ 400kHz SCL Input Schmitt tigger input pin for serial clock input 2 Input pin for hardware write protection control If you tie this pin to ...

Page 50: ...3 39 7 MC4580 7 1 PIN CONFIGURATION 7 2 TEST CIRCUIT 7 3 ABSOLUTE MAXIMUM RATINGS TA 25 ...

Page 51: ...69 70 53 54 55 56 57 58 59 51 52 60 46 47 48 49 50 9 10 11 12 13 14 15 16 1 2 3 4 5 6 7 8 30 31 32 33 34 35 36 37 26 27 28 29 76 77 78 79 80 17 18 19 20 38 39 40 41 42 43 44 45 21 22 23 24 25 IO_VDD IO_VSS IO_VDD DVDD DVSS IO_VDD IO_VDD IO_VDD DVSS DVDD IO_VDD PULSUS PS9829B 8 2 BLOCK DIAGRAM PLL PWM Modulator Internal Controls MLRCK MBCK MSDIN 0 3 CLK_IN SCK SCL SO SDA SI I2C_AD0 CS I2C_AD2 PWM2_...

Page 52: ...GR5 GR6 PT6324 DIN STB K1 K2 DOUT OSC 12 13 14 16 17 18 19 20 21 22 23 24 25 26 15 SG5 KS5 SG6 KS6 SG7 KS7 SG8 KS8 SG9 KS9 SG10 KS10 SG11 KS11 SG12 KS12 SG13 KS13 SG14 KS14 SG15 KS15 SG16 KS16 SG 17 39 38 37 36 35 34 33 32 31 29 27 28 30 SG18 SG19 52 50 49 48 47 46 45 44 43 42 41 40 51 GND VDD VEE GR16 GR13 GR12 GR11 GR10 GR9 GR8 GR7 GR15 GR14 ...

Page 53: ...KS5 SG6 KS6 SG7 KS7 SG8 KS8 SG9 KS9 SG10 KS10 SG11 KS11 SG12 KS12 SG13 KS13 SG14 KS14 SG15 KS15 SG16 KS16 SG17 SG18 SG19 SG20 GR1 GR2 GR3 GR4 GR5 GR6 GR7 GR8 SG21 SG22 SG23 SG24 GR9 GR10 GR11 GR12 GR13 GR14 GR15 GR16 DOUT CLK STB Serial Data Interface Control Display Memory Timing Generator Key Matrix Memory K1 K2 DIN ...

Page 54: ... output pin N channel Open drain When this pin acts as output pin serial data is outputted at the falling edge of the shift clock starting from the lower bit 4 K1 to K2 I I I I O Key data input pins The data inputted to these pins is latched at the end of the display cycle 5 6 OSC Oscillator input pin A resistor is connected to this pin to determine the oscillation frequency 7 GND Ground pin 8 52 ...

Page 55: ...uency Modulation 140 typ 32V Timer tFMx128 R S Q 10 2 PIN FUNCTION Terminal No SYMBOL Description Functions 1 Source O C P Source O C P terminal MOSFET Source Over current protect 2 FM SS FM terminal Capacitor connection terminal for frequency jitter and soft start 3 GND Ground terminal Ground Input of constant voltage signal 4 FB CC OLP FB CC OLP terminal constant current operation control signal...

Page 56: ...P50 42 P31 INTP2 41 P140 PCL INTP6 P141 BUZ BUSY0 INTP7 P142 SCKA0 P143 SIA0 P144 SOA0 P145 STB0 P00 T1000 P01 T1010 TO00 P02 SO11 P03 SI11 P04 SCK11 P130 ANI0 P20 ANI1 P21 ANI2 P22 ANI3 P23 ANI4 P24 ANI5 P25 ANI6 P26 80 79 78 77 7675 74 7372 71 7069 68 67 66 65 64 6362 61 ANI7 P27 P60 SCL0 P61 SDA0 P62 EXSCL0 P63 P33 TI51 INTP4 P64 P65 P66 P67 P77 KR7 P76 KR6 P75 KR5 P74 KR4 P73 KR3 P72 KR2 P71 K...

Page 57: ...11 P06 TI000 P00 TI001 P05 TOH0 P15 TOH1 P16 TI50 TO50 P17 TI51 TO51 P33 RxD0 P11 TxD0 P10 RxD6 P14 TxD6 P13 SI10 P11 SO10 P12 SI11 P03 SO11 P02 SCK11 P04 SCK11 P05 SIA0 P143 SOA0 P144 SCKA0 P142 STB0 P145 BUSY0 P141 EXSCL0 P62 SDA0 P61 SCL0 P60 AVREF RxD6 P14 LINSEL INTP0 P120 INTP1 P30 to INTP4 P33 INTP5 P16 INTP6 P140 INTP7 P141 AVSS ANI0 P20 to ANI7 P27 SCK10 P10 RxD6 P14 LINSEL 16 bit timer e...

Page 58: ...1 bit units Use of an on chip pull up resistor can be specified by a software setting I O Port 5 Input port 8 bit I O port Input output can be specified in 1 bit units Use of an on chip pull up resistor can be specified by a software setting I O Port 6 Input port 8 bit I O port Output of P60 to P63 is N ch open drain output 6V tolerance Input output can be specified in 1 bit units Only for P64 to ...

Page 59: ...t can be specified in 1 bit units Use of an on chip pull up resistor can be specified by a software setting Output Port 13 Output port 1 bit output only port P70 to P77 KR0 to KR7 P130 P120 P121 P122 P123 P124 INTP0 EXLVI X1 X2 EXCLK XT1 XT2 EXCLKS I O Port 14 Input port 6 bit I O port Input output can be specified in 1 bit units Use of an on chip pull up resistor can be specified by a software se...

Page 60: ...3 49 3 50 WIRING DIAGRAM ...

Page 61: ...T R A N S 2 2 FL1 FL2 FL1 FL2 4 4 5V V 12V 12V 12V 12V 78R12 78R12 5V P SEN 5V P SENS S FEED FEED BACK ACK 5 5 6V KIA278R05 6V KIA278R05 PN901 PN901 PN902 PN902 FEED FEED BACK ACK AM AMP 2 23V 3 3 5V 278R35 5V 278R35 31 31 5V VK 5V VKK RECTIFIER RECTIFIER SMOOTHING SMOOTHING CIRCUIT CIRCUIT BLOCK DIAGRAMS 1 SMPS BLOCK DIAGRAM ...

Page 62: ...3 53 3 54 2 MAIN FRONT BLOCK DIAGRAM ...

Page 63: ...INAL CIRCUIT SPECIAL COMPONENTS ARE SHADED ON THE SCHEMATIC FOR EASY IDENTIFICATION THIS CIRCUIT DIAGRAM MAY OCCASIONALLY DIFFER FROM THE ACTUAL CIRCUIT USED THIS WAY IMPLEMENTATION OF THE LATEST SAFETY AND PERFORMANCE IMPROVEMENT CHANGES INTO THE SET IS NOT DELAYED UNTIL THE NEW SERVICE LITERATURE IS PRINTED 1 Shaded parts are critical for safety Replace only with specified part number 2 Voltages...

Page 64: ...3 57 3 58 2 MAIN INTERFACE PWM SCHEMATIC DIAGRAM ...

Page 65: ...3 59 3 60 3 MPEG SCHEMATIC DIAGRAM ...

Page 66: ...3 61 3 62 4 SERVO SCHEMATIC DIAGRAM ...

Page 67: ...3 63 3 64 5 INTERFACE SCHEMATIC DIAGRAM ...

Page 68: ...3 65 3 66 6 FRONT SCHEMATIC DIAGRAM ...

Page 69: ...3 67 3 68 7 FRONT MIC SCHEMATIC DIAGRAM ...

Page 70: ...3 69 3 70 8 IPOD 1 SCHEMATIC DIAGRAM OPTION ...

Page 71: ...3 71 3 72 9 IPOD 2 SCHEMATIC DIAGRAM OPTION ...

Page 72: ...3 73 3 74 10 2 CHANNEL AMP SCHEMATIC DIAGRAM ...

Page 73: ...3 75 3 76 11 BLUTHOOTH MODULE SCHEMATIC DIAGRAM OPTION ...

Page 74: ...0 17PIN 11 8V 21PIN 29V 26PIN 29V 29PIN 29V 34PIN 29V IC801 8PIN 11 6V IC802 8PIN 4 99V RM301 3PIN 4 6V PIN No Voltage IC100 19PIN 4 87V 20PIN 4 87V 59PIN 4 87V IC103 8PIN 4 87V IC301 9PIN 4 8V 51PIN 4 8V IC302 6PIN 10 8V IC401 7PIN 5V 8PIN 5V 20PIN 5V IC409 6PIN 5V 7PIN 3 3V IC501 1PIN 3 29V 10PIN 3 29V 17PIN 1 47V 24PIN 3 29V 36PIN 3 29V 46PIN 3 29V 53PIN 3 29V 59PIN 3 29V 66PIN 1 47V 73PIN 3 29...

Page 75: ...3 79 3 80 1 MAIN P C BOARD TOP VIEW PRINTED CIRCUIT BOARD DIAGRAMS ...

Page 76: ...3 81 3 82 MAIN P C BOARD BOTTOM VIEW ...

Page 77: ...3 83 3 84 2 FRONT P C BOARD TOP VIEW BOTTOM VIEW ...

Page 78: ...3 85 3 86 3 SMPS P C BOARD TOP VIEW BOTTOM VIEW ...

Page 79: ...3 87 3 88 MEMO 4 MIC JACK P C BOARD TOP VIEW BOTTOM VIEW 5 IPOD P C BOARD OPTION TOP VIEW BOTTOM VIEW ...

Reviews: