10
Initial Settings
By using the Setup menu, you can make various adjust-
ments to items such as picture and sound. You can also
set a language for the subtitles and the Setup menu,
among other things. For details on each Setup menu
item, read the page 10 to 11
a
LANGUAGE - OSD / Disc Audio / Subtitle / Menu
b
DISPLAY - TV Aspect / Display Mode /
Progressive Scan
c
AUDIO - Dynamic Range Control (DRC) / Vocal
d
LOCK (Parental Control) - Rating / Password /
Area Code
e
OTHERS - DivX(R) Registration /
Semi Karaoke
To display and exit the Menu:
Press SETUP to display the menu. A second press of
SETUP will take you back to initial screen.
To go to the next level:
Press
B
on the Remote Control.
To go back to the previous level:
Press
b
on the Remote Control.
GENERAL OPERATION
1. Press SETUP. The Setup menu appears.
2. Use
v
/
V
to select the desired option then press
B
to move to the second level. The screen shows the
current setting for the selected item, as well as alter-
nate setting(s).
3. Use
v
/
V
to select the second desired option and
then press
B
to move to the third level.
4. Use
v
/
V
to select the desired setting then press
SELECT/ENTER
to confirm your selection. Some
items require additional steps.
5. Press SETUP or PLAY to exit the Setup menu.
LANGUAGE
OSD
Select a language for the Setup menu and the on-
screen display.
Disc Audio / Subtitle / Menu
Select the language you prefer for the audio track (disc
audio), subtitles, and the disc menu.
Original
– Refers to the original language in which the
disc was recorded.
Other
– To select another language, press numeric but-
tons and then
SELECT/ENTER
to enter the cor-
responding 4-digit number according to the lan-
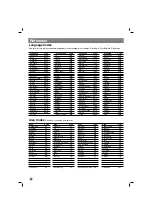
guage code list on the page 18. If you enter the
wrong language code, press CLEAR.
DISPLAY
TV Aspect
4:3 –
Select when a standard 4:3 TV is connected.
16:9 –
Select when a 16:9 wide TV is connected.
Display Mode
The display Mode setting works only when the TV
Aspect mode is set to “4:3”.
Letterbox –
Displays a wide picture with bands on the
upper and lower portions of the screen.
Panscan –
Automatically displays the wide picture on
the entire screen and cuts off the portions that do not fit.
Progressive Scan
Progressive Scan Video provides the high quality pic-
tures with less flickering. If you are using the
Component Video jacks for connection to a TV or moni-
tor that is compatible with a progressive scan signal, set
[Progressive Scan] to [On]. Press
SELECT/ENTER
to
confirm your selection. The confirm menu will appear.
T
o Turn ON progressive scan:
Connect component out of the unit to the input of your
monitor/television, set your television or monitor to
Component Input.
1. Select “Progressive Scan” on the DISPLAY menu
then press
B
2. Select “On” using the
v
/
V
buttons.
3. Pressing
SELECT/ENTER
will set the player to
Progressive scan mode.
Caution
Caution
Once the setting for progressive scan output is entered,
an image will only be visible on a progressive scan com-
patible TV or monitor. If you set Progressive Scan to on
in error, you must reset the unit. First, remove the disc in
the unit. Next, press
STOP
(
x
) on the remote control
and hold it for five seconds before releasing it. The
video output will be restored to the standard setting, and
a picture will once again be visible on a conventional
analog TV or monitor.
Setup
a
b
c
d
e


