background image

2

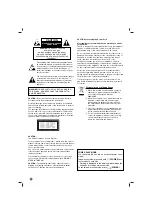
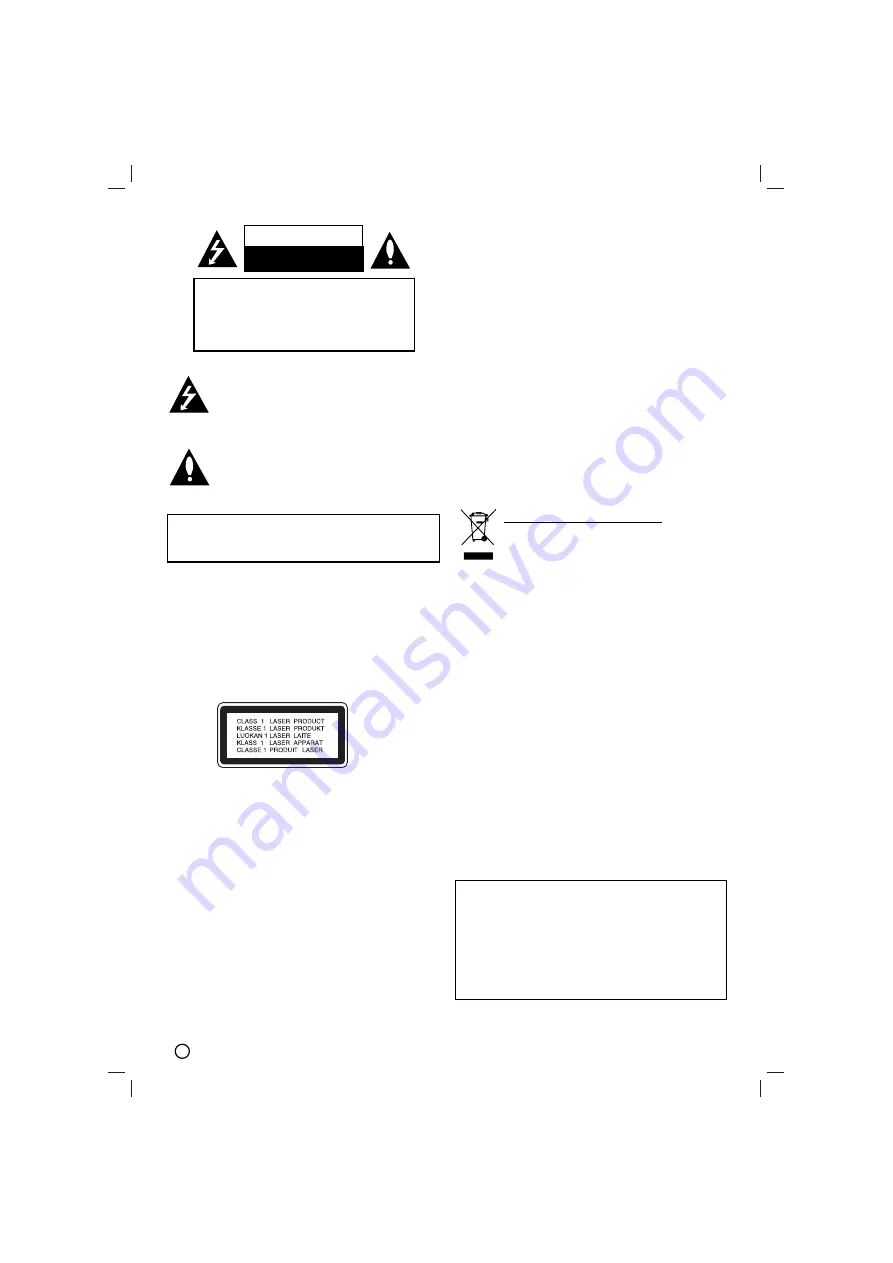
This lightning flash with arrowhead symbol within
an equilateral triangle is intended to alert the user
to the presence of uninsulated dangerous voltage
within the product’s enclosure that may be of 
sufficient magnitude to constitute a risk of electric
shock to persons. 

The exclamation point within an equilateral triangle
is intended to alert the user to the presence of
important operating and maintenance (servicing)
instructions in the literature accompanying the 
appliance.

CAUTION: 

Do not block any ventilation openings. Install in

accordance with the manufacturer's instructions.

Slots and openings in the cabinet are provided for ventilation
and to ensure reliable operation of the product and to protect it
from over heating. 
The openings should be never be blocked by placing the prod-
uct on a bed, sofa, rug or other similar surface. This product
should not be placed in a built-in installation such as a book-
case or rack unless proper ventilation is provided or the manu-
facturer's instruction have been adhered to.

CAUTION:

This Product employs a Laser System.

To ensure proper use of this product, please read this owner’s
manual carefully and retain for future reference, should the unit
require maintenance, contact an authorized service location-
see service procedure.

Use of controls, adjustments or the performance of procedures
other than those specified herein may result in hazardous 
radiation exposure.

To prevent direct exposure to laser beam, do not try to open
the enclosure. Visible laser radiation when open. DO NOT
STARE INTO BEAM.

CAUTION:

The apparatus shall not be exposed to water, 

dripping or splashing and that no objects filled with liquids,
such as vases, shall be placed on the apparatus.

CAUTION concerning the Power Cord

Most appliances recommend they be placed upon a dedi-
cated circuit;

That is, a single outlet circuit which powers only that appliance
and has no additional outlets or branch circuits. Check the
specification page of this owner's manual to be certain.

Do not overload wall outlets. Overloaded wall outlets, loose or
damaged wall outlets, extension cords, frayed power cords, or
damaged or cracked wire insulation are dangerous. Any of
these conditions could result in electric shock or fire.
Periodically examine the cord of your appliance, and if its
appearance indicates damage or deterioration, unplug it, dis-
continue use of the appliance, and have the cord replaced with
an exact replacement part by an authorized servicer.

Protect the power cord from physical or mechanical abuse,
such as being twisted, kinked, pinched, closed in a door, or
walked upon. Pay particular attention to plugs, wall outlets, and
the point where the cord exits the appliance.

To disconnect power from the mains, pull out the mains cord
plug. When installing the product, ensure that the plug is easily
accessible.

CAUTION

RISK OF ELECTRIC SHOCK 

DO NOT OPEN

WARNING: 

TO REDUCE THE RISK 

OF ELECTRIC SHOCK

DO NOT REMOVE COVER (OR BACK)

NO USER-SERVICEABLE PARTS INSIDE

REFER SERVICING TO QUALIFIED SERVICE

PERSONNEL.

WARNING:

TO REDUCE THE RISK OF FIRE OR ELEC-

TRIC SHOCK, DO NOT EXPOSE THIS PRODUCT TO
RAIN OR MOISTURE.

POWER SAVE MODE

You can set up the unit into an economic power save
mode.
In power-on status, press and hold 

1/[

(

POWER

) but-

ton for about 3 seconds. 
-  Nothing is displayed in the display window when the

unit goes into the power save mode.

To cancel power save mode, press 

1/[ 

(

POWER

).

Disposal of your old appliance

1. When this crossed-out wheeled bin symbol is

attached to a product it means the product is
covered by the European Directive
2002/96/EC.

2. All electrical and electronic products should be

disposed of separately from the municipal
waste stream via designated collection facili-
ties appointed by the government or the local
authorities.

3. The correct disposal of your old appliance will

help prevent potential negative consequences
for the environment and human health.

4. For more detailed information about disposal

of your old appliance, please contact your city
office, waste disposal service or the shop
where you purchased the product.

Summary of Contents for MDD-D112X

Page 1: ...2X MDS D112V MDD D72X MDD D72X MDS D72V ÑÓÏ ÌËÈ ÏËÌË ÍËÌÓÚÂ Ú Lees deze handleiding aandacht door voordat u dit toestel gebruikt àÌÚ ÌÂÚ ÂÒ http ua lge com àÌÙÓ Ï ˆËÓÌÌ fl ÒÎÛÊ LG 380 44 490 7777 8 800 303 0000 RUSSIAN å Ì ÒËÒÚÂÏ ÓÏ Ì Ó Ó Í ÌÓÚÂ Ú Û èÂ Ì Ê ÓÁÔÓ ÚË ËÍÓ ËÒÚ ÌÌfl Ô ËÒÚ Ó Û Î ÒÍ Û ÊÌÓ Ô Ó ËÚ ÈÚ ˆ ÌÒÚ Û͈ ßÌÚ ÌÂÚ ÂÒ http ua lge com ßÌÙÓ Ï ˆ ÈÌ ÒÎÛÊ LG 380 44 490 7777 ÅÂÁÍÓ ÚÓ Ì ÌÙÓ Ï ...

Page 2: ...Check the specification page of this owner s manual to be certain Do not overload wall outlets Overloaded wall outlets loose or damaged wall outlets extension cords frayed power cords or damaged or cracked wire insulation are dangerous Any of these conditions could result in electric shock or fire Periodically examine the cord of your appliance and if its appearance indicates damage or deteriorati...

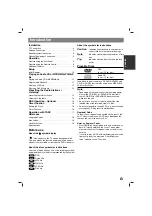
Page 3: ...file About the symbols for instructions Caution Caution Indicates hazards likely to cause harm to the unit itself or other material damage Note Note Indicates special operating features of this unit T Tip ip Indicates tips and hints to make the task easier Playable Discs DVD 8 cm 12 cm disc Audio CD 8 cm 12 cm disc In addition this unit can play a DVD R DVD RW and CD R or CD RW that contains audio...

Page 4: ... the TV using the video cable supplied V Component Video connection Connect the COMPONENT VIDEO OUT PROGRES SIVE SCAN Y PB PR jacks from the unit to the corre sponding jacks on the TV using a Y PB PR cable C Progressive Scan connection If your television is a high definition or digital ready television you may take advantage of this unit s progressive scan output for higher video resolution If you...

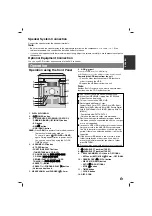
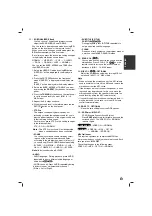
Page 5: ...ress DEMO in power off state to demonstrate the function in the display window To cancel it press POWER or DEMO again During demonstration in power on sta tus you can cancel it by using the CLOCK TIMER buttons 4 XDSS MP3 OPT button XTS PRO button FUNCTION SELECT buttons TUNER TAPE AUX CD DVD CD SKIP SEARCH b bb b B BB B CD SCAN b bb b B BB B REWIND FAST FORWARD TAPE TUNING b bb b B BB B PRESET but...

Page 6: ...movie and music The 1 5 speed allows you to watch the pictures and lis ten to the sound quicker than playing at a normal speed on the disc 1 Press the PLAY button during the normal playback The screen will appear at 1 5 speed with sound 2 To return to normal PLAY press PLAY 10 PROG MEMO Accesses or removes Program menu Enter a radio station s frequency into the tuner REPEAT During playback press R...

Page 7: ... repeatedly BYPASS ON STAGE STUDIO CLUB HALL THEATER 1 CHURCH BYPASS Note Note Initial sound mode is BYPASS AUDIO AUDIO language During playback press AUDIO repeatedly to hear a different audio language or audio track AUDIO channel Press AUDIO repeatedly during playback to hear a different audio channel Stereo Left or Right SUBTITLE S TITLE SUBTITLE During playback press S TITLE repeatedly to sele...

Page 8: ...or flashes on display window To can cel it press volume or MUTE again SKIP During playback press SKIP or to go to the next chapter track or to return to the begin ning of the current chapter track Press SKIP twice briefly to step back to the previous chapter track SLOW In the pause mode press m or M to select required speed DVD t 1 2 1 4 1 8 1 16 or T 1 2 1 4 1 8 1 16 SCAN m m M M During playback ...

Page 9: ...s SELECT ENTER to confirm Playback starts from the selected time Screen Saver The screen saver appears when you leave the unit in Stop mode for about five minutes Last Scene Memory This unit memorizes the last scene from the last disc that is viewed The last scene remains in the memory even if you remove the disc from the unit or switch off the unit If you load a disc that has the scene memorized ...

Page 10: ...eric but tons and then SELECT ENTER to enter the cor responding 4 digit number according to the lan guage code list on the page 18 If you enter the wrong language code press CLEAR DISPLAY TV Aspect 4 3 Select when a standard 4 3 TV is connected 16 9 Select when a 16 9 wide TV is connected Display Mode The display Mode setting works only when the TV Aspect mode is set to 4 3 Letterbox Displays a wi...

Page 11: ...ENTER to verify 3 Press SETUP to exit the menu If you forget your password If you forget your password you can clear it using the following steps 1 Press SETUP to display the Setup menu 2 Input the 6 digit number 210499 and press SELECT ENTER The password is cleared Area Code Enter the code of the area whose standards were used to rate the DVD video disc based on the list on 18 page 1 Select Area ...

Page 12: ...UDIO CD or MP3 WMA list and then press PLAY Repeat Programmed Tracks 1 Press REPEAT when playing a disc The repeat icon appears 2 Press REPEAT to select a desired repeat mode TRACK repeats the current track ALL repeats all the tracks on programmed list Off No display does not play repeatedly Erasing a Track from Program List 1 Use v V to select the track that you wish to erase from the Program lis...

Page 13: ...ibility with this player is limited as follows Sampling frequency within 32 48 kHz MP3 within 24 48kHz WMA Bit rate within 32 320kbps MP3 40 192kbps WMA File extensions mp3 wma CD ROM file format ISO9660 We recommend that you use Easy CD Creator which creates an ISO 9660 file system The total number of characters for file name maxi mum 8 characters excluding file extensions like mp3 wma They shoul...

Page 14: ...and then a preset number will flash To change the preset number follow the steps 4 5 To recall preset numbers Press and hold v V on the remote control until the desired preset number appears or press the button repeatedly Listening to the radio 1 Press TUNER BAND on the remote control to show either FM or AM in the display window Or Press TUNER on the front panel The last received station is tuned...

Page 15: ...l Enables the unit to receive the actual time and show it in the Display Window Note Note Some RDS stations may not choose to include some of these additional features If the data required for the selected mode is not being transmitted the Display Window will show a PTY NONE RT NONE CT NONE or PS NONE message Programme Search PTY A major benefit of RDS is its ability to encode broad casts with Pro...

Page 16: ...on flashes 3 Select the previous memorized preset number by pressing b bb b B BB B on the front panel and press SET CD ON TIME indicator appears for about 0 5 seconds in the display window and then disappears b When you select CD DVD USB or TAPE function ON TIME indicator appears for about 0 5 seconds in the display window and then disappears 5 Set the hour to switch on by pressing b bb b B BB B o...

Page 17: ... DUBBING Normal speed copying To stop recording press STOP x Basic Setting 1 Select a function you want to record except tape function 2 Open the cassette deck TAPE 2 and insert a blank cassette into the cassette compartment Set the recording direction Recording from Radio CD or Auxiliary source 1 Press REC on the front panel or z on the remote control REC flashes and holds the cassette in pause m...

Page 18: ... 8379 Spanish 6983 Sudanese 8385 Swahili 8387 Swedish 8386 Tagalog 8476 Tajik 8471 Tamil 8465 Tatar 8484 Telugu 8469 Thai 8472 Tibetan 6679 Tigrinya 8473 Tonga 8479 Turkish 8482 Turkmen 8475 Twi 8487 Ukrainian 8575 Urdu 8582 Uzbek 8590 Vietnamese 8673 Volapük 8679 Welsh 6789 Wolof 8779 Xhosa 8872 Yiddish 7473 Yoruba 8979 Zulu 9085 Language Codes Use this list to input your desired language for the...

Page 19: ...k side down The disc is not placed within the guide Place the disc on the disc tray correctly inside the guide The disc is dirty Clean the disc A menu is on the TV screen Press the SETUP button to turn off the menu screen The Rating level is set Cancel the Rating function or change the rating level Loud hum or noise is heard The disc is dirty Clean the disc The speakers and components are connecte...

Page 20: ...mic range audio More than 80 dB Video output 1 0 V p p 75 Ω Component Video output Y 1 0 V p p 75 Ω Pb Pr 0 7 V p p 75 Ω Speakers Speaker Name Front Speaker L R Type Bass Reflex 2Way 2Speaker Impedance 4 Ω Frequency Response 55 20000 Hz MDS D112V 60 20000 Hz MDS D72V Sound Pressure Level 83 dB W 1m MDS D112V 83 dB W 1m MDS D72V Rated Input Power 50 W MDS D112V 30 W MDS D72V Max Input Power 100 W M...

Reviews: