background image

19

Karaoke Basic Playback - More you can do

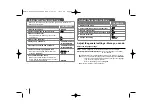
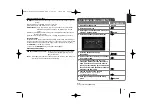
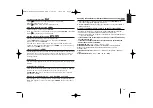
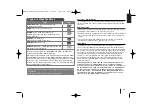
You can change the key to suit your vocal range with Key Control

You can adjust the key to 13 steps (6 steps higher, 6 steps lower and the 
original key).
- The setting appears on the screen.
• To flatten the key one by one, press the 

KEY CON.(b)

repeatedly during

playback.

• To sharp the key one by one, press the 

KEY CON.(#)

repeatedly during 

playback.

- Press 

TONE CONTROL

(

) on remote control repeatedly to change MAN’s

or WOMEN’s tone.

To change tempo 

You can use this function when you want to play fast or slow. 

1

Press 

TEMPO +

repeatedly during singing to play faster.

2

Press 

TEMPO -

repeatedly during singing to play slower.

Shadow Function

If KARAOKE CD caption and the song’s subtitle are mixed up, the song’s 
subtitle may be invisible. In this case, to highlight the song’s subtitle, press

SHADOW

.

- It will be highlighted by background shadow image.

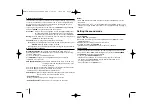
To adjust ECHO Volume

You can give an echo effect to the sound from the microphones.
Press the 

ECHO VOL. + 

on the remote control to increase the echo volume or

ECHO VOL. -

decrease it. (MIN, 1~14, MAX steps)

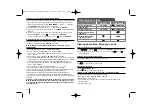
Using Microphone 

1

Connect your microphone to the MIC1/ MIC 2 Jacks. 
“MIC IN” will be shown in the display window.

2

Play the music you want.

3

Sing along with the accompaniment

.

Adjust the microphone volume by pressing 

MIC VOL.(+/-)

button. 

Notes:

• When not using the microphone, set the

MIC VOL.(+/-)

button to minimum or

turn off the MICs and remove the microphone from the MIC Jacks.

• If the microphone is set too near the speaker, a howling sound may be 

produced. In this case, move the microphone away from the speaker or
decrease the sound level by using the 

MIC VOL.(+/-)

button.

• If sound through the microphone is extremely loud, it may be distorted. In this

case, press the 

MIC VOL.(+/-)

button toward minimum.

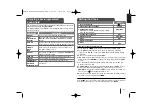
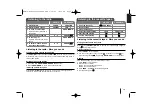
Reserving the Song - More you can do

To cancel the reserved song

Each time you press 

CLEAR

, the reserved song will be cancelled one by one.

To cancel or change the wrong reserved song

1

Press the 

PROG./MEMO

. to move to the desired position.

2

Press the 

CLEAR

to cancel the reserved song

.

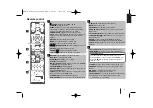
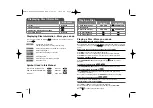
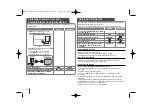
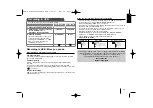
Karaoke Basic Playback

ON REMOTE

1 Check if the system is connected. (Page 4)

2 Turn on the power of TV and unit.

1

1   

POWER

3 Open the disc tray and insert supplied 

karaoke disc. 

Z

Z  

OPEN/CLOSE

4 Close the disc tray. 

Z

Z  

OPEN/CLOSE

5 To enter to the DVD/CD(karaoke) mode. 

FUNCTION(DVD/CD) 

b

b

KARAOKE

6 Connect the microphone to the MIC jacks. 

7 Press the melody number you want. 

If you 

want to cancel the selected melody number, 
press the 

CLEAR

NUMERIC No. 0 ~ 9

8 To start, press 

ENTER or 

B

B  

PLAY

9 To stop, press 

x

x  

STOP

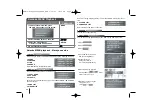
Reserving the Song

ON REMOTE

1 To reserve melody number you want in the

karaoke disc play mode, press  

NUMERIC No. 0 ~ 9

2 To reserve, press 

The melody number is reserved

PROG./MEMO.

3 Repeat steps 1-2. 

You can reserve at most 8 songs 

MDS714-A5U_karaoke_LGERA_ENG  5/29/09  10:30 AM  Page 19

Summary of Contents for MDS264V

Page 1: ...oduct models meet the ENERGY STAR guidelines for energy efficiency ENERGY STAR is a U S registered mark Internet address http ua lge com Customer Information Center LG 380 44 490 7777 8 800 303 0000 The working life of this product is 7 years since the date of purchase êìëëäàâ аза тілі O ZBEK ìäêÄ çëúäÄ English MDS714 A5U_karaoke_LGERA_ENG 5 29 09 10 30 AM Page 1 ...

Page 2: ... BEAM CAUTION The apparatus shall not be exposed to water dripping or splashing and no objects filled with liquids such as vases shall be placed on the apparatus CAUTION concerning the Power Cord Most appliances recommend they be placed upon a dedicated circuit That is a single outlet circuit which powers only that appliance and has no additional outlets or branch circuits Check the specification ...

Page 3: ...layer or external device 16 Using an USB device 16 Power Save Mode You can set up the unit into an economic power save mode In power on status press and hold 1 button for about 3 seconds Nothing is displayed in the display window when the unit is turned off To cancel press 1 Recording to USB 17 Recording to TAPE 18 Synchronized Recording from CD to TAPE 18 Karaoke Basic Playback 19 Reserving the S...

Page 4: ...ir hands or any objects into the speaker duct Speaker duct A hole for plentiful bass sound on speaker cabinet enclosure Grey Red Green Orange Blue White Rear Front Center Sub Woofer Rear Front Behind you and to your right In front of you to the right of the screen Above screen directly in front of you This can be placed in any front position Behind you and to your left In front of you to the left ...

Page 5: ...input jacks on your TV using a Video cable AUX IN L R jacks connection Connect a VCR or Auxiliary device etc to the INPUT jack of this unit Press the FUNCTION button on the remote control until the AUX indicator is displayed in the display window Antenna connection Fit the AM loop aerial to its stand Connect the AM loop aerial to the unit Connect the FM aerial The reception will be at its best whe...

Page 6: ...table in 12 11 10 9 8 7 6 5 4 3 2 1 6 Main unit 6 7 8 Selects TUNER function Selects TAPE function Selects KARAOKE DVD CD function Selects USB function PRO EQ Volume control Cassette Door 1 2 TIMER Use your player as an alarm clock CLOCK See setting the Clock EQ LG EQ You can choose fixed sound impression XDSS plus Reinforce the treble bass and sur round effect USB connector PHONES Headphone jack ...

Page 7: ...This function enable you to play fast or slow the music speed in KARAOKE mode SCAN bb BB Search backward or forward SKIP Go to next or previous chapter track Title D SKIP DISC SKIP Choose a desired disc MUTE To mute the sound VOL Volume Adjusts speaker volume EQ LG EQ EQUALIZER Effect You can choose sound impressions 0 9 numerical buttons Selects numbered options in a menu TONE CONTROL Adjusts man...

Page 8: ... U U u u I I i i and activated page 21 ENTER 8 To confirm what you press Make sure to finish setting the Area Code before leaving the setup menu if you cannot set the rating and Password ENTER When you use this unit for the first time you have to set the Area Code as shown below ON REMOTE Adjust the general settings More you can do Adjust the language settings OSD Selects a language for the Setup ...

Page 9: ...ngs DRC Dynamic Range Control Make the sound accurate when the volume is turned down Dolby Digital only Set to On for this effect Vocal Select On to mix karaoke channels into normal stereo This function is effective for multi channel karaoke DVDs only Note 2 1 Speaker Setup MDT364 5 1 Speaker Setup MDS714 ON REMOTE 1 Open the settings menu SETUP 2 Select the audio icon U U u u 3 Select right to en...

Page 10: ... checking interval and beat during sing a song in the karaoke mode only Selects the On Score bar shows levels while checking the interval and beat Selects the Off Score bar are not display on the screen This function is not supported the Semi karaoke mode Semi Karaoke When a chapter title track is fully finished this function shows the score in the screen with a fanfare sound Semi Karaoke on When ...

Page 11: ...d fields You can select a desired sound mode by using EQ LG EQ The displayed items for the Equalizer may be different depending on sound sources and effects NATURAL You can enjoy comfortable and natural sound Local Regionally optimized sound effect DANGDUT ARABIC Specialization PERSIAN INDIA REGUETON MERENGUE SAMBA equalizer SALSA AUTO EQ Realizes the sound equalizer that is the most similar to th...

Page 12: ...vious chapter track file Press to move to the next chapter track file Press to return to the beginning of the current chapter track file Press twice briefly to step back to the previous chapter track file Pausing a playback Press PAUSE STEP X to pause playback Press B B PLAY to continue playback Frame by Frame playback Press PAUSE STEP X repeatedly to play Frame by Frame playback Playing repeatedl...

Page 13: ...it press and hold PAUSE STEP X for more than five seconds to be able to select a system PAL NTSC AUTO Mixed disc or USB Flash Drive DivX MP3 WMA and JPEG When playing a disc or USB Flash Drive contained with DivX MP3 WMA and JPEG files together you can select file type with MENU button on the remote control DVD DivX DVD DVD DVD Changing the character set to display DivX subtitle correctly 1 If the...

Page 14: ...less than 999 This unit requires discs and recordings to meet certain technical standards in order to achieve optimal playback quality Pre recorded DVDs are automatically set to these standards There are many different types of recordable disc formats including CD R containing MP3 or WMA files and these require certain pre existing conditions see above to ensure compatible playback Customers shoul...

Page 15: ... Z PUSH EJECT TAPE B B x x ON REMOTE FUNCTION B B x x Listening to the radio More you can do Looking for radio stations automatically Press on the front panel TUN TUN on the remote control for more than 0 5 second The tuner will scan automatically and stop when it finds a radio station Deleting all the saved stations 1 Press and hold PROG MEMO ERASE ALL shows 2 Press PROG MEMO to erase all the sav...

Page 16: ...play 4 Start your media playing 5 To stop press 6 Before disconnecting the portable USB device change to any other function USB B B x x TUNER TAPE FUNCTION U U u u B B PLAY x x FUNCTION Compatible USB Devices MP3 Player Flash type MP3 player USB Flash Drive Devices that support USB 2 0 or USB 1 1 This USB Function may not be available depending on devices USB device requirement Devices which requi...

Page 17: ...rds after creating your own program if you want to record the track you want Audio CD only When you are recording look out for the following You can check the recording percentage rate for the USB record on the screen during the recording AUDIO MP3 WMA CD only During recording MP3 WMA there is no sound When you stop recording during playback the file that has been recorded at that time will be sto...

Page 18: ...d Recording starts 7 To stop recording press PUSH EJECT TUNER USB B B x x FUNCTION B B z REC z REC x x ON UNIT ON REMOTE Synchronized Recording from CD to Tape 1 Open the tape deck and then insert a blank tape 2 Close the door and insert a CD Audio CD only 3 To select CD function press 4 Press the button on a stop status to move to CD synchronizing mode Recording automatically starts 7 seconds lat...

Page 19: ...t using the microphone set the MIC VOL button to minimum or turn off the MICs and remove the microphone from the MIC Jacks If the microphone is set too near the speaker a howling sound may be produced In this case move the microphone away from the speaker or decrease the sound level by using the MIC VOL button If sound through the microphone is extremely loud it may be distorted In this case press...

Page 20: ...ong title or entire title 3 RANDOM You can enjoy songs randomly 4 CHALLENGE You can enjoy a song game dividing by two teams of red team blue team Karaoke MENU Playback ON REMOTE 1 To move to the main menu press MENU The main menu appears on the screen 2 Select a desired option on the menu U U u u I I i i 3 Adjust the menu settings ENTER or Select a option from the menu 4 To move the previous mode ...

Page 21: ...377 Sanskrit 8365 Scots Gaelic 7168 Serbian 8382 Serbo Croatian 8372 Shona 8378 Sindhi 8368 Singhalese 8373 Slovak 8375 Slovenian 8376 Spanish 6983 Sudanese 8385 Swahili 8387 Swedish 8386 Tagalog 8476 Language Code Tajik 8471 Tamil 8465 Telugu 8469 Thai 8472 Tonga 8479 Turkish 8482 Turkmen 8475 Twi 8487 Ukrainian 8575 Urdu 8582 Uzbek 8590 Vietnamese 8673 Volapük 8679 Welsh 6789 Wolof 8779 Xhosa 88...

Page 22: ... placed within the guide The TV is not set to receive the video signal Insert a playable disc Place the disc with the playback side down Place the disc on the disc tray correctly inside the guide Clean the disc Select the appropriate video input model on the TV so the picture from the unit appears on the TV Unable to record TAPE Record protect tabs are removed Cover holes on back edge of tape with...

Page 23: ...s prohibited CONSUMERS SHOULD NOTE THAT NOT ALL HIGH DEFINITION TELEVI SION SETS ARE FULLY COMPATIBLE WITH THIS PRODUCT AND MAY CAUSE ARTIFACTS TO BE DISPLAYED IN THE PICTURE IN CASE OF 525 OR 625 PROGRESSIVE SCAN PICTURE PROBLEMS IT IS RECOMMEND ED THAT THE USER SWITCH THE CONNECTION TO THE STANDARD DEFINITION OUTPUT IF THERE ARE QUESTIONS REGARDING OUR TV SET COMPATIBILITY WITH THIS MODEL 525p A...

Page 24: ...00 Hz Signal to noise ratio audio More than 75 dB 1 kHz Signal to noise ratio video More than 55 dB 1 kHz Dynamic range audio More than 80 dB Video output 1 0 V p p 75 Ω Component Video output Y 1 0 V p p 75 Ω Pb Pr 0 7 V p p 75 Ω Speakers MDS264V MDS364V MDS364W MDS714V MDS714C MDS714S MDS714W Front Speaker Center Speaker Rear Speaker Subwoofer Type 2 Way 2 Speaker 2 Way 2 Speaker 2 Way 2 Speaker...

Reviews: