background image

4

Outdoor Unit

Safety Precautions

Safety Precautions

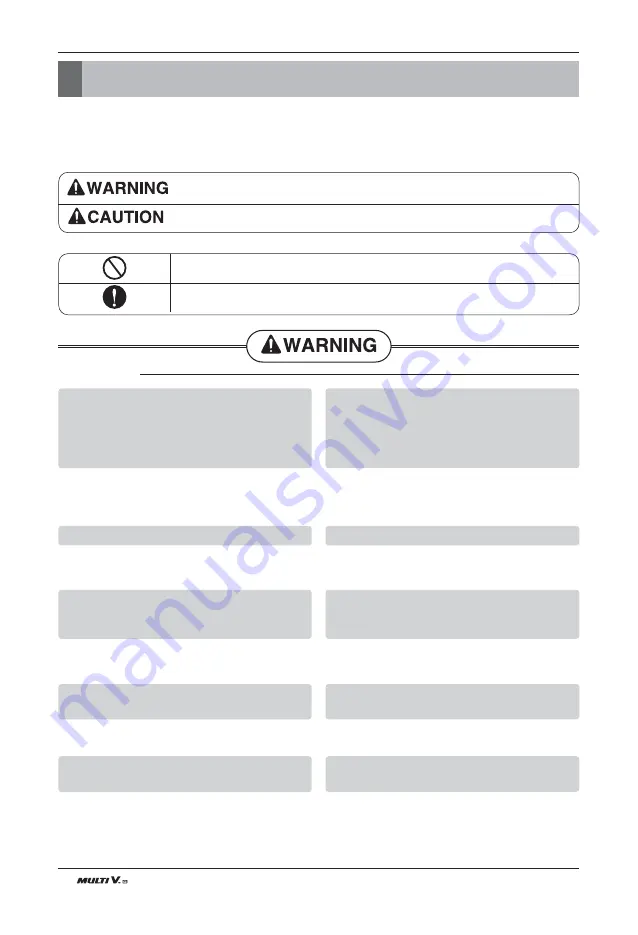
To prevent injury to the user or other people and property damage, the following instructions must
be followed.

n

Incorrect operation due to ignoring instruction will cause harm or damage. The seriousness is
classified by the following indications.

n

Meanings of symbols used in this manual are as shown below.

This symbol indicates the possibility of death or serious injury.

This symbol indicates the possibility of injury or damage to properties only.

Be sure not to do.

Be sure to follow the instruction.

n

Installation

Have all electric work done by a licensed
electrician according to "Electric Facility En-
gineering Standard" and "Interior Wire Regu-
lations" and the instructions given in this
manual and always use a special circuit.

• If the power source capacity is inadequate or

electric work is performed improperly, electric
shock or fire may result.

Ask the dealer or an authorized technician to
install the air conditioner.

• Improper installation by the user may result in

water leakage, electric shock, or fire.

Always ground the product.

• There is risk of fire or electric shock.

Always intstall a dedicated circuit and breaker.

• Improper wiring or installation may cause fire or

electric shock.

For re-installation of the installed product, al-
ways contact a dealer or an Authorized Serv-
ice Center.

• There is risk of fire, electric shock, explosion, or

injury.

Do not install, remove, or re-install the unit
by yourself (customer).

• There is risk of fire, electric shock, explosion, or

injury.

Do not store or use flammable gas or 
combustibles near the air conditioner. 

• There is risk of fire or failure of product.

Use the correctly rated breaker or fuse.

• There is risk of fire or electric shock.

Prepare for strong wind or earthquake and
install the unit at the specified place.

• Improper installation may cause the unit to top-

ple and result in injury.

Do not install the product on a defective in-
stallation stand.

• It may cause injury, accident, or damage to the

product.

Summary of Contents for Multi V ARUB Series

Page 1: ...work must be performed in accordance with the national wiring standards by authorized personnel only Please retain this installation manual for future reference after reading it thoroughly your set and retain it for future reference P NO MFL67406401 www lg com MODELS ARUB Series Heat recovery ENGLISH FRANCAIS ESPAÑOL PORTUGUESE ...

Page 2: ... insulate any tubing run inside a room to prevent sweating that can cause dripping and water damage to wall and floors in moist or uneven locatinons Use a raised concrete pad or concrete blocks provide a solid level foundation for the outdoor unit This prevents water damage and abnormal vibration in an area with high winds Securely anchor the outdoor unit down with bolts and a metal frame Provide ...

Page 3: ...ace 17 Lifting method 19 Installation 20 Refrigerant piping installation 25 Pipe connections between indoor and outdoor unit 31 Refrigerant piping system 34 Electrical Wiring 56 HR Unit PCB 79 Test Run 94 New Function 120 Caution For Refrigerant Leak 127 Installation guide at the seaside 129 Installation Guide for Harmonics 131 ARUB Series Outdoor unit Installation Manual TABLE OF CONTENTS ...

Page 4: ...sult Ask the dealer or an authorized technician to install the air conditioner Improper installation by the user may result in water leakage electric shock or fire Always ground the product There is risk of fire or electric shock Always intstall a dedicated circuit and breaker Improper wiring or installation may cause fire or electric shock For re installation of the installed product al ways cont...

Page 5: ...amage Do not touch the power switch with wet hands There is risk of fire electric shock explosion or injury When installing and moving the air condi tioner to another site do not charge it with a different refrigerant from the refrigerant specified on the unit If a different refrigerant or air is mixed with the original refrigerant the refrigerant cycle may malfunction and the unit may be damaged ...

Page 6: ...cause the air condi tioner to operate erroneously or fail to operate On the other hand the air conditioner may affect such equipment by creating noise that disturbs medical treatment or image broadcasting Do not install the product where it is exposed to sea wind salt spray directly It may cause corrosion on the product Corrosion particularly on the condenser and evaporator fins could cause produc...

Page 7: ...g so may cut your fingers When transporting the outdoor unit suspending it at the specified positions on the unit base Also support the outdoor unit at four points so that it cannot slip sideways Do not touch any of the refrigerant piping during and after operation It can cause a burn or frostbite Do not operate the air conditioner with the panels or guards removed Rotating hot or high voltage par...

Page 8: ...witch setting Determination of division work The vacuum pump used must have a capacity of reaching at least 5 torr more than 1 hour Vacuum drying Recharge correctly as calculated in this manual and record the amount of added refrigerant Additional charge of refrigerant Make sure there are no gaps left between the facing materials used on the ceiling Fit facing panels Run each indoor unit in turn t...

Page 9: ...inch 1 Outdoor Unit 14 16 18 20 ARUB140BT3 ARUB160BT3 ARUB180BT3 ARUB200BT3 ARUB140BT3 ARUB160BT3 ARUB180BT3 ARUB100BT3 ARUB100BT3 7 0 7 0 9 12 8 23 35 26 40 29 45 32 50 270 1 270 1 330 1 240 2 595 1 595 1 727 1 529 2 1 240 1 680 760 1 1 240 1 680 760 1 1 240 1 680 760 1 920 1 680 760 2 48 8 66 1 29 9 1 48 8 66 1 29 9 1 48 8 66 1 29 9 1 36 2 66 1 29 9 2 12 7 1 2 12 7 1 2 15 88 5 8 15 88 5 8 28 58 ...

Page 10: ...8 1 1 8 28 58 1 1 8 28 58 1 1 8 Unit System HP Model Product Charge kg Max Connectable No of Indoor Units Net Weight kg lbs Dimensions WxHxD mm inch Connecting Pipes Liquid mm inch Low Pressure Gas mm inch High Pressure Gas mm inch 2 Outdoor Unit 3 Outdoor Unit 38 40 42 44 ARUB380BT3 ARUB400BT3 ARUB420BT3 ARUB440BT3 ARUB140BT3 ARUB160BT3 ARUB160BT3 ARUB160BT3 ARUB120BT3 ARUB120BT3 ARUB140BT3 ARUB1...

Page 11: ...nnectable No of Indoor Units Net Weight kg lbs Dimensions WxHxD mm inch Connecting Pipes Liquid mm inch Low Pressure Gas mm inch High Pressure Gas mm inch 3 Outdoor Unit 54 ARUB540BT3 ARUB180BT3 ARUB180BT3 ARUB180BT3 27 00 64 330 3 727 3 1 240 1 680 760 3 48 8 66 1 29 9 3 19 05 3 4 41 3 1 5 8 34 9 1 3 8 ...

Page 12: ...760 1 36 2 x 66 1 x 29 9 x 2 36 2 x 66 1 x 29 9 x 2 36 2 x 66 1 x 29 9 x 1 36 2 66 1 29 9 1 48 8 x 66 1 x 29 9 x 1 48 8 66 1 29 9 1 15 88 5 8 15 88 5 8 19 05 3 4 19 05 3 4 34 9 1 3 8 34 9 1 3 8 34 9 1 3 8 34 9 1 3 8 28 58 1 1 8 28 58 1 1 8 28 58 1 1 8 28 58 1 1 8 n Heat Recovery Power Supply Outdoor Unit 3Ø 460V 60Hz Unit System HP Model Product Charge kg Max Connectable No of Indoor Units Net Wei...

Page 13: ... 2 7 8 22 2 7 8 44 5 1 3 4 44 5 1 3 4 53 98 2 1 8 53 98 2 1 8 41 3 1 5 8 41 3 1 5 8 44 5 1 3 4 44 5 1 3 4 Unit System HP Model Product Charge kg Max Connectable No of Indoor Units Net Weight kg lbs Dimensions WxHxD mm inch Connecting Pipes Liquid mm inch Low Pressure Gas mm inch High Pressure Gas mm inch 2 Outdoor Unit 3 Outdoor Unit 38 40 42 44 ARUB380DT3 ARUB400DT3 ARUB420DT3 ARUB440DT3 ARUB200D...

Page 14: ... 680 x 760 x 4 1 240 x 1 680 x 760 x 4 1 240 x 1 680 x 760 x 4 48 8 x 66 1 x 29 9 x 4 48 8 x 66 1 x 29 9 x 4 48 8 x 66 1 x 29 9 x 4 48 8 x 66 1 x 29 9 x 4 22 2 7 8 22 2 7 8 22 2 7 8 22 2 7 8 53 98 2 1 8 53 98 2 1 8 53 98 2 1 8 53 98 2 1 8 44 5 1 3 4 44 5 1 3 4 44 5 1 3 4 44 5 1 3 4 Unit System HP Model Product Charge kg Max Connectable No of Indoor Units Net Weight kg lbs Dimensions WxHxD mm inch ...

Page 15: ...stalling the prod uct at a place With a high humidity in winter near beach coast lake etc Ex Rooftop where there is always sunshine The refrigerant R410A has the property of higher operating pressure in comparison with R22 Therefore all materials have the characteristics of higher resisting pressure than R22 ones and this character istic should be also considered during the installation R410A is a...

Page 16: ...ore Servicing space 300more Servicing space 450more Servicing space 1 2 3 5 4 6 7 453 174 174 182 218 419 61 137 124 128 30 60 NOTICE 2 NOTICE 2 450 450 100 more Serviceing space 100 more 100 more Serviceing space Serviceing space 100 more Serviceing space 1 Be sure to install the inspection door at the control box side 2 If reducers are used servicing space must be increased equal to reducer s di...

Page 17: ...Front The height of the wall on the front side must be 1500mm or less The height of the wall on the inlet rear side must be 500mm or less There is no limit to the wall on the side If the height of the walls on the front and the inlet side are higher than the limit there must be additional space on the front and the inlet side Additional Space on the inlet side by 1 2 of h1 Additional Space on the ...

Page 18: ...t is installed at snowy area attach the hood to the system Install the outdoor unit at the higher installation console by 50cm than the average snowfall annual average snow fall if it is installed at the area with much snowfall Where snow accumulated on the upper part of the Outdoor Unit by more than 10cm always remove snow for op eration 1 The height of H frame must be more than 2 times the snowf...

Page 19: ...your bare hands Otherwise you may get a cut in your hands Tear plastic packaging bag and scrap it so that children cannot play with it Otherwise plastic packaging bag may suffocate children to death When carrying in Outdoor Unit be sure to support it at four points Carrying in and lifting with 3 point support may make Outdoor Unit unstable resulting in a fall Use 2 belts of at least 8 m long Place...

Page 20: ...ts should have minimum height of 200mm Anchor bolts must be inserted at least 75mm At least 100mm At least 100mm At least 100mm At least 100mm At least 100mm At least 100mm Needed for outdoor units of 23kW or above Center of the Unit The outdoor unit should not be supported only by the corner supports Needed for outdoor units of 23kW or above Center of the Unit 730 760 65 65 Unit mm At least 65 At...

Page 21: ...unit in operation and the passages of the pipe and wiring when making the ground support Do not use tube or pipe for water outlet in the Base pan Use drainage instead for water outlet The tube or pipe may freeze and the water may not be drained WARNING Be sure to remove the Pallet Wood Support of the bottom side of the outdoor unit Base Pan before fixing the bolt It may cause the unstable state of...

Page 22: ...he flared work with figure below n If flare is noted to be defective cut off the flared section and do flaring work again Main cause of gas leakage is defect in flaring work Carry out correct flaring work in the following procedure Copper tube 90 Slanted Uneven Rough Pipe Reamer Point down Bar Copper pipe Clamp handle Red arrow mark Cone Yoke Handle Bar A Inclined Inside is shining without scratch...

Page 23: ...e hose for service port connection After tightening the cap check that no refrigerant leaks are present When loosening a flare nut always use two wrenches in combination When connecting the piping always use a spanner and torque wrench in combination to tighten the flare nut When connecting a flare nut coat the flare inner and outer faces with oil for R410A PVE and hand tighten the nut 3 to 4 turn...

Page 24: ...it is operated for a long time in high humid atmosphere dew point tempera ture more than 23 C water drops are liable to fall In this case add heat insulation material according to the following procedure Heat insulation material to be prepared EPDM Ethylene Propylene Diene Methylene over 120 C the heat resistance temperature Add the insulation over 10mm thickness at high humidity environment Indoo...

Page 25: ...he indoor unit and welding connection for the outdoor pipe and the branching parts Use hexagonal wrench to open close the valve WARNING Always careful not to leak the refrigerant during welding The refrigerant generates poisonous gas harmful to human body if combusted Do not perform welding in a closed space Be sure to close the cap of the service port to prevent gas leakage after the work CAUTION...

Page 26: ... 1 1 4 I D 28 58 1 1 8 I D 28 58 1 1 8 I D 28 58 1 1 8 I D 22 2 7 8 331 13 1 32 314 12 3 8 O D 19 05 3 4 I D 19 05 3 4 I D 15 88 5 8 I D 15 88 5 8 I D 15 88 5 8 I D 22 2 7 8 I D 12 7 1 2 I D 12 7 1 2 I D 9 52 3 8 70 2 3 4 83 3 9 32 O D 19 05 3 4 O D 19 05 3 4 I D 15 88 5 8 I D 22 2 7 8 I D 12 7 1 2 334 13 5 32 281 11 1 16 83 3 9 32 I D 34 9 1 3 8 O D 34 9 1 3 8 125 4 29 32 406 16 353 13 29 32 111 ...

Page 27: ...id pipe High pressure Gas pipe CAUTION Whenever connecting the indoor units with the HR unit install the indoor units in numerical order from No 1 Ex In case of installing 3 indoor units No 1 2 3 O No 1 2 4 X No 1 3 4 X No 2 3 4 X Installation procedure for HR unit Six sided Nut M10 or M8 Hanger metal Hanger metal Hanger metal Flat washer Flat washer Flat washer M10 Hanging bolt Hanging bolt Hangi...

Page 28: ... Ø9 52 Brazing Type 1 2 3 4 Remove caps on The brazing part Liquid pipe Low pressure gas pipe High pressure gas pipe Joint Method of HR Unit Big Duct URNU76GB8 URNU96GB8 Joint Method is required when B5 B8 chassis is installed In Joint Method two neighboring outlets of one HR unit are linked by Y branch pipe and connected to one indoor unit 1st HR Unit 2nd HR Unit 1 2 3 4 B8 96k 28k BG 1 2 3 4 B8 ...

Page 29: ...apacity of the indoor unit up to 14 5kW 48kBtu h for max installation The maximum total capacity of indoor units connected to a PRHR041 HR unit is 58kW 192kBtu h The maximum number of indoor units connected to a PRHR041 HR unit are 32 indoor units The Maximum indoor units per a branch pipe of HR unit are 8 indoor units There is not operate Auto changeover Mode override function in the zoning group...

Page 30: ...pipe Indoor unit reducer HR unit reducer PRHR021 OD22 2 Ø19 05 Ø15 88 OD15 88 Ø12 7 Ø6 35 OD9 52 Ø6 35 OD9 52 OD19 05 Ø15 88 Ø12 7 OD22 2 Ø19 05 Ø15 88 OD15 88 Ø12 7 PRHR031 PRHR041 OD19 05 Ø15 88 OD28 58 Ø22 2 Ø19 05 OD12 7 Ø9 52 OD15 88 Ø12 7 OD15 88 Ø12 7 Ø9 52 Unit mm Refrigerant piping installation ...

Page 31: ...nt Pipe Regulator Nitrogen Nitrogen Direction Taping Valve Removal Area for common pipe bottom side connections Removal Area for Liquid Gas pipe bottom side connections 1 Open the front panel 2 Remove Brackets 3 Fix with only nut and washer as shown in the figure Brackets for Transportation Washer Nut Pipe connections between indoor and outdoor unit Preparation Work CAUTION Do not give damage to t...

Page 32: ...xtract remaining refrigerant or air inside using the service port 3 Remove the leakage prevention cap n Method of drawing out pipes on the front side Proceed with the pipe work as shown in the below figure for front side pipe drawing out Liquid pipe Low Pressure Gas pipe High Pressure Gas pipe Service Port Leakage Prevention Cap Pipe Drawing Out during Single Series connection Liquid pipe Low Pres...

Page 33: ...al of Base pan Liquid pipe Low Pressure Gas pipes n Method of drawing out pipes on the bottom side Drawing out common pipe through side panel n Figure of Sides when drawing out through bottom pipe Drawing out common pipe through bottom pipe i Single Series outdoor units Draw out High Pressure Gas pipe through bottom ii Single Series outdoor units Draw out High Pressure Gas pipe through side panel ...

Page 34: ...oor units ARCNB21 Ⓖ Header Ⓗ HR Unit A1 H1 D 1 2 D D D 3 4 E1 E2 A F3 C1 B C2 C3 B1 B2 A2 A3 a b c d e g j k x l m n sealing f i H h a b F2 F1 E H2 H4 G H3 Master Slave 1 Slave 2 Case 1 a Maximum height is 15m if you install with Y branch Case 2 b Maximum height is 5m in serial connection of HR units ODU Capacity Master Slave1 Slave 2 D 5 D 6 D 7 D 8 D 10 D 9 D 11 D 12 Refrigerant Pipe Connection ...

Page 35: ...pe length after 1st branch B C3 k 40m 131ft 90m 295ft Difference in height Outdoor Unit Indoor Unit H 110m 361ft Difference in height Indoor Unit Indoor Unit h 15m 49ft Difference in height Outdoor Unit Outdoor Unit h1 5m 16ft Difference in height HR Unit HR Unit a 15m 49ft b 5m 16ft L l H h h1 a b Assume equivalent pipe length of Y branch to be 1 64ft that of header to be 3 3ft calculation purpos...

Page 36: ...e f g i j k l m n 1 000m 3 280ft 3 Length of pipe from each indoor unit to the closest HR Unit a b c d e e g i j k l m n 40m 131ft 4 Length of pipe from outdoor unit to the farthest indoor unit D12 B C3 K Length of pipe outdoor unit to the closest indoor unit D1 C1 a 40m 131ft h If available on site it use this size Otherwise it can t be increased Upward outdoor unit total capacity Pipe diameter P...

Page 37: ...2 3 4 Pattern 4 12k 12k 12k 12k 1 2 3 4 HR1 HR1 48k 24k 24k 24k 12k 12k 48k A B 1 2 HR2 48k 48k 3 4 Pattern 6 The maximum total capacity of indoor units is 58kW 192 kBtu h The maximum total capacity of a branch pipe of HR unit is 14 5kW 48 kBtu h Impossible installation Head branch pipe HR unit Impossible installation HR unit Head branch pipe Y and Head branch pipe HR1 B B A A A A 1 2 3 4 5 Refrig...

Page 38: ...oor Unit Indoor Unit Y Branch pipe Low pressure Gas pipe High pressure Gas pipe Liquid pipe Gas pipe Liquid pipe Head Branch pipe Indoor Unit Pattern 7 Pattern 8 HR1 A A A 48k 48k 1 2 Serial connection of HR units Capacity sum of indoor units 192 kBtu h Maximum indoor units per a branch are 8 indoor units HR2 48k 48k 3 4 HR3 48k 48k 5 6 HR1 48k 48k 1 2 HR2 B 12k 12k 12k 12k 3 4 5 6 24k 7 24k 8 Ref...

Page 39: ... Indoor Unit Indoor Unit Indoor Unit Indoor Unit Indoor Unit Indoor Unit Indoor Unit Indoor Unit Indoor Unit Indoor Unit Indoor Unit Indoor Unit 1 under 40m Y branch Keep the sum of indoor capacity under 56 4kW 192 kBtu h 1 Keep the 40m distance from the first branch to the farthest indoor Refrigerant piping system ...

Page 40: ... Do not let the connection pipe from branch to branch exceed the main pipe diameter chosen by outdoor unit model name EX Where connecting the indoor units to the 22 HP 61 5 kW outdoor unit to 120 of its system capacity 73 8 kW and branching 7k 2 1kW indoor unit at the 1st branch Main pipe diameter 22 HP outdoor unit Ø28 58 Low pressure gas pipe Ø15 88 Liquid pipe Ø22 2 High pressure gas pipe Pipe ...

Page 41: ...tween the outdoor units becomes more than 2m apply Oil Traps between the gas pipes If the outdoor unit is located lower than the main pipe apply Oil Trap If the main pipe is higher than the outdoor units oil is accumulated in the outdoor unit If there are differences in the height between the outdoor units oil is accumulated in the lower outdoor unit Oil Trap u Pipe Connection Method Precautions f...

Page 42: ...Oil Trap as shown below when the length of the pipe between the outdoor units is more than 2m Otherwise the unit may not operate properly Toward indoor unit Toward indoor unit Pipe inclination 2 or more Toward indoor unit Toward indoor unit Toward indoor unit Toward indoor unit Example 1 Example 2 Example 3 Example 1 Example 2 Toward indoor unit Toward indoor unit 2m 2m 2m 0 2m Oil Trap Refrigeran...

Page 43: ...ave outdoor unit should be avoided Otherwise the unit may not operate properly Toward indoor unit Toward indoor unit Example 1 Example 2 Example 3 h h h 0 2m Toward indoor unit Toward indoor unit Toward indoor unit Oil Trap The level difference between two outdoor units h is allowed up to 5m Refrigerant piping system ...

Page 44: ... 5k 7k 9k 12k 15k 18k 24k 28k 36k 42k 48k 76k 96k Type 1 6 2 2 2 8 3 6 4 5 5 6 7 1 8 2 10 6 12 3 14 1 22 4 28 0 Ceiling Concealed Duct Low Static 0 17 0 17 0 17 0 17 0 37 0 37 Ceiling Concealed Duct High Static 0 26 0 26 0 26 0 26 0 26 0 26 0 44 0 44 0 44 0 62 1 00 1 00 Wall Mounted 0 24 0 24 0 24 0 24 0 28 0 28 1Way Ceiling Cassette 0 20 0 20 0 20 0 29 0 29 2Way Ceiling Cassette 0 16 0 16 4Way Ce...

Page 45: ...g work Prepare for earthquake and thermal stress Total amount of refrigerant in the system 0 44 kg m3 Volume of the room at which Indoor Unit of the least capacity is installed Add exact amount of refrigerant calculated by the installation pipe diameter length and the indoor combination If the refrigerant amount is not exact it may not operate properly If additionally bottled refrigerant amount is...

Page 46: ... due to an abnormality like excessive or insufficient refrigerant At such a time always properly charge the unit When servicing always check the notes concerning both the piping length and the amount of additional refrigerant 10 Never use refrigerant to perform an air purge Always evacuate by using a vacuum pump 11 Always insulate the piping properly Insufficient insulation will result in a declin...

Page 47: ...onditioner to another site be sure to make recharge refrigerant after perfect evacuation If a different refrigerant or air is mixed with the original refrigerant the refrigerant cycle may malfunction and the unit may be damaged After selecting diameter of the refrigerant pipe to suit total capacity of the indoor unit connected after branching use an appropriate branch pipe set according to the pip...

Page 48: ...int mounting configuration If the diameter of the refrigerant piping selected by the procedures described is different from the size of the joint the connecting section should be cut with a pipe cutter Branch pipe should be insulated with the insulator in each kit When the number of pipes to be connected is smaller than the number of header branches in stall a cap to the unconnected branches The i...

Page 49: ...nsulator in each kit Joints between branch and pipe should be sealed with the tape included in each kit Any cap pipe should be insulated using the insulator provided with each kit and then taped as described above B Pinched pipe Horizontal plane View from point B in the direction of the arrow Insulate the header using the insulation material attached to the branch pipe kit as shown in the figure I...

Page 50: ...Be sure to give insulation work to refrigerant piping by covering liquid pipe and gas pipe separately with enough thickness heat resistant polyethylene so that no gap is observed in the joint between indoor unit and insulating material and insulating materials themselves When insulation work is insufficient there is a possibility of con densation drip etc Pay special attention to insulation work t...

Page 51: ... D I 4 5 2 D I I D25 4 I D19 05 I D19 05 I D22 2 I D25 4 O D19 05 I D15 88 I D12 7 110 O D12 7 I D9 52 70 O D19 05 I D15 88 70 471 517 125 120 130 I D19 05 I D15 88 O D22 2 I D12 7 I D19 05 I D22 2 I D41 3 I D38 1 I D41 3 O D34 9 I D34 9 I D34 9 I D22 2 I D28 58 I D28 58 I D38 1 I D41 3 I D34 9 I D38 1 O D38 1 O D15 88 O D28 58 90 70 120 2 3 3 2 2 3 3 471 517 125 120 130 I D19 05 I D15 88 O D22 2 ...

Page 52: ...4 120 120 150 360 ID9 52 ID9 52 ID6 35 ID6 35 ID9 52 ID12 7 120 150 120 ID15 88 ID12 7 ID15 88 ID12 7 ID15 88 ID19 05 120 150 120 ID6 35 ID9 52 ID9 52 ID12 7 120 150 160 580 ID19 05 ID15 88 ID15 88 ID12 7 ID22 2 ID28 58 ID25 4 120 150 700 120 ID6 35 ID9 52 ID9 52 ID6 35 ID9 52 ID12 7 120 150 160 760 ID19 05 ID15 88 ID15 88 ID12 7 ID22 2 ID28 58 ID25 4 120 150 120 720 ID6 35 ID9 52 ID9 52 ID6 35 ID...

Page 53: ...dged good if the pressure has not be reduced after leaving for about one day after completion of nitrogen gas pressurization Note If the ambient temperature differs between the time when pressure is applied and when the pressure drop is checked apply the following correction factor There is a pressure change of approximately 0 1 kg cm2 0 01 MPa for each 1 C of temperature difference Correction Tem...

Page 54: ...e it again with the vacuum pump for 1hr to 100 7kPa vacuum drying If the system cannot be evacuated to 100 7kPa within 2 hrs repeat the steps of vacuum break and its drying Finally check if the vacuum gauge does not rise or not after maintaining the system in vacuum for 1 hr WARNING When installing and moving the air conditioner to another site recharge after perfect evacuation If a different refr...

Page 55: ...tch on 10 12 13 Vacuum mode setting ODU valve open Main EEV SC EEV open IDU EEV open HR unit valve open SC EEV open ODU power reset Press the black button Main PCB 5 sec Vacuum mode setting method Vacuum mode cancellation method Master unit PCB DIP switch off Switch off 10 12 13 Power reset Vacuum mode cancellation CAUTION ODU operation stops during vacuum mode Compressor can t operate Refrigerant...

Page 56: ...tion for technical standard related to electrical equipment wiring regulations and guidance of each electric power company 2 Install the Outdoor Unit transmission line away from the power source wiring so that it is not affected by electric noise from the power source Do not run it through the same conduit 3 Be sure to provide designated grounding work to Outdoor Unit 4 Give some allowance to wiri...

Page 57: ...fore never install a phase leading capacitor Make sure that the power unbalance ratio is not greater than 2 If it is greater the units lifespan will be reduced Electrical Wiring When none are available follow the instructions below Do not connect wiring of different thicknesses to the power terminal block Slack in the power wiring may cause abnormal heat When connecting wiring which is the same th...

Page 58: ...ication line between outdoor unit and indoor units with shielded wire connect the shield ground to the earth screw Front Panel UX3 UX2 Fan PCB Noise filter Bridge diode Magnet switch Inverter PCB Take care of the phase sequence of 3 phase 3 wire power system Take care of the phase sequence of 3 phase 3 wire power system Reactor Fan PCB Noise filter Bridge diode Magnet switch Inverter PCB Transform...

Page 59: ...rect proportion to the additional length of line involved 2 If the power supply waveform continues to exhibit some distortion the recommended spacing in the table should be increased If the lines are laid inside conduits then the following point must also be taken into account when grouping various lines together for introduction into the conduits Power lines including power supply to air conditio...

Page 60: ...or electrical outlet to disconnect each of indoor unit separately from the power supply WARNING Follow ordinance of your governmental organization for technical standard related to electrical equipment wiring reg ulations and guidance of each electric power company Make sure to use specified wires for connections so that no external force is imparted to terminal connections If con nections are not...

Page 61: ...the power goes on and off while the product is operating attach a reversed phase protection circuit locally Running the product in reversed phase may break the compressor and other parts R L1 S L2 T L3 Switch ELCB Communication Line 2 Wires Cable Power Line 3 Wires Cable Communication Line 3 Wires Cable Power Line 2 Wires Cable Power Line ELCB 2 Wires Cable Power Line 2 Wires Cable Power Line 2 Wi...

Page 62: ...ower 2 Wires 2 Wires C r Line 2 Wires Cab Master Sla Power L Wire Power supply 3 Phase 3 Wires 60Hz 208 230V Power supply 1 Phase 60Hz 208 230V R L1 S L2 T L3 Switch ELCB ELCB Switch Communication Line 2 Wires Cable Power Line 3 Wires Cable Communication Line 3 Wires Cable Power Line 2 Wires Cable Power Line 2 Wires Cable Power Line 2 Wires Cable Power Line 2 Wires Cable Master Indoor Units Power ...

Page 63: ...ing electrical shock accident during current leakage Communication disorder by noise effect and motor current leakage without connection to pipe Don t install an individual switch or electrical outlet to disconnect each of indoor unit separately from the power supply Install the main switch that can interrupt all the power sources in an integrated manner because this system consists of the equipme...

Page 64: ...s Cable Power 2 Wires Master Slav Power Line 2 Wires Ca R L1 S L2 T L3 Switch ELCB ELCB Switch Communication Line 2 Wires Cable Power Line 3 Wires Cable Communication Line 3 Wires Cable Power Line 2 Wires Cable Power Line 2 Wires Cable Power Line 2 Wires Cable Power Line 2 Wires Cable Master Indoor Units Power supply 3 Phase 3 Wires 60Hz 208 230V Power supply 1 Phase 60Hz 208 230V Power supply 3 P...

Page 65: ...es are required for preventing electrical shock accident during current leakage Communication disorder by noise effect and motor current leakage without connection to pipe Don t install an individual switch or electrical outlet to disconnect each of indoor unit separately from the power supply Install the main switch that can interrupt all the power sources in an integrated manner because this sys...

Page 66: ...n and off while the product is operating attach a reversed phase protection circuit locally Running the product in reversed phase may break the compressor and other parts R L1 S L2 T L3 Switch ELCB Communication Line 2 Wires Cable Power Line 3 Wires Cable Communication Line 3 Wires Cable Power Line 2 Wires Cable Power Line ELCB 2 Wires Cable Power Line 2 Wires Cable Power Line 2 Wires Cable Power ...

Page 67: ...er option Pull Box Installer option HR unit Power supply 3 Phase 3 Wires 60Hz 460V Power supply 1 Phase 60Hz 208 230V R L1 S L2 T L3 Switch ELCB ELCB Switch Communication Line 2 Wires Cable Power Line 3 Wires Cable Communication Line 3 Wires Cable Power Line 2 Wires Cable Power Line 2 Wires Cable Power Line 2 Wires Cable Power Line 2 Wires Cable Master Indoor Units Power supply 3 Phase 3 Wires 60H...

Page 68: ...ctrical shock accident during current leakage Communication disorder by noise effect and motor current leakage without connection to pipe Don t install an individual switch or electrical outlet to disconnect each of indoor unit separately from the power supply Install the main switch that can interrupt all the power sources in an integrated manner because this system consists of the equipment util...

Page 69: ... Box Installer option HR unit R L1 S L2 T L3 Switch ELCB ELCB Switch Communication Line 2 Wires Cable Power Line 3 Wires Cable Communication Line 3 Wires Cable Power Line 2 Wires Cable Power Line 2 Wires Cable Power Line 2 Wires Cable Power Line 2 Wires Cable Master Indoor Units Power supply 3 Phase 3 Wires 60Hz 460V Power supply 1 Phase 60Hz 208 230V Power supply 3 Phase 3 Wires 60Hz 460V Power s...

Page 70: ...required for preventing electrical shock accident during current leakage Communication disorder by noise effect and motor current leakage without connection to pipe Don t install an individual switch or electrical outlet to disconnect each of indoor unit separately from the power supply Install the main switch that can interrupt all the power sources in an integrated manner because this system con...

Page 71: ... Box Installer option Pull Box Installer option HR unit R S T Switch Fuse L L1 N L2 Communication Line 2 Wires Cable Power Line 3 Wires Cable Communication Line 3 Wires Cable Power Line 2 Wires Cable Power Line 2 Wires Cable Power Line 2 Wires Cable Power Line 2 Wires Cable Power Line 2 Wires Cable Master Indoor Units Power supply 3 Phase 3 Wires 60Hz 460V Power supply 1 Phase 60Hz 220V Main Switc...

Page 72: ...door Unit ground Lines are required for preventing electrical shock accident during current leakage Communication disorder by noise effect and motor current leakage without connection to pipe Don t install an individual switch or electrical outlet to disconnect each of indoor unit separately from the power supply Install the main switch that can interrupt all the power sources in an integrated man...

Page 73: ...Connection of communication cable must be installed like below figure between indoor unit to outdoor unit STAR type Abnormal operation can be caused by communication defect when connection of communication cable is installed like below figure STAR type HR unit HR unit Electrical Wiring ...

Page 74: ...ine Power Ground lines Over 50mm Gap Main Power Terminal Block Insulation sleeves attachments Main Power Terminal Block Main Power Terminal Block Main Power Terminal Block Insulation sleeves attachments Insulation sleeves attachments Insulation sleeves attachments Front Side 1 Main Power Main Power Terminal Block Terminal Block Main Power Terminal Block Insulation sleeves attachments Fix firmly no...

Page 75: ...ower Terminal Block Main Power Terminal Block Main Power Terminal Block Insulation sleeves attachments Insulation sleeves attachments Insulation sleeves attachments Main Power Terminal Block Insulation sleeves attachments Front Side 1 r s t Insulation sleeves attachments Ground Cable Fix firmly not to be displaced Main Power Terminal Block Main Power Terminal Block Main Power Terminal Block ODU OD...

Page 76: ...76 Outdoor Unit Electrical Wiring 7 Segment SW02B AUTO ADDRESS SW03B DATA CONFIRM DIP SW01 DIP SW02 DIP Switch Setting u Location of setting Switch n SUB PCB ...

Page 77: ...setting condition For example represents R410A 30HP Master model code Slave1 model code Slave2 model code total capacity 2 25 190 1 255 Master model code 1 255 Slave1 model code 1 255 Slave2 model code 1 255 Slave3 model code 8 54HP 220V HP number sum of master capacity and slave capacity 8 80HP 460V No display cooling only 2 heat pump heat recovery 25 normal 190 Model Type ARUB DT3 170 Model Type...

Page 78: ...ⅹ ⅹ ⅹ ⅹ ⅹ ⅹ ⅹ ⅹ Function ODU setting Inverter backup Const 1 backup Const 2 backup Unità backup Night low noise operation cooling heating Night low noise operation cooling only Snow removal function Forced defrost Snow removal Forced defrost Non operation indoor unità EEV adjustment Indoor unità target subcooling overheating adjustment Operation indoor unità EEV adjustment Real time sensor monitor...

Page 79: ...alve LED green 1 heating valve LED red 4 valve housing Switch No 1 On Switch No 1 Off ON S W Selection No 1 Method for addressing valves of an HR unit Auto Manual No 2 Model of HR unit No 3 Model of HR unit No 4 Model of HR unit No 5 Valve group setting No 6 Valve group setting No 7 Use only in factory production preset to OFF Zoning setting ON No 8 Use only in factory production preset to OFF SW0...

Page 80: ...nt to use a PRHR041 for 3 branches HR unit after closing the 4th pipes set the dip switch for 3 branches HR unit If you want to use a PRHR041 for 2 branches HR unit after closing the 3rd and 4th pipes set the dip switch for 2 branches HR unit The unused port must be closed with a copper cap not with a plastic cap For 2 branches PRHR021 For 3 branches PRHR031 For 4 branches PRHR041 Initial Setting ...

Page 81: ...3 4 I D19 05 3 4 I D15 88 5 8 I D12 7 1 2 I D12 7 1 2 I D12 7 1 2 I D12 7 1 2 I D12 7 1 2 I D12 7 1 2 I D12 7 1 2 74 2 29 32 70 2 3 4 70 2 3 4 I D15 88 5 8 I D15 88 5 8 I D25 4 1 I D25 4 1 I D25 4 1 O D25 4 1 80 3 5 32 110 4 11 32 110 4 11 32 332 13 1 16 321 12 5 8 83 3 9 32 1 2 3 3 I D19 05 3 4 I D19 05 3 4 O D19 05 3 4 O D19 05 3 4 2 3 2 3 1 2 O D15 88 5 8 444 17 15 32 421 16 9 16 96 3 25 32 I D...

Page 82: ...trol address of the connected indoor unit SW01M selection of the valve to address SW03M increase in the digit of 10 of valve address SW04M increase in the last digit of valve address Prerequisite for manual valve addressing central control address of each indoor unit must be preset dif ferently at its wired remote control 1 2 3 4 1 2 3 4 1 2 3 4 A B A B A B S W No Setup No 1 Manual addressing of v...

Page 83: ...s SW05M Rotary S W Prerequisite for manual valve addressing central control address of each indoor unit must be preset differently at its wired remote control S W No Setup No 1 Manual addressing of valve 1 No 2 Manual addressing of valve 2 No 3 Manual addressing of valve 3 No 4 Manual addressing of valve 4 SW03M Increase in the digit of 10 of valve address SW04M Increase in the last digit of valve...

Page 84: ...detection Execute in case of Auto pipe detection failure Turn off all the indoor units before auto addressing If indoor unit is operated auto addressing would not be completed 2 Auto pipe detection 1 Turn No 1 of SW02M of HR unit PCB off 2 Confirm that the setting of No 2 3 of SW02M corresponds with the number of indoor units 3 Reset the power of HR unit PCB 4 Turn on the No 17 DIP S W of main uni...

Page 85: ...f an error occurred it means that manual pipe setting is not completed 7 During 5 minutes after pipe detection is completed do not turn off the main unit PCB to save the re sult of pipe detection automatically WARNING 1 Execute auto addressing and auto pipe detection again whenever the indoor PCB and HR unit PCB is replaced Operation error occurs unless power is applied to the indoor and HR units ...

Page 86: ... RED Button for 10 15sec SW02B 7 segment LED 88 Don t press RED Button H P SW0B C O SW02V 7 segment LED OK YES NO Check the connections of transmission line 88 The number of the indoor units connected is displayed at 7 SEG of the outdoor unit main PCB after 2 7 minutes The number of HR units connected is displayed at 7 SEG of the outdoor unit main PCB Auto addressing setting end Numbers of indoor ...

Page 87: ...W03B of the outdoor unit main PCB for 5 seconds 88 is displayed on 7 SEG of the outdoor unit main PCB Outdoor unit is operated for 5 60 minues The number of indoor units detected is displayed for 30 seconds on the outdoor unit PCB after outdoor unit stopped Display error on outdoor unit PCB Display error on HR unit PCB Outdoor unit PCB HR HR unit number Valve number HR unit 200 Check the HR unit a...

Page 88: ...e valve Reset the power of outdoor unit PCB Wait for about 5 minutes The number of the indoor units installed is displayed Ex HR The number of the indoor Check the central control address of indoor and HR unit Make sure that reset the outdoor unit power when changing the central control unit Are the number of indoor units connected to the outdoor unit and displayed one equal Execute in case of Aut...

Page 89: ...d Contents Operation Turn dip S W No 1 on to address valve 1 Display Existing value saved in EEPROM is displayed in 7 SEG Operation Set the digit of 10 to the number in Group High data of the wired remote control connected to the corresponding in door unit to the valve 1 by pressing left tack S W Display Digit increasing with the times of pressing tack S W is displayed in left 7 SEG Operation Set ...

Page 90: ... piping 1 sets from rotary switch 0 1 2 and 3 4 5 with FF set Prerequisite for manual valve addressing central control address of each indoor unit must be preset differ ently at its wired remote control Above setup must be done for all HR unit valves The valve that is not connected with any indoor unit should be addressed with any other number than used address numbers of the valves connected with...

Page 91: ... Address Method of checking the pipe detection result at outdoor unit Operation more than 2 dip switches turned on Display Er is displayed in 7 SEG No 1 Display and Setup Setup and Contents 7 SEG SW01M HR Unit PCB ROTARY 01 ROTARY 02 0 0 1 Wait for 5 minutes after Pipe detection is completed 2 Turn on the No 10 14 16 DIP S W of SUB PCB at master unit 3 Check the data on 7 segment switching rotary ...

Page 92: ...play the Master IDU No of the HR unit on 7segment Default display is 00 on 7segment 5 Press the black button The IDU No increase every 1 second in the zoning 6 Set the Master IDU Press the red button during 1 5seconds stop twinkling No of Indoor unit No of HR unit branch No of HR unit CAUTION Waiting for 80seconds after power on The zoning information and Master IDU information remove from EEPROM ...

Page 93: ...purpose B D A C B A SODU B SODU A IDU IDU INT B INTA Outdoor Units Terminal block on the main PCB Group recognizing the simple central controller No 0 group 00 0F No 1 group 10 1F No 2 group 20 2F No 3 group 30 3F No 4 group 40 4F No 5 group 50 5F No 6 group 60 6F No 7 group 70 7F No 8 group 80 8F No 9 group 90 9F No A group A0 AF No B group B0 BF No C group C0 CF No D group D0 DF No E group E0 EF...

Page 94: ...or messages in the display of indoor units or remote controls and LED in outdoor units Checks Before Test Run CAUTION when cutting main power of the Multi V Always apply main power of the outdoor unit during use of product cooling season heating season Always apply power 6 hours in advance to heat the crank case heater where performing test run after installation of product It may result in burnin...

Page 95: ...sure error or discharge temper ature error Motor insulation broken Strainer clogged Oil leakage Motor insulation failure R S T misconnection Motor failure bad ventilation around outdoor heat exchanger Bad connector contact Coil failure EEV clogged EEV clogged Check resistance between terminals and chassis Change strainer Check oil amount after opening oil port Check resistance between terminals an...

Page 96: ...ure sensor Note 1 2 outdoor pressure sensors This function is used along with Refrigerant Auto recharge and Quantity auto decide function It is used for judging sensor abnormality Note2 DIP Switch Settings Warning Please reset SUB PCB before starting this function Setting1 Refrigerant Auto Recharge Setting2 Refrigerant Quantity Auto Decide Setting3 Integrated Test Run cooling Setting4 Integrated T...

Page 97: ... Auto decide Cooling Heating Heat Recovery Start Inspection of each Function Note 1 Outdoor temperature number is different according to each chassis Note 2 Please check the sensor that is found abnormal Note 3 Each step is displayed on the Main PCB LED Note 4 Please refer to the sensor error descriptions on the next page WARNING 1 Please confirm if auto addressing function was executed Check the ...

Page 98: ...umber of errors is displayed continuously and repeatedly No Classification 1 Pipe In Temperature 2 Pipe Out Temperature 3 Indoor Air Temperature Table 2 IDU Sensor Error Code Table 1 ODU Sensor Error Code No Sensor type 1 2 5 6 7 8 9 10 11 12 14 Displaying error content n Indoor unit error display 1 1st and 2nd number represents indoor unit number 2 Last number represents sensor 1 Pipe inlet tempe...

Page 99: ...button for 2 sec after turning off all of dip S W Yes No IDU runs with cooling mode In designated order Press the black button IDU and ODU are turned off when Auto Charging is completed Close the valve Press the black button 1 Refrigerant Auto Charging Process Main PCB SW01V Completed 2 DIP Switch Settings Warning Please reset SUB PCB before starting this function Note 1 After installing the refri...

Page 100: ... 1 Guaranteed temperature range Error will occur if temperature is out of range IDU 20 C 32 C ODU 0 C 43 C 2 For refrigerant charging use designated device only Capillary Assem Set 3 Set the IDU wired remote controller temperature sensing mode as IDU 4 Be careful that IDU should not be thermo off n Error contents about auto refrigerant charging function 1 Temperature Range Error In case that IDU o...

Page 101: ...as Liquid pipe direct connection Based on Refrigerant Quantity NO NO YES YES Display Error Display Error Press black button for 2 seconds Press black button for 2 seconds Data Reset and Wait End DIP Switch Settings Warning Please reset SUB PCB before starting this function Note 1 In case air temperature is out of guaranteed temperature refrigerant checking function may end without performing refri...

Page 102: ... will be OFF 2 Excess of Refrigerant 619 After remove the 20 of calculated total refrigerant recharge the refrigerant by using Refrigerant Auto Charging Function 3 Scarcity of Refrigerant 629 Charge the refrigerant by using Refrigerant Auto Charging Function 4 Impossible to Judge 639 IF the system is not in order check the other problem except refrigerant CAUTION 1 Guaranteed Temperature range Err...

Page 103: ...mode Saved data can check using LGMV Note 1 Judge the normal condition refer to report of Test Running Thermo off IDU judge Start Temp Condition 1 IDU operation 1 IDU operation data 10min Refrigerant amount judge during all IDU operation data on Test Runing 15min Error Display Error Display Press the black button for 2 sec Yes No Note 1 End Press the black button for 2 sec after turning off all of...

Page 104: ...n Press the black button for 2 sec This function is checking process for normal operation of parts and system On operating system All processes carry out included refrigerant amount judge logic and check normal condition of parts on heating mode This function check only normal condition of parts on heating mode Saved data can check using LGMV Note 1 Judge the normal condition refer to report of Te...

Page 105: ... system will be OFF 2 Excess of Refrigerant 619 After remove the 20 of calculated total refrigerant recharge the refrigerant by using Refrigerant Auto Charging Function 3 Scarcity of Refrigerant 629 Charge the refrigerant by using Refrigerant Auto Charging Function 4 Impossible to Judge 639 IF the system is not in order check the other problem except refrigerant CAUTION 1 Guaranteed Temperature ra...

Page 106: ...oling capacity may go down Reset the power Setting the Fan Max RPM Setting Complete Set the DIP S W Note 1 DIP Switch Settings Warning Please reset SUB PCB before starting this function Step Black Button Red Button 1 1 time 1 time 2 2 time 1 time 3 3 time 1 time 4 4 time 1 time 5 5 time 1 time 6 6 time 1 time 7 7 time 1 time 8 8 time 1 time 9 9 time 1 time Capacity Judgment Time hr Operation Time ...

Page 107: ...Set the DIP S W ON Vacuum mode setting ODU V V OPEN Main EEV SC EEV OPEN IDU EEV OPEN HR unit SC EEV sol valve Open Press the black button Main PCB 5 sec Vacuum mode setting method Set the DIP S W OFF Power reset Vacuum mode cancellation ODU power reset CAUTION ODU operation stops during vacuum mode Compressor can t operate DIP Switch Settings Warning Please reset SUB PCB before starting this func...

Page 108: ... static pressure mode Set DIP S W Static pressure compensation mode Power Reset Set the DIP S W ON Static pressure compensation mode setting method Static pressure compensation mode cancellation method DIP switch OFF Power Reset Static pressure compensation mode is set Static pressure compensation mode is cancelled DIP Switch Settings Warning Please reset SUB PCB before starting this function Test...

Page 109: ...ensor of indoor unit Outlet pipe temperature sensor of indoor unit is open or short 0 9 Indoor EEPROM Error In case when the serial number marked on EEPROM of Indoor unit is 0 or FFFFFF 1 0 Poor fan motor operation Disconnecting the fan motor connector Failure of indoor fan motor lock 1 7 Inlet Air temperature sensor of FAU Air temperature sensor of indoor unit is open or short 2 1 1 Master Outdoo...

Page 110: ...oor Unit DC Volt age Over Charging System is turned off by Slave2 Outdoor Unit DC Volt age Over Charging System is turned off by Slave3 Outdoor Unit DC Volt age Over Charging Master Outdoor Unit Inverter Compressor Fault OR Drive Fault Slave1 Outdoor Unit Inverter Compressor Fault OR Drive Fault Slave2 Outdoor Unit Inverter Compressor Fault OR Drive Fault Slave3 Outdoor Unit Inverter Compressor Fa...

Page 111: ...ff by Slave2 Outdoor Unit Constant Speed Com pressor2 High Discharge Temperature System is turned off by Slave3 Outdoor Unit Constant Speed Com pressor2 High Discharge Temperature System is turned off by Master Outdoor Unit Inverter Compressor High Discharge Temperature System is turned off by Slave1 Outdoor Unit Inverter Compressor High Discharge Temperature System is turned off by Slave2 Outdoor...

Page 112: ... or short Slave1 Outdoor Unit High Pressure Sensor open or short Slave2 Outdoor Unit High Pressure Sensor open or short Slave3 Outdoor Unit High Pressure Sensor open or short Master Outdoor Unit Air Temperature Sensor open or short Slave1 Outdoor Unit Air Temperature Sensor open or short Slave2 Outdoor Unit Air Temperature Sensor open or short Slave3 Outdoor Unit Air Temperature Sensor open or sho...

Page 113: ...emperature Sensor open or short Slave3 Outdoor Unit Constant Speed Compressor 2 Discharge Temperature Sensor open or short Master Outdoor Unit Heat Ex changer Temperature Sensor Front side Fault Slave1 Outdoor Unit Heat Ex changer Temperature Sensor Front side Fault Slave2 Outdoor Unit Heat Ex changer Temperature Sensor Front side Fault Slave3 Outdoor Unit Heat Ex changer Temperature Sensor Front ...

Page 114: ...it Controller part cannot receive in verter control signals usually happens after on board ing Slave3 Outdoor Unit Controller part cannot receive in verter control signals usually happens after on board ing In the case of installing smaller outdoor unit as master unit Master Outdoor Unit Faulty IPM Temperature Sensor Slave1 Outdoor Unit Faulty IPM Temperature Sensor Slave2 Outdoor Unit Faulty IPM ...

Page 115: ...f Master Outdoor Unit Constant2 CT Sensor Error of Slave1 Outdoor Unit Constant2 CT Sensor Error of Slave2 Outdoor Unit Constant2 CT Sensor Error of Slave3 Outdoor Unit Instant Over Current Peak of Master Outdoor Unit PFC Instant Over Current Peak of Slave1 Outdoor Unit PFC Instant Over Current Peak of Slave2 Outdoor Unit PFC Instant Over Current Peak of Slave3 Outdoor Unit PFC Master Outdoor Unit...

Page 116: ... MICOM and EEPROM or omitting EEPROM Master Outdoor Unit Fan Over Current Error Slave1 Outdoor Unit Fan Over Current Error Slave2 Outdoor Unit Fan Over Current Error Slave3 Outdoor Unit Fan Over Current Error Master Outdoor Unit Fan Start Failure Error Slave1 Outdoor Unit Fan Start Failure Error Slave2 Outdoor Unit Fan Start Failure Error Slave3 Outdoor Unit Fan Start Failure Error Master Outdoor ...

Page 117: ...ster Outdoor Unit Fan DC Link Input Voltage is under 380V Slave1 Outdoor Unit Fan DC Link Input Voltage is under 380V Slave2 Outdoor Unit Fan DC Link Input Voltage is under 380V Slave3 Outdoor Uni Fan DC Link Input Voltage is under 380V Liquid pipe temperature sensor of Master Outdoor Unit is open or short Liquid pipe temperature sensor of slave1 Outdoor Unit is open or short Liquid pipe temperatu...

Page 118: ...or 1 2 1 1 5 3 4 1 2 1 5 1 3 4 1 2 1 5 3 3 4 1 2 1 5 4 3 4 Comp locking Check Valve leakage comp dielectric break down at Master Outdoor Unit Comp locking Check Valve leakage comp dielectric at Slave1 Outdoor Unit Comp locking Check Valve leakage comp dielectric at Slave2 Outdoor Unit Comp locking Check Valve leakage comp dielectric at Slave3 Outdoor Unit Master Outdoor Unit lower part temperature...

Page 119: ...ure Sensor open or short 2 Slave1 const 2 oil equalizing pipe Tem perature Sensor error Slave1 Outdoor Unit oil equalizing temperature Sensor open or short 3 Slave2 const 2 oil equalizing pipe Tem perature Sensor error Slave2 Outdoor Unit oil equalizing temperature Sensor open or short 4 Slave3 const 2 oil equalizing pipe Tem perature Sensor error Slave3 Outdoor Unit oil equalizing temperature Sen...

Page 120: ...ot allowed in the Heat Recovery model If you use Demand control Cooling or Heating capacity would be down in the synchronous operation h If you want to get more details refer to each installation Manuals New Function Applied item ODU Dry contact PQDSBDCVM0 Demand Control ODU Solution Accessory Night Low Noise Control Error Alarm Monitoring ...

Page 121: ...door unit 3 SW_Address1 Switch to set a lower address of the outdoor unit 4 SW_STEP Switch to select a control mode 5 CN_PWR DC Input terminal 6 ERROR Error display with relay contact 7 BUS A RS 485 Terminal 8 BUS B RS 485 Terminal 9 CN_CAPACITY Signal input terminal to control a capacity of outdoor unit 10 CN_SPEED CAP Signal input terminal for Analog Input Low noise operation 11 CN_OUT Outdoor u...

Page 122: ...nit 2 ODU Dry contact with Central controller With Single Outdoor unit With Series Outdoor units CN_OUT TTL Multi V WIRE ASSY 1 1EA BUS_B BUS_A Central Control Devices Multi V WIRE ASSY 1 1EA CN_OUT TTL New Function ...

Page 123: ... methods 1 Using Contact signal Without External power source With External power source Setting SW_STEP Input Signal 0 1 2 3 4 5 6 Contact signal D E Analog signal SW_STEP Using Contact signal Using Analog signal with DDC Module LG does not supply this section Field supply Notes Do not input the voltage signal in NON VOLT setting mode otherwise it will cause serious damage SW_VOLT2 SW_VOLT1 Input...

Page 124: ...5 4 3 2 1 1 1 Signal Input Step Performance output of the ODU Control Value Using Contact signal Rotary S W Volt Cooling Heating Step Control Step Control D 0 0 Not Control 0 Not Control 1 1 100 0 100 2 2 90 0 90 3 3 80 0 80 4 4 70 0 0 70 5 5 60 0 60 6 6 50 0 50 7 7 45 0 45 8 8 40 0 40 9 9 Comp OFF 0 Comp OFF 10 10 All OFF 0 All OFF Rotary S W Volt Cooling Heating Step Control Step Control E 0 9 C...

Page 125: ... 0 0 1 COMP OFF 3 0 0 0 No control 1 0 0 70 0 1 0 40 0 0 1 ALL OFF 4 0 0 0 No control 1 0 0 70 0 1 0 50 0 0 1 ALL OFF 5 0 0 0 No control 1 0 0 80 0 1 0 50 0 0 1 ALL OFF 6 0 0 0 No control 1 0 0 50 0 1 0 COMP OFF 0 0 1 ALL OFF Using Analog signal with DDC Module Non Control 100 90 80 70 60 50 45 40 0V 1V 2V 3V 4V 5V 6V 7V 8V 9V 10V 0 1 2 3 4 5 6 7 8 9 10 Comp OFF System OFF Signal Input Step Perfor...

Page 126: ...as provided Error Alarm monitoring function Notice for system fault information by buzzer or warning lamp Occurring fault is not only ODUs but also IDUs Setting Note AC Power 3A 250V DC Power 3A 30V ON L1 2 3 4 Connect with S W or Timer for Night Low Noise Control Notes Default State is L1 ON L2 ON Position Function ON L1 2 3 4 ON Master Mode OFF Slave Mode ON L1 2 3 4 ON Enable Low Noise Operatio...

Page 127: ...centration Limiting concentration is the limit of Freon gas concentration where immediate measures can be taken with out hurting human body when refrigerant leaks in the air The limiting concentration shall be described in the unit of kg m3 Freon gas weight per unit air volume for facilitating calculation Limiting concentration 0 44kg m3 R410A Outdoor unit No 1 system Flow of refrigerant Indoor un...

Page 128: ...ng the outdoor refrigerant qty Pay a special attention to the place such as a basement etc where refrigerant can stay since refrigerant is heavier than air Outdoor unit Indoor unit Smallest room R410A Refrigerant concentration kg m3 Total amount of replenished refrigerant in refrigerant facility kg Capacity of smallest room where indoor unit is installed m3 In case the result of calculation exceed...

Page 129: ...changer 1 Periodic more than once year cleaning of the dust or salt particles stuck on the heat exchanger by using water Selecting the location Outdoor Unit 1 If the outdoor unit is to be installed close to the seaside direct exposure to the sea wind should be avoided Install the outdoor unit on the opposite side of the sea wind direction 2 In case to install the outdoor unit on the seaside set up...

Page 130: ...the requirement above If necessary the user can ask the public power supply company for the system impedance at the interface point The value of can be chosen by following ⓐ ⓐ 0 Z 0 4 Ω Donʼt need to be declared 1 0 400 j0 250 Ω Z 0 350 j0 219 Ω 0 350 j0 219 Ω 2 0 350 j0 219 Ω Z 0 325 j0 203 Ω 0 325 j0 203 Ω 3 0 325 j0 203 Ω Z 0 300 j0 188 Ω 0 300 j0 188 Ω 4 0 300 j0 188 Ω Z 0 275 j0 172 Ω 0 275 j...

Page 131: ...y system which fulfills the requirement above If necessary the user can ask the public power supply company for the system impedance at the interface point The value of can be chosen by following ⓐ ⓐ 0 Z 0 4 Ω Donʼt need to be declared 1 0 400 j0 250 Ω Z 0 350 j0 219 Ω 0 350 j0 219 Ω 2 0 350 j0 219 Ω Z 0 325 j0 203 Ω 0 325 j0 203 Ω 3 0 325 j0 203 Ω Z 0 300 j0 188 Ω 0 300 j0 188 Ω 4 0 300 j0 188 Ω ...

Page 132: ... a power supply system which fulfills the requirement above If necessary the user can ask the public power supply company for the system impedance at the interface point The value of can be chosen by following ⓐ ⓐ 0 Z 0 4 Ω Donʼt need to be declared 1 0 400 j0 250 Ω Z 0 350 j0 219 Ω 0 350 j0 219 Ω 2 0 350 j0 219 Ω Z 0 325 j0 203 Ω 0 325 j0 203 Ω 3 0 325 j0 203 Ω Z 0 300 j0 188 Ω 0 300 j0 188 Ω 4 0...

Page 133: ......

Reviews: