background image

TO CONTACT THE LGE CUSTOMER SERVICE CENTER BY MAIL: 

LGE Customer Interactive Center  
P.O. Box 240007   
201 James Record Road   
Huntsville, Alabama 35824  
http://www.lgservice.com

FOR SERVICE: 
Before you call for warranty service, check your operating guide – you may avoid a service call.  

For warranty service information, please contact the LGE Customer Interactive Center telephone number.   

When calling for service, 

please have your product model number, serial number and the date of pur-

chase or the date of original installation available.

If a replacement unit is required, under some circumstances you may be asked to provide a reserve deposit to
the LGE Service Center against a credit card number as surety for advanced shipment.  Your credit card will not
be charged if you return the defective unit within 10 working days.   

If a replacement unit is received, please use the carton and packaging from that unit in returning the defective
unit to the LG

®

Brand Service Center. 

Parts and service in accordance with the LGE warranty are LGE’s responsibility and will be provided without
charge. Other service requirements will be at the owner’s expense. If you have problems in obtaining satisfactory
warranty service, write or call the LGE Customer Interactive Center. Service may be provided by independently
owned and operated service organizations. 

To assure proper credit and avoid unnecessary charges, you must obtain an LGE Return Authorization before
returning any product to the LGE Service Center.  Contact the Customer Interactive Center for details. 

CUSTOMER INTERACTIVE CENTER NUMBERS: 

To obtain customer assistance, product
information or Dealer or Service locations 

Call

1-800-243-0000 

24 hours a day, 365 days per year

THIS LIMITED WARRANTY DOES NOT APPLY TO: 

The cost of repair or replacement under these excluded circumstances shall be borne by the consumer. 

damage caused in shipping or transit       

service required as a result of improper installation,
including incorrect or insufficient AC supply (please
consult the owner’s manual for power supply
requirements)

installation or repair of antenna systems, cable con-
verters, cable company supplied equipment, or
other components in a video system

set-up or adjustment on consumer controls, or
damage caused by improper adjustments

damage caused by other system components

any panel that  has been modified or incorporated
into any other product

replacement of batteries on the remote control.

damage (including cosmetic damage), failure, loss
or personal injury due to misuse, abuse, negli-

gence, improper maintenance or storage, or to acts
of nature or other causes beyond our control.
(Causes beyond our control include but are not lim-
ited to lightning strike, power surges, power out-
ages and water damage.)     

image burn-in    

repair or replacement of warranted parts by other
than LGE authorized service centers.    

units purchased or serviced outside of the coverage
area.   

product where the original factory serial numbers
have been removed, defaced or changed in any
way.   

product sold and labeled as “as is, where is” or sim-
ilar disclaimer. 

Summary of Contents for MW 71PY10

Page 1: ...nual carefully before oper ating your set Retain it for future reference Record model number and serial number of the set See the label attached on the back of the set and quote this information to your dealer when you require service Model number Serial number P NO 3828VA0484A a RF04FA ...

Page 2: ...allation This equipment generates uses and can radiate radio frequency energy and if not installed and used in accordance with the instructions may cause harmful interference to radio communications However there is no guarantee that interference will not occur in a particular installation If this equipment does cause harmful interference to radio or television reception which can be determined by...

Page 3: ...ollow all instructions 5 Do not use this apparatus near water 6 Clean only with dry cloth 7 Do not block any ventilation openings Install in accordance with the manufacturer s instructions 8 Do not install near any heat sources such as radiators heat registers stoves or other apparatus including ampli fiers that produce heat 9 Do not defeat the safety purpose of the polarized or grounding type plu...

Page 4: ...Pay particular attention to plugs wall outlets and the point where the cord exits the appliance Use a dedicated power cord Do not modify or extend the power cord Do not install remove or reinstall the unit by yourself customer For electrical work contact the dealer seller a qualified electrician or an Authorized Service Center For installation always contact the dealer or an Authorized Service Cen...

Page 5: ...Menu Options Clock Setup 22 On Off Timer Setup 22 Auto Off 22 Sleep Timer 22 Special Menu Options Key Lock 23 ISM Method 23 Low power 23 XD Demo 24 Index 24 Screen Menu Options Auto Adjustment 25 Setting Picture Format 25 Split Zoom 26 Screen Position 26 Manual Configure 26 Initializing 27 Selecting Wide VGA mode 27 Screen Adjustments 28 Cinema Mode Setup 28 Luminance Noise Reduction 28 PIP Pictur...

Page 6: ...ma Display Panel which is the display device of this product is composed of 0 9 to 2 2 million cells A few cell defects will normally occur in the PDP manufacturing process Several minute colored dots visible on the screen should be accept able This also occurs in other PDP manufacturers products and the tiny dots appearing does not mean that this PDP is defective Thus a few cell defects are not s...

Page 7: ...ont Panel Controls Front Panel Controls MENU Button INPUT Button VOLUME F G Buttons E D Buttons INDEX Switches LED Display on or off Remote Control Sensor Power Indicator Illuminates red in standby mode Illuminates green when the monitor is turned on Sub power Button ...

Page 8: ...o video output from an external device to these jacks Component Input 1 2 Connect a component video audio device to these jacks EURO SCART SOCKET Connect the euro scart of the VCR to these sockets Remote Control Port Connect your wired remote control here S Video Input Connect S Video out from an S VIDEO device to the S VIDEO input Power Cord Socket This monitor operates on an AC power The voltage...

Page 9: ...ayer RECORD button is not avail able for DVD player SPLIT ZOOM Enlarges the picture MODE Selects the remote operating mode MNT VCR DVD CABLE HDSTB or AUDIO Select other operating modes for the remote to operate external devices POWER Turns your monitor or any other pro grammed equipment on or off depending on mode DW Selects the DW mode SLEEP Sets the Sleep Timer XD Switches the XD on or off Refer...

Page 10: ... WIN SIZE WIN POSITION SPLIT ZOOM MENU PIP INPUT ARC EXIT PLAY PAUSE STOP RECORD VIDEO COM1 RGB DVI ENTER HDMI KEY LOCK INDEX REW FF SKIP POWER DW DASP APC COM2 Remote Control Video cables Audio cables Optional extras can be changed or modified for quality improvement without any notification new optional extras can be added Contract your dealer for buying these items Option Extras Option Extras T...

Page 11: ...tilation is available GROUNDING Ensure that you connect the grounding earth wire to prevent possible electric shock If grounding methods are not possible have a qualified electrician install a separate circuit breaker Do not try to ground the unit by connecting it to telephone wires lightening rods or gas pipes Power Supply Short circuit Breaker Desktop Pedestal Installation Desktop Pedestal Insta...

Page 12: ...d Audio Right red 2 If you connect an S VIDEO output from VCR to the S VIDEO input the picture quality is improved compared to connecting a regular VCR to the Video input 3 If you connect the Euro scart socket of the VCR to the Euro scart socket of the set No other connection is needed Mono VCR Connect the video output cable from the VCR to the VIDEO input on the monitor S VIDEO VCR Connect the S ...

Page 13: ...he Video 2 Video 3 or Video 4 input source 2 Select your desired channel with the remote control for cable box Cable Cable TV Setup TV Setup AUDIO COMPONENT COMPONENT R L VIDEO INPUT 1 INPUT 2 VIDEO INPUT 2 VIDEO INPUT 1 VIDEO MONO AUDIO R L S VIDEO VID TV VCR RF Cable R AUDIO L VIDEO Cable Box How to connect 1 Connect the audio and video cables from the external equipment s output jacks to the mo...

Page 14: ... DVD audio outputs to the AUDIO INPUT jacks on the monitor as shown in the figure 2 If your DVD only has an S Video output jack connect this to the S VIDEO input on the mon itor and connect the DVD audio outputs to the AUDIO INPUT jacks on the monitor as shown in the figure How to use 1 Turn on the DVD player insert a DVD 2 Use the INPUT button on the remote control to select Component 1 Component...

Page 15: ...vertical pattern contrast or brightness in PC mode If noise is present change the PC mode to another resolution change the refresh rate to another rate or adjust the brightness and contrast on the menu until the picture is clear If the refresh rate of the PC graphic card can not be changed change the PC graphic card or consult the manufacturer of the PC graphic card NOTES Use a DVI cable Avoid kee...

Page 16: ... 500 43 269 35 156 37 879 46 875 53 674 49 725 31 500 35 000 37 500 31 500 35 000 37 500 48 363 56 476 60 023 54 348 63 995 67 500 60 000 63 981 80 000 70 08 85 03 59 94 66 66 72 80 75 00 85 00 56 25 60 31 75 00 85 06 74 55 60 00 70 00 75 00 60 00 70 00 75 00 60 00 70 06 75 02 60 05 70 01 75 00 60 00 60 02 75 00 Vertical Frequency Hz 832x624 1024x768 852x480 1152x864 1280x960 1280x1024 ...

Page 17: ...rce Devices not supported Auto HDMI is been the Resolution is setted manually To get the best picture quality adjust the DVD Player or Set Top Box output resolution to 1920 x 1080i How to connect When Source Devices DVD Player or Set Top Box support HDMI If Source Devices have HDMI Output Connector Source Devices connect to DTV with HDMI Cable not supplied with the product If Source Devices suppor...

Page 18: ...UT button on the remote control and then the Monitor will switch on The menus can be shown on the screen in the selected language First select your language 1 Press the MENU button and then use D E button to select the SPECIAL menu 2 Press the G button and then use D E button to select Language 3 Press the G button and then use D E button to select your desired language From this point on the on s...

Page 19: ...u options contrast brightness color sharpness and tint manually APC automati cally changes to Off Readjust Picture menu settings for each following input source as preferred Picture Menu Options Picture Menu Options You can also select Daylight Optimum Night time or Off in the PICTURE menu Daylight Optimum and Night time settings are preset for optimum picture quality at the factory and cannot be ...

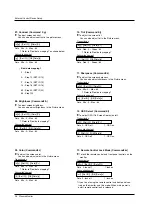
Page 20: ...100 G Brightness 60 Color 50 Sharpness 50 Tint 0 Picture Menu Options continued Picture Menu Options continued Use Fleshtone to select the desired skin color option 1 Press the MENU button and then use D E button to select the PICTURE menu 2 Press the G button and then use D E button to select Fleshtone 3 Press the G button and then use F G button to make appropriate adjustments The adjustment ran...

Page 21: ...L VL Auto V Auto Volume Leveler olume Leveler SRS TSXT Flat Music Movie Sports PICTURE SOUND TIMER SPECIAL SCREEN PIP DW Prev Menu On Off DASP BBE G AVL Balance 0 Treble 50 Bass 50 PICTURE SOUND TIMER SPECIAL SCREEN PIP DW Prev Menu On Off DASP BBE AVL G Balance 0 Treble 50 Bass 50 PICTURE SOUND TIMER SPECIAL SCREEN PIP DW Prev Menu DASP BBE AVL Balance 0 G Treble 50 Bass 50 L R 1 Press the MENU b...

Page 22: ... new settings Clock Setup Clock Setup If current time setting is wrong correct the clock setting 1 Press the MENU button and then use D E button to select the TIMER menu 2 Press the G button and then use D E button to select Clock 3 Press the G button and then use D E button to set the hour 4 Press the G button and then use D E button to set the minutes 5 Press the ENTER button to save the new set...

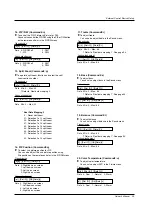
Page 23: ...use D E button to select either Normal White wash Orbiter or Inversion Normal If image sticking is never a problem ISM is not necessary set this to Normal White wash White Wash removes permanent images from the screen Note An excessive permanent image may be impossible to clear completely using White Wash To return to normal viewing press the any button Low Power Low Power Low power reduces the pl...

Page 24: ...MENU button and then use D E button to select the SPECIAL menu 2 Press the G button and then use D E button to select Demo 3 Press the G button to begin XD Demo 4 Press the EXIT button to stop XD Demo Use it to see the difference between XD Demo on and XD Demo off 1 Press the MENU button and then use D E button to select the SPECIAL menu 2 Press the G button and then use D E button to select Index...

Page 25: ...etting Picture Format Setting Picture Format Caution If a 4 3 fixed image is on the screen for a long time it may remain visible RGB DVI PC 4 3 16 9 Component 480i Video sources 4 3 16 9 Horizon and Zoom RGB DTV DVI DTV Component 480p 720p 1080i HDMI 480p 720p 1080i 4 3 16 9 and Zoom 1 Press the ARC button repeatedly to select the desired picture format You can also select picture format in the SC...

Page 26: ...t the SCREEN menu 2 Press the G button and then use D E button to select Position 3 Press the G button and then use D E F G button to adjust the position 4 Press the ENTER button to save the new settings Screen Position Screen Position Enlarges the picture in correct proportions Split Zoom can be used for all input sources In 2 Split Zoom mode you can only move the image up or down If a screen is ...

Page 27: ...EN menu 2 Press the G button and then use D E button to select VGA Mode 3 Press the G button and then use D E button to select the desired VGA res olution 4 Press the ENTER button to save the new settings Selecting W Selecting Wide VGA ide VGA mode RGB PC mode only mode RGB PC mode only To see a normal picture match the resolution of RGB VGA mode 640x480 848x480 852x480 with the selection for VGA ...

Page 28: ... button and then use D E button to select On or Off 4 Press the ENTER button to save the new settings Cinema Mode Setup V Cinema Mode Setup Video1 2 and Component 480i mode only ideo1 2 and Component 480i mode only Use YNR to reduce the picture noise that may appear on the screen Luminance Noise Reduction V Luminance Noise Reduction Video 1 2 and Component 480i modes only ideo 1 2 and Component 48...

Page 29: ...the sub picture Win position PIP PIP Picture In Picture Feature Picture In Picture Feature 10 30 Component Video Win size F G PIP PIP T Transparency PIP ransparency PIP Mode only Mode only To make the PIP clear or opaque 1 Press the MENU button and then use D E button to select the PIP DW menu 2 Press the G button and then use D E button to select PIP Transparency 3 Press the G button and then use...

Page 30: ...screen into 2 allowing 2 picture sources to be shown on the monitor screen at the same time Each source is given half the screen This function doesn t work for RGB DTV 1080p DW Setup Option DW Setup Option Win size F G Use the PIP INPUT button to select the input source for the sub picture Main Picture Source Available Sub Picture Sources Video Component 480i Component 480p 720p 1080i RGB DVI DTV ...

Page 31: ... 9 Connect the RS 232C input jack to an external control device such as a computer or an A V control system and control the Monitor s functions externally Connect the serial port of the control device to the RS 232C jack on the Monitor back panel RS 232C connection cables are not supplied with the Monitor T Type of Connector D Sub 9 pin Male ype of Connector D Sub 9 pin Male RS 232C Configurations...

Page 32: ...3 04 Screen Mute k d 0 1 05 Volume Mute k e 0 1 06 Volume Control k f 0 64 07 Contrast k g 0 64 08 Brightness k h 0 64 09 Color k i 0 64 10 Tint k j 0 64 11 Sharpness k k 0 64 12 OSD Select k l 0 1 13 Remote Control Lock Mode k m 0 1 14 PIP DW k n 0 3 15 Split Zoom k p 0 99 16 PIP Position k q 0 3 17 Treble k r 0 64 18 Bass k s 0 64 19 Balance k t 0 64 20 Color Temperature k u 0 2 21 PIP Input Sel...

Page 33: ...ct Ratio Control button on remote control or in the Screen menu Transmission Data 0 Normal screen 4 3 1 Wide screen 16 9 2 Wide screen Horizon 3 Full screen Zoom k c Set ID Data Cr Acknowledgement c Set ID OK Data x 05 Volume Mute Command 2 e G To control volume mute on off You can also adjust mute using the MUTE button on remote control Transmission Data 0 Volume mute on Volume off 1 Volume mute ...

Page 34: ...in the Picture menu Transmission Data Min 0 Max 64 Refer to Real data mapping 1 k i Set ID Data Cr Acknowledgement i Set ID OK Data x 10 Tint Command2 j G To adjust the screen tint You can also adjust tint in the Picture menu Transmission Data Red 0 Green 64 Refer to Real data mapping 1 k j Set ID Data Cr Acknowledgement j Set ID OK Data x 08 Brightness Command2 h G To adjust screen brightness You...

Page 35: ...ance Command2 t G To adjust balance You can also adjust balance in the Sound menu Transmission Data Min 0 Max 64 Refer to Real data mapping 1 See page 34 k t Set ID Data Cr Acknowledgement t Set ID OK Data x Data 0 Right down on screen 1 Left down on screen 2 Left up on screen 3 Right up on screen Data Min 0 Max 64 Data Min 0 Max 64 Data Min 0 Max 64 Data 0 Cool 1 Normal 2 Warm 15 Split Zoom Comma...

Page 36: ... z G To recognize an abnormal state Transmission Data 0 Power on signal 1 Power on No signal 2 Remote control off 3 Sleep time off 4 RS 232C off 5 5V monitor off 6 AC detect off 7 Fan Alarm off 8 Off timer off 9 No signal off a Connection Detect off k z Set ID FF Cr Acknowledgement z Set ID OK Data x Data FF Read Data 1 Video1 2 Video2 3 Component1 4 Component2 5 RGB 6 DVI 7 Video3 8 Video4 9 HDMI...

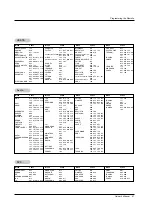
Page 37: ...code Data code TC Tf T1 C0 Carrier frequency FCAR 1 TC fOSC 12 Duty ratio T1 TC 1 3 Repeat frame C1 C2 C3 C4 C5 C6 C7 C0 C1 C2 C3 C4 C5 C6 C7 D0 D1 D2 D3 D4 D5 D6 D7 D0 D1 D2 D3 D4 D5 D6 D7 Repeat code 9 ms 4 5 ms 0 55 ms 9 ms 2 25 ms G Bit description G Frame interval Tf The waveform is transmitted as long as a key is depressed Bit 0 Tf Tf Tf 108ms 455KHz 0 56 ms 0 56 ms 1 12 ms Bit 1 2 24 ms How...

Page 38: ...n R C Button R C Button R C Button R C Button R C Button R C Button R C Button R C Button R C Button R C Button R C Button R C Button Power On Off R C Button R C Button R C Button R C Button R C Button R C Button R C Button R C Button R C Button R C Button 4 3 16 9 Horizon Zoom mode Selection R C Button R C Button R C Button R C Button R C Button R C Button R C Button R C Button R C Button R C But...

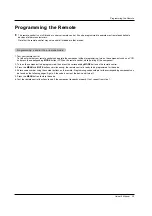
Page 39: ...ng turn on the component such as a VCR and press the corresponding MODE button VCR on the remote control while pointing at the component 2 Turn on the component to be programmed then press the corresponding MODE button on the remote control 3 Press the MENU and MUTE buttons simultaneously the remote control is ready to be programmed for the code 4 Enter a code number using the number buttons on th...

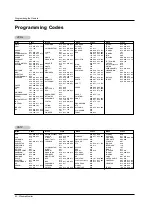
Page 40: ...017 037 112 129 131 SEARS 003 008 009 010 013 014 017 020 031 042 073 081 101 SHARP 031 054 149 SHINTOM 024 SONY 003 009 031 052 056 057 058 076 077 078 149 SOUNDESIGN 034 STS 013 SYLVANIA 031 033 034 059 067 SYMPHONIC 034 TANDY 010 034 TATUNG 039 043 TEAC 034 039 043 TECHNICS 031 033 070 TEKNIKA 019 031 033 034 101 THOMAS 034 TMK 006 TOSHIBA 008 013 042 047 059 082 112 131 TOTEVISION 040 101 UNIT...

Page 41: ...28 146 ZENITH 081 082 083 084 091 120 HDSTB HDSTB Brand Codes Brand Codes Brand Codes Brand Codes Brand Codes Brand Codes Brand Codes Brand Codes AIWA 014 028 070 096 125 129 139 229 230 AKAI 163 ANAM 003 014 017 023 059 106 189 216 217 235 236 BURMECTER 252 CARVER 086 CLARION 199 DAEWOO 027 053 060 184 102 148 198 221 DENON 015 075 130 143 FANTASIA 071 FINEARTS 022 FISHER 089 099 LG GOLDSTAR 001 ...

Page 42: ...t distance between the Monitor and the VCR Activate any function to restore the brightness of the picture If still picture is on the screen for more than 5 minutes the screen gets dark The remote control doesn t work Check to see if there is any object between the Plasma Display and the remote control causing obstruction Are batteries installed with correct polarity to to Refer to p 9 Install new ...

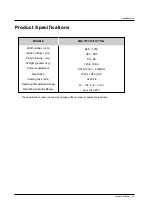
Page 43: ...ications Product Specifications MODELS Width inches mm Height inches mm Depth inches mm Weight pounds kg Power requirement Resolution Viewing Size mm Operating Temperature Range Operating Humidity Range MW 71PY10 71PY10G 68 9 1750 38 7 982 3 9 98 190 6 86 5 AC110 240V 50 60Hz 1920 x 1080 Dot 1512 26 41 104 F 5 40 C Less than 80 ...

Page 44: ...44 Plasma Monitor Notes Notes Notes ...

Page 45: ...Owner s Manual 45 Notes Notes Notes ...

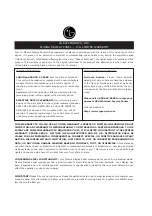
Page 46: ...SED IN CONTRACT TORT OR OTHERWISE Some states do not allow the exclusion or limitation of incidental or consequential damages or limitations on how long an implied warranty lasts so the above exclusion or limitation may not apply to you This warranty gives you specific legal rights and you may also have other rights that vary from state to state WARRANTY PERIOD LABOR and PARTS 2 YEARS from the Dat...

Page 47: ...ion before returning any product to the LGE Service Center Contact the Customer Interactive Center for details CUSTOMER INTERACTIVE CENTER NUMBERS To obtain customer assistance product information or Dealer or Service locations Call 1 800 243 0000 24 hours a day 365 days per year THIS LIMITED WARRANTY DOES NOT APPLY TO The cost of repair or replacement under these excluded circumstances shall be b...

Page 48: ...nual carefully before oper ating your set Retain it for future reference Record model number and serial number of the set See the label attached on the back of the set and quote this information to your dealer when you require service Model number Serial number P NO 3828VA0484A a RF04FA ...

Reviews: