background image

Owner’s & Installation Manual 

47

E

N

G

L

IS

H

46

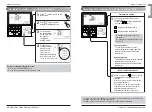
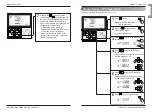
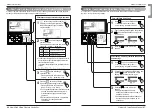
New Wide Wired Remote Controller

Owner's Instructions

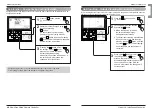
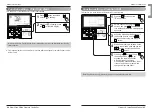
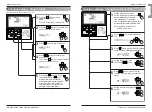
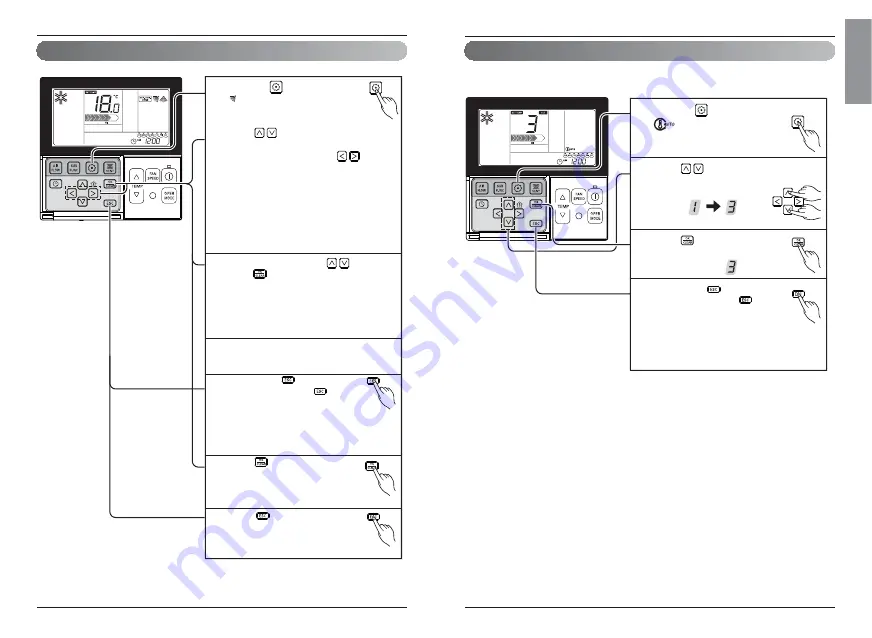
Function Setting - Change Temp

Press the       button until the 
          icons flashes.

1

Press            button to change.

 Converting temp value : 1~7

2

Press        button to complete 
and active the setting process. 

3

Pressing the       button will exit 
the settings mode. If       is not 
pressed, the remote controller 
will automatically exit setup mode 
after 25 seconds with no input. 
If the set button is not pressed, 
the changes will not take effect. 

4

Change temperature function can change a delta temperature of Auto change over function. The
change temperature value consist certain gap between cooling and heating change over points.

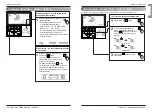
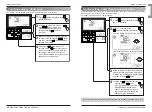
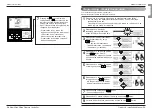
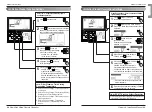
Owner's Instructions

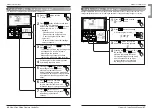
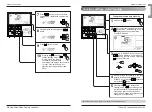
Press the       button until the 
    icons flashes.

1

Press           button to select active vane : 
1 / 2 / 3 / 4 / All / Standard
Select Vane number using           buttons.

 Vane number : No. 1, 2., 3, 4, all, or 

standard
- Selected vane is in operation.  
- Please verify the operating vane.
- To set the angle of all the vanes, 

select 'all'.

- To set as the factory default settings, 

select 'standard'. 

2

Select wind angle using           button, and 
press       button.
- The boundary of wind angle settings can 

be changed to 5 levels or 6 levels 
according to the product.

- When selecting 'standard' for Vane 

number, the wind angle does not move.

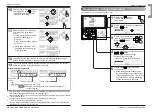
3

Set the angles for the remaining vanes 
by following the same steps.

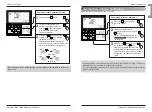
4

Pressing the       button will exit 
the settings mode. If       is not 
pressed, the remote controller 
will automatically exit setup mode after 
25 seconds with no input. If the set button 
is not pressed, the changes will not take 
effect. 

5

Press       button to complete and 
activate the setting process. 
(Airflow direction function will be 
released whenever setting vane angle)

6

Press        button to exit or 
system will automatically release 
without any input after 25 
seconds.

7

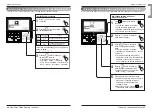
This function is to adjust angle at which airflow is blown out.

Function setting - Vane Angle Control

Summary of Contents for PQRCVSL0

Page 1: ...etely before installing the product Installation work must be performed in accordance with the national wiring standards by authorized personnel only Please retain this owner s installation manual for future reference after reading it thoroughly OWNER S INSTALLATION MANUAL AIR CONDITIONER ITALIANO ESPAÑOL FRANÇAIS DEUTSCH êìëëäàâ PORTUGUÊS ...

Page 2: ...l Single Operation with Direct Expansion Ventilation 66 Ventilation Product Additional Operations Fast Power Saving 67 Ventilation Product Function Settings 68 Ventilation Product Reservations Settings 69 Ventilation Product Installer Setting Functions Entering Method 70 Different Mode Drive 71 Self diagnosis for Trouble Mode 72 Outage Compensation Function 72 Troubleshooting Steps 73 Entrust inst...

Page 3: ... If setting up the remote controller cable to exit through the top or right side be sure to remove the plastic from the guide grooves from the remote controller case Remove guide groove with long nose Through the wall Through the top Through the right side Installation Instructions Part Description Part Description Name and Function of Remote Controller OPERATION INDICATION SCREEN SET TEMPERATURE ...

Page 4: ...etting section on how to set master slave for more details 3 switch OFF Master Factory default setting 3 switch ON Slave Wall Side Wall Side Wall Side Wall Side Connecting order Separating order 3 Place the top part of the remote controller into the setup board you have screwed into the wall as pictured to the right and connect the pieces by pressing the bottom into the board Arrange the cable thr...

Page 5: ...P Value 03 03 Med 04 High 05 Very High 01 Remo 4 Thermistor 04 02 Indoor 03 2TH 01 Low 02 Med 5 Ceiling Height 05 03 High 04 Very High 01 V H 02 F H 6 Static Pressure 06 03 V L 04 F L 7 Master Setting 07 00 Slave If only Plus1 series models 00 Group setting 01 Master 01 Single setting 8 Override Setting 08 00 Slave 01 Master 9 Dry Contact 09 00 Auto Off 01 Auto On 10 Release 3 Min 10 01 Set Delay ...

Page 6: ...ed to this operation refer to the product manual 10 New Wide Wired Remote Controller 2 General Ventilation product Some contents may not be displayed depending on the product function No Function Code Value 1 Test Run 01 01 Test Run Setup 2 02 00 FF Address of Central Control 3 SA Supply Air ESP 03 ESP level ESP value Example 4 EA Exhaust Air ESP 04 01 Low 0 255 02 High 03 Super High 5 Product Dir...

Page 7: ...by a certified technician This function allows the wind strength for each fan speed level to be set manually It s the function to use for connecting central control Please refer to central controller manual for the details Function Code Group No Indoor No Set Group No by pressing button 0 F 3 Move to Indoor No setting option by pressing button 4 Set Indoor No by pressing button 5 Press button to s...

Page 8: ... in remote controller temperature sensor 02 Indoor unit Operation in indoor unit temperature sensor 03 2TH Cooling Operation of higher temperature by comparing indoor unit s and wired remote controller s temperature There are products that operate at a lower temperature Heating Operation of lower temperature by comparing indoor unit s and wired remote controller s temperature Thermistor Table Inst...

Page 9: ...y pressing button 01 Low 02 Medium 03 High 04 Very high 3 Press button to save 4 5 If moving to ceiling height selection menu by pressing button it indicates as pictured below 2 Pressing and holding the button for 3 seconds enters the remote controller setup mode If it is not held for 3 seconds it enters the user setup mode 1 Pressing the button will exit the settings mode If is not pressed the re...

Page 10: ...Slave 01 Master 3 Press button to save 4 Pressing and holding the button for 3 seconds enters the remote controller setup mode If it is not held for 3 seconds it enters the user setup mode 1 If pressing button repeatedly it moves to master slave selection menu as pictured below 2 Pressing the button will exit the settings mode If is not pressed the remote controller will automatically exit setup m...

Page 11: ...low to variable or fixed Variable Comp ON setup airflow Comp OFF weak wind Fixed Comp ON setup airflow Comp OFF setup airflow Installation Instructions Installer Setting Dry Contact Mode Setting Function Code Dry Contact setting value Select Dry contact setting by pressing button 00 Manual 01 Automatic 3 Press button to save 4 Pressing and holding the button for 3 seconds enters the remote control...

Page 12: ...Function code 13 Ex Setting the Zone Type as New 2 Select Zone Type by pressing button 00 Old 01 New 3 Press button to save or release 4 1 Pressing and holding the button for 3 seconds enters the remote controller setup mode If it is not held for 3 seconds it enters the user setup mode Pressing the button will exit the settings mode If is not pressed the remote controller will automatically exit s...

Page 13: ...his function will set the Emergency Heater Setting Emergency Heater is used to heat the space in emergency case such as heat pump error Emergency heat is in place of and does not supplement heat pump Emergency Heater setting Function sets following conditions 1 Emergency Heater operation while in error or outdoor unit operates cooling cycle 2 Emergency Heater operation in Low Ambient temperature 3...

Page 14: ... 26 New Wide Wired Remote Controller Installation Instructions Installation Instructions Installer Setting Option Function Setting Function Code Existing condition Select existing condition of each mode by pressing button 00 not installed 01 installed 3 Press button to save 4 If pressing button repeatedly it moves to the selected option function code as pictured below 2 Function Plasma purificatio...

Page 15: ...ter setup it automatically gets out of setup mode if there is no button input for 25 seconds When exiting without pressing set button the manipulated value is not reflected 5 If pressing button repeatedly it moves to static pressure selection menu as picture below 2 Select static pressure by pressing button 00 use static pressure code 06 set value 01 11 static pressure step code 32 set value 3 Pre...

Page 16: ...drive does not release cool wind but general fan Because it releases the wind that has no temperature difference from the room it functions to circulate the inside air The menu item of wind powerfulness might not be partially selected according to the product Standard Operation Dehumidification Mode Owner s Instructions Press button to trun on the indoor unit 1 Press button to select cooling opera...

Page 17: ...remote to display a different temperature than you experience elsewhere in the room 1 Temperature Setting Room Temperature Check For air cooling drive from 18 64 to 30 86 and for heating drive from 16 60 to 30 86 you can select desired temperature 5 10 is proper for the difference between room and outside temperature Room temp Indicates the current room temperature Set temp Indicates the temperatu...

Page 18: ...up desired fan speed by fan speed button Every time you press fan speed you can select the wind flow in order of SLO LO LO MED MED MED HI HI SHI AUTO Air flow setting function might be different according the types of indoor unit Please refer to product manual for product s detailed function 1 Please set desired wind direction by pressing button You can select wind direction of comfortable wind Up...

Page 19: ...ll exit the settings mode If is not pressed the remote controller will automatically exit setup mode after 25 seconds with no input If the set button is not pressed the changes will not take effect 3 Only products with humidifying function can use this Owner s Instructions The icon of direct indirect wind blinks on the display and then if pressing button direct indirect wind icon is removed and th...

Page 20: ...rgency heater can be turned on for simultaneous heating and cooling Indoor units with the emergency heater must be turned OFF for simultaneous cooling and heating Heater function is additional function and it only operates in selected models Emergency heater can be turned on while in error code in case of emergency Electric heater icon is displayed on LCD display window with error code when emerge...

Page 21: ...n for cleaner attached to the product to automatically clean the filter when using air conditioner for the specific period of time Owner s Instructions Energy Saving Cooling improves the user s comfort by slowly changing the set temperature to an energy efficient setting Sub function Energy Saving Cooling Operation Press the button until the icons flashes 1 Operate or cancel Energy Saving function...

Page 22: ...seconds with no input If the set button is not pressed the changes will not take effect 4 2 Set state Enable Auto Smart Clean function Clear state Disable Auto Smart Clean function Robot cleaning is an additional function and it might not be available on all types of indoor unit Owner s Instructions This feature locks the keypad to prevent any unwanted changes to the settings Function setting Chil...

Page 23: ...xit setup mode after 25 seconds with no input If the set button is not pressed the changes will not take effect 5 When filter cleaning is finished fix the filter to the up down grille and use the buttons to select ascent and press the button Elevation grill function only operates in the indoor unit with the elevation grill This function is to clear the indicator of indoor filter cleaning Function ...

Page 24: ...ane number No 1 2 3 4 all or standard Selected vane is in operation Please verify the operating vane To set the angle of all the vanes select all To set as the factory default settings select standard 2 Select wind angle using button and press button The boundary of wind angle settings can be changed to 5 levels or 6 levels according to the product When selecting standard for Vane number the wind ...

Page 25: ...button 4 Press button to move to Hour setting mode the Hour segment will flash 5 Setting Hour value by pressing button 6 Owner s Instructions This function turns any set zones on or off Function setting Zone Control Press the button until the icons flashes Ex Turn on the zone 1 and zone 3 1 Press the buttons to select which zones you wish to turn on off 2 Press button to turn on off zone 3 Press b...

Page 26: ...Move to auto cleaning menu by pressing button twice Auto cleaning icon will be displayed and the current status DISABLE will blink 2 If moving to ENABLE icon area by using button ENABLE icon blinks and auto cleaning function is setup if pressing button at that time 3 When returning to auto cleaning no use auto cleaning function is cancelled if moving to DISABLE icon by pressing button and then pre...

Page 27: ...ple reservation setup product automatically runs or stops after the time that is set Owner s Instructions Function Setting WLAN Wireless LAN Module Access Point mode Push the button repeatedly until the term of AP is displayed on the screen 1 Press the button After setup it automatically gets out of setup mode 2 While WLAN module is operating in access point mode the term of AP blinks on the scree...

Page 28: ...tting Whenever reservation is done 4 Pressing the button will exit the settings mode If is not pressed the remote controller will automatically exit setup mode after 25 seconds with no input If the set button is not pressed the changes will not take effect 5 If finishing sleep reservation setup air conditioner product operates sleep drive and stops after the time that is set 6 Sleep reservation is...

Page 29: ...o Minute setting mode When the Minute icon flashes you can set the time between 00 59 5 Press button to finish setting 6 Automatically turned Off at reserved time that you set Owner s Instructions Pressing the button will exit the settings mode If is not pressed the remote controller will automatically exit setup mode after 25 seconds with no input If the set button is not pressed the changes will...

Page 30: ...e from Monday to Sunday 4 Please move to AM PM setup part of turning on by using button 5 Please move to hour setup part of turning on by using button It is the part to set up the time at which air conditioner is turned on 6 Please move to minute setup part of turning on by using button 8 Please change time by using button You can setup hour 0 12 7 If minute indication blinks please setup minute b...

Page 31: ...ner is turned off If hour indication blinks please set up hour Please setup hour and minute identically with the method to set up turning on time 11 If finishing weekly reservation setup please press setup cancellation button Weekly reservation setup for the day that you set is finished 12 If you setup with the method identical with above by selecting the day that you would like to setup it operat...

Page 32: ...s indoor air using the ventilation product at the same time operating the air conditioning function Owner s Instructions 1 Control using remote controller where air conditioner indoor unit and the ventilation product is installed at the same time When the power is turned on your remote control recognizes the product takes about 30 seconds and then works normally C Connecting wires is the same as a...

Page 33: ...ger it automatically converts back to air conditioner mode 2 Manual Conversion Pressing button in ventilation mode will manually convert 5 Interlinked Operation with Direct Expansion Ventilation It can only be used when the air conditioner is interlinked with direct expansion ventilation product Owner s Instructions Manual Conversion Pressing Ventilation button in ventilation mode will manually co...

Page 34: ...er It displays as the figure right side in the direct expansion type ventilation single operation 1 Pressing button will change the ventilation mode Pressing the button converts from heat exchange normal automatic 2 Pressing button will change operation mode Pressing the button will convert from cooling eating automatic stop 3 Pressing button in ventilation mode changes the strength of wind Pressi...

Page 35: ... air conditioner for Simple ON OFF Weekdays Holidays Reservations Ventilation Product Function Settings Press Settings button 1 Pressing button repeatedly will move to the delay time menu Then delay time icon is displayed and the delay time blinks at the perature display area 2 Pressing button will change the delay time settings Boundary of delay time settings 00 60 minutes in the units of 1 minut...

Page 36: ...tton to enter ventilation mode 1 Pressing and holding the button for 3 seconds enters the settings mode If it is not held for 3 seconds it enters the user settings mode 2 When you enter the installer settings mode the data value that can be set is displayed at the lower right corner of LCD screen 3 Code value Seting value Installer setting mode is a mode to set the detail functions of the remote c...

Page 37: ...on and set cancel button are pressed simultaneously for 3 seconds or longer all set reservations will be cancelled Please check again wire remote controller s setup condition Please check again connection condition of air conditioner and remote controller cable Management Check up Owner s Instructions Self diagnosis for Trouble Mode Outage Compensation Function If power supply fails due to outage ...

Page 38: ......
Reviews: