background image

56

INSTALLATION INSTRUCTION

ENGLISH

INSTALLATION INSTRUCTION

57

ENGLISH

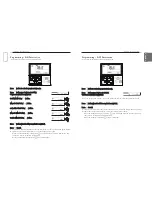
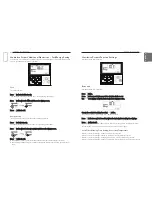
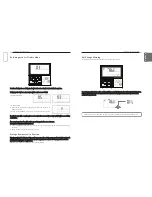
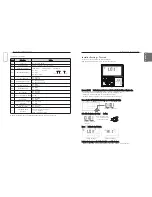
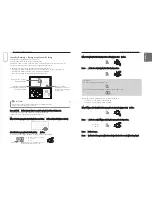
Code value

Set value

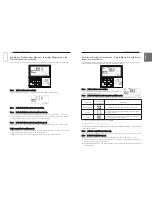
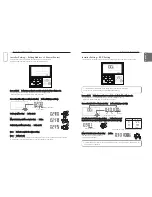
Press and hold 

B

button for more than 3 seconds to enter the installer settings mode.

- If pressing only once briefly, it will enter the user settings mode.

Make sure to press and hold for more than 3 seconds.

Once entered the installer settings mode, it displays the programmable data values in the lower

right of LCD screen.

• Some items in the menu may not be displayed depending on the product functions, or have

different name in the menu.

CAUTION

Installer setting is a mode to set the detailed functions of remote control.

If the installer setting mode is set improperly, it may cause a break down, injury, or property
damage.

The installation requires an expertise and must be performed by one of our service centers
or expert installer providers.

The person who performed an installation takes responsibility for any troubles associated
with the installation, and in this case, service will be charged. 

!

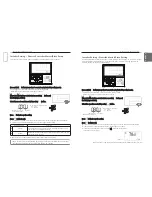
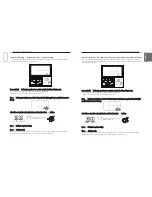
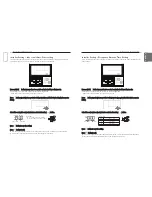
Installer Setting – Installer Setting Mode Approach

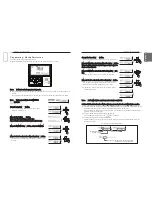
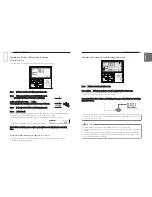
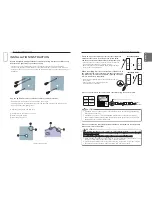
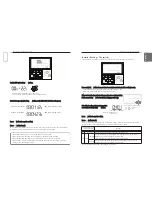
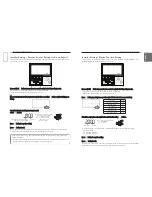
• When controlling in groups, set the master/slaver of the remote controller. Refer to Installer

setting section on how to set master/slave for more detail.

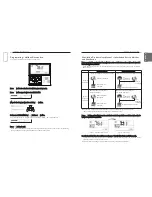
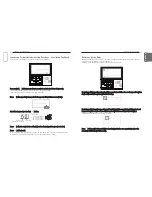
When installing more than 2 units of air condi-

tioner to one wired remote controller, please

connect as the right figure. 

• If it is not event communication indoor unit,

set the unit as slave.

• Check for event communication through the

product manual.

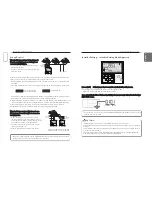
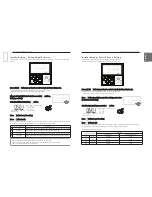
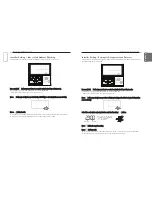
When installing more than 2 wired remote con-

trollers to one air conditioner, please connect as

the right picture.

• When installing more than 2 units of wired

remote controller to one air conditioner, set one

wired remote controller as master and the others

all as slaves, as shown in the right picture. 

• You cannot control the group as shown in the

right for some products. 

• Refer to the product manual for more detail.

- For wall-mount type and stand type product, change the master/slave setting with the wireless

remote controller. (Refer to wireless remote controller manual for detail)

When installing 2 remote controllers to one indoor unit with event communication function, set

the master/slave of the remote controller. (Refer to remote controller master/slave selection)

When controlling the group, some functions excluding basic operation setting, fan level

Min/Mid/Max, remote controller lock setting and time setting may be limited.

When controlling multiple indoor units with event communication function with one remote con-

troller, you must change the master/slave setting from the indoor unit.

- After completion of master/slave setting of indoor unit and turn off the unit, 1 minute later turn

it on again.

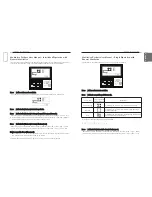
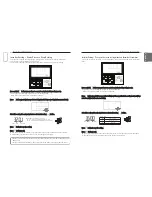
- For ceiling type cassette and duct product group, change the switch setting of the indoor PCB.

Master

Slave

Slave

GND

GND

DC 12 V

Signal wire

Signal wire

GND

DC 12 V

B   Y   R

B   Y   R

MASTER

SLAVE

Signal wire

GND

DC 12 V

Signal wire

Group Control

#

3

 switch OFF: Master

(Factory default setting)

#

3

 switch ON: Slave

<When simultaneously connecting  

2 sets of wired remote controller>

ENGLISH

Summary of Contents for PREMTB001

Page 1: ...g the product Installation work must be performed in accordance with the national wiring standards by authorized personnel only Please retain this installation manual for future reference after reading it thoroughly P NO MFL62129220 NEW WIDE WIRED REMOTE CONTROLLER ENGLISH ITALIANO ESPAÑOL FRANÇAIS DEUTSCH РУССКИЙ ЯЗЫК PORTUGUESE ...

Page 2: ...elevant qualifications our company will not provide free service The following safety cautions are provided to prevent unexpected dangers or losses WARNING If the user does not follow the mandatory items it may result in serious injury or death CAUTION If the user does not follow the mandatory items it may cause personal injury or property damage Warning and Caution are to call the user s attentio...

Page 3: ... Direct Expansion Ventilation 45 Ventilation Product User Manual Single Operation with Direct Expansion Ventilation 46 Ventilation Product Additional Operations Fast Energy Saving 47 Ventilation Product Function Settings 48 Ventilation Product Reservation Settings 49 Ventilation Product Installer Setting Functions 50 Ventilation Product Installer Setting Functions Ventilation Fan Speed TABLE OF CO...

Page 4: ...re Fan Speed Button To select the fan speed On Off Button To turn on off with a remote controller Mode Selection Button To select the operating mode Wireless Remote Controller Receiver Accessories Connecting Cable 1 EA 10m Screw 4 EA Owner s Installation manual Inform label 8EA 8Languages Standard Operation Standard Cooling A pleasant and fresh breeze cools off the room Press 2 button in the remot...

Page 5: ...ange of the desired temperature is 16 C 30 C for heating Heating applies only to cooling heating models Heating will not work in the cooling only models Press 2 button to turn on the indoor Press N button during cooling and it will move to Po and start power cooling Some units run the power cooling after power breeze Press N button during operation to cancel the power cooling and run the fan speed...

Page 6: ...y vary depending on the product type Standard Operation Dehumidifying Mode It removes moisture while cooling gently P Press 2 button Press P button to select Dehumidify The temperature cannot be changed during dehumidification Press N button repeatedly to adjust airflow SLOW LOW MED HIGH AUTO The initial fan speed in dehumidifying mode is set at Low Using this function in the rainy season or high ...

Page 7: ...ppropriate When warm When hot Display window cooling model In the Auto Operation mode You can use N button If it doesn t operate as you desire you can select the other operation mode manually P Press 2 button Press P button to select Fan mode Press N button repeatedly to adjust wind powerfulness SLOW LOW MED HIGH AUTO The compressor will not run in the Fan mode Fan mode blows the room temperature ...

Page 8: ...or temperature displayed in the remote controller may not be identical due to the inconsistent temperature distribution in a space where the unit is installed Press temperature control button to select the desired temperature Press the button to raise the temperature by 1 C Press and hold the button to raise the temperature by 1 C automatically Press the button to lower the temperature by 1 C Pres...

Page 9: ...and disappear in reverse case Press L button to exit the setup mode If no button is selected for about 25 seconds after setup it exits the setup mode automatically If Set button is not selected before you exit the changes will not apply Some products may not include Air purifying function because it is an additional function Air purifying is available only when the unit is running If you want to r...

Page 10: ...case Press L button after setup If no button is selected for about 25 seconds after setup it exits the setup mode automatically If Set button is not selected before you exit the changes will not apply Heater function is additional function and it only operates in selected models The indoor unit product with Auxiliary Heater function set automatically displays 0 icon during the AUXILIARY HEATING OP...

Page 11: ...e vane angles for the remaining vanes as the same as above Some products include only No 1 and No 2 vanes Press L button to exit after setup If no button is selected for about 60 seconds after setup it exits the setup mode automatically If Set button is not selected before you exit the changes will not apply Function setting Vane Angle Control P Press C button repeatedly until Himalaya cooling ico...

Page 12: ...ton to exit after setup If no button is selected for about 60 seconds after setup it exits the elevation grill mode automatically If Set button is not selected before you exit the changes will not apply The elevation grill function is available only in the indoor unit with a built in elevation grill Function setting Zone Control You can turn on off the zones by used of it Press B button repeatedly...

Page 13: ...up mode automatically If Set button is not selected before you exit the changes will not apply Some products may not include robot cleaning function Function setting Auto Cleaning Auto cleaning is a function to remove moisture or mold after turning off the cooling system by drying the inside of indoor unit Press B button repeatedly to select Auto cleaning in the menu J icon will display and the cu...

Page 14: ...atically cancelled without any separate cancellation after cer tain period of time Function setting Child Lock This function is to lock the buttons to prevent children or others from careless using Press B button repeatedly until icon is blinking Move to icon using H I button The icon will blink and press K button to set the lock function To cancel the lock function press H I button to move to ico...

Page 15: ... ing according to the temperature in the Auto operation mode Example of Change Temp Conditions 1 Mode Auto operation 2 Desired temperature 22 C 3 Change temperature 3 C If it falls under the conditions described above it will run as shown in the graph Function setting Changing Current Time When the day hour minute setting is finished press K button to complete the current time set ting If pressing...

Page 16: ...nclude the indoor outdoor unit model information function Function setting Indoor Outdoor Unit Model Information Press B button repeatedly to select the power consumption in the menu icon will display and the accumulated power consumption will display in the temperature and the current time display section Press L to exit If no button is selected for about 1 minute after setup it exits the setup m...

Page 17: ...ds before WLAN module operates in access point mode In the case WLAN module is not installed the access point mode does not work Indoor Outdoor Unit Model Information Table Category Display Values Outdoor Unit Indoor Unit Capacity Data unavailable common No Model No Model No Model 0 Multi V 1 Multi 2 Single No Model No Model No Model 0 CST 5 Direct Expansion Ventilation A Hydrokit for medium tempe...

Page 18: ...mode Excessive cooling is harmful for your health The desired temperature in the remote controller and the unit may not be identical because the SLEEP mode runs automatically adjusting the desired temperature for a pleasant cooling Some product without a temperature control by 0 5 C operates OFF reservation instead of SLEEP reservation Programming Simple Reservation Simple reservation function can...

Page 19: ...ystem will stop at the time programmed When the schedule is cancelled icon will disappear Programming ON Reservation It turns ON automatically at the time programmed Press E button to enter the programming mode Press E button repeatedly to select ON ON icon and AM icon will blink Set AM PM using F G button Move to Hour using H I button and set the Hour using F G button Move to Minute using H I but...

Page 20: ...r button is blinking set the Hour Program the Hour and Minute as the same way as the ON time setting Change the time using F G button You can program the Hour from 1 hour up to 12 hours Move to Minute section in the ON setting using I button When the Minute button is blinking press Up Down but ton to set the Minute Move to AM PM section in the OFF setting using I but ton AM PM setting is the same ...

Page 21: ...ators and direct expansion ventilators Fig 2 1 Air conditioner mode Fig 2 2 Vent mode General Ventilation Single Operation General Ventilation Wired Remote Controller Direct Expansion Ventilation Direct Expansion Ventilation Wired Remote Controller Wired Remote Controller Air conditioner Indoor unit General Ventilation Wired Remote Controller Air conditioner Indoor unit General Ventilation Interli...

Page 22: ...interlocked This function is to cool off the air in the room using a ventilator while air conditioner function is operating Press 1 button on the remote controller It can be used only when the air conditioner and the general ventilator are interlocked Press 2 button in the Vent mode to run the ventilator Press P button in the Vent mode to change the ventilation operation mode Each time you press t...

Page 23: ...ent Vent mode Remote controller display window Description Heat exchange Circulating the air in the room without any heat loss Normal Circulating the air in the room without using an electric heating exchanger Auto Circulating the air in the room by comparing the indoor out door temperatures automatically Ventilation Product User Manual Interlinked Operation with Direct Expansion Ventilation It ca...

Page 24: ... Vent mode The additional vent mode converts Fast Energy saving sequentially Press K button when the icon blinks on the display screen Press L button to exit Press L button to exit The additional mode of general ventilation and direct expansion ventilation is identical The additional mode settings for air cleaner heater humidifier are as the same as the air condi tioner Ventilation Product Additio...

Page 25: ...nstaller and we do not provide service free of charge Ventilation Product Installer Setting Functions Ventilation Product Reservation Settings Sleep Reservation You can program a ventilator to run moderately while you are sleeping Press E button to enter the schedule programming mode Press E button repeatedly to move to SLEEP in the menu icon will blink and the scheduled time will display Set the ...

Page 26: ...n in the same operating mode as the other Indoor Unit after about 5 seconds Ventilation Product Installer Setting Functions Ventilation Fan Speed This function is to change the standard fan speed of ventilation Press and hold B button for more than 3 seconds to enter the installer settings mode If pressing only once briefly it will enter the user settings mode Make sure to press and hold for more ...

Page 27: ...ed remote controller lock is programmed this function will not work Some product may not include this function Outage Compensation Function If power supply fails due to outage or other reasons the outage compensation function automati cally retrieves the operating conditions previously programmed before the power failure Thus you don t need to press any buttons Additional functions will not be ret...

Page 28: ...installing the extension cable check the connecting direction of the connector of the remote controller side and the product side for correct installation If you install the extension cable in the opposite direction the connector will not be connected Specification of extension cable 2547 1007 22 2 core 3 shield 5 or above Wall Side Wall Side Wall Side Wall Side Connecting order Separating order P...

Page 29: ...ion through the product manual When installing more than 2 wired remote con trollers to one air conditioner please connect as the right picture When installing more than 2 units of wired remote controller to one air conditioner set one wired remote controller as master and the others all as slaves as shown in the right picture You cannot control the group as shown in the right for some products Re...

Page 30: ...eight 01 Low 02 Med 03 High 04 Very High 06 Static Pressure 01 V H 02 F H 03 V L 04 F L 07 Master Setting 00 Slave If only Plus1 series models 01 Master 00 Group setting 01 Single setting 08 Override Setting 00 Slave 01 master 09 Dry Contact 00 Auto Off 01 Auto On 10 Release 3 Min Delay 01 Set 11 Zone State 01 Variable 02 Fixed 12 Celsius Fahrenheit Switching 00 Celsius 01 Fahrenheit Optimized onl...

Page 31: ...the test run Operation selection temperature up down fan speed Airflow run stop button When cooling When heating Ventilator code table Some contents may not be displayed depending on the product function Code Function Value 01 Test run 01 Test Run Setup 02 Address Setting 00 FF Address of Central Control 03 SA Supply Air ESP ESP Step ESP Value Example 01 Low 0 255 02 High 03 Super High 04 EA Exhau...

Page 32: ...eed ESP value is set for the product without very weak wind or power wind the system may not operate ESP level Fan Speed 01 02 03 04 05 SLOW LOW MED HIGH POW The ESP set value can be programmed 0 225 Installer Setting Setting Address of Central Control This function is to be used when connecting to a central controller See the central controller manual for more detailed functions Press and hold B ...

Page 33: ...oor unit Operating by a temperature sensor in the indoor unit 03 2TH Cooling Operating at a higher temperature after comparing the temperatures between indoor unit and cable remote control Some product may operate at a lower temperature Heating Operating at a lower temperature after comparing the temperatures between indoor unit and cable remote control 2TH functions features vary according to the...

Page 34: ...Selection This function is to adjust the level of fan speed according to the height of ceiling for ceiling type product Press and hold B button for more than 3 seconds to enter the installer settings mode If pressing only once briefly it will enter the user settings mode Make sure to press and hold for more than 3 seconds Move to Ceiling Height Selection in the menu using B and then it displays as...

Page 35: ...ude the operation master slave selection function figure 1 Installer Setting Remote Controller Master Slave Setup This function is the settings when controlling 2 remote controls or group control P Press and hold B button for more than 3 seconds to enter the installer settings mode If pressing only once briefly it will enter the user settings mode Make sure to press and hold for more than 3 second...

Page 36: ... for Zone State Set value Set value for Zone State 01 Variable 02 Fixed Installer Setting Dry Contact mode Setting This function is available only for the products with dry contact device Press and hold B button for more than 3 seconds to enter the installer settings mode If pressing only once briefly it will enter the user settings mode Make sure to press and hold for more than 3 seconds Move to ...

Page 37: ... 00 Old 01 New CAUTION If you set zone number incorrectly the product may malfunction especially in zone control This function must carried out by a certificated technician Installer Setting Celsius Fahrenhei Switching This function is used for switching the display between Celsius and Fahrenheit Optimized only for U S A Press and hold B button for more than 3 seconds to enter the installer settin...

Page 38: ... exit the changes will not apply Code value for Centigrade Control Settings Set value Set value for Centigrade Control Settings 00 1 C Control 01 0 5 C Control Installer Setting Zone Number Setting This function is only available on some products Zone Number is to set the number of installed zones It s possible to control only in zone new type Select the Zone Number Setting using F G button Press ...

Page 39: ... in place of and does not supplement heat pump Emergency Heater setting Function sets following conditions 1 Emergency Heater operation while in error or outdoor unit operates cooling cycle 2 Emergency Heater operation in Low Ambient temperature 3 Fan speed setting during Emergency Heater operation Select the Emergency Heater Setting using F G button If 00 is set at this stage setting 2 setting 3 ...

Page 40: ...eater setting 00 not installed 01 installed general 02 installed duct type Installer Setting Function Control Setting for Group Control This function is to control the common functions or some functions based on the master indoor unit criteria for group control Press and hold B button for more than 3 seconds to enter the installer settings mode If pressing only once briefly it will enter the user ...

Page 41: ... to exit If no button is selected for about 25 seconds after setup it exits the setup mode automatically If Set button is not selected before you exit the changes will not apply Code value Set value Set value for Refrigerant Leak Detector Installation 00 Not installed 01 Installed Installer Setting Indoor Unit Address Checking This function is to identify the indoor unit address assigned by the ou...

Page 42: ...etting Static Pressure Step Setting This function is applied to only duct type Setting this in other cases will cause malfunction This function is only available on some models This is the function that static pressure of the product is divided in 11 steps for setting Select the code value and set value for each function using F G button Press and hold B button for more than 3 seconds to enter the...

Page 43: ... exits the setup mode automatically If Set button is not selected before you exit the changes will not apply Code value Set value Set value 00 air conditioner fan operate very low 01 air conditioner fan off Installer Setting Primary Heater control setting It is a function that sets the outdoor unit to operate with auxiliary heat source and the heater to run with main heat source in heating mode Se...

Page 44: ... Code value Set value value time setting 00 0 minute 01 10 minutes 02 30 minutes 03 60 minutes Set value Installer Setting Indoor unit Auto Start setting It is a function that sets whether to restore the indoor unit operation by resuming the previous power on state or as power off state in the power failure compensation Select the code value and set value for each function using F G button Press a...

Page 45: ... BREAKDOWN Please first check the items below for product s defects before consulting to service center Symptoms Check up Management It has no power on Is air conditioner s power on Please check up circuit breaker Please check up wire remote con troller s setup condition Are air conditioner and remote controller properly connected with cable Please connect air conditioner and remote controller cab...

Reviews: