background image

24

FUNCIONAMIENTO

FUNCIONAMIENTO

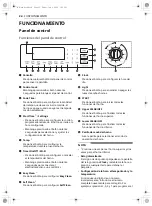
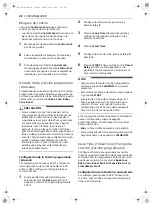
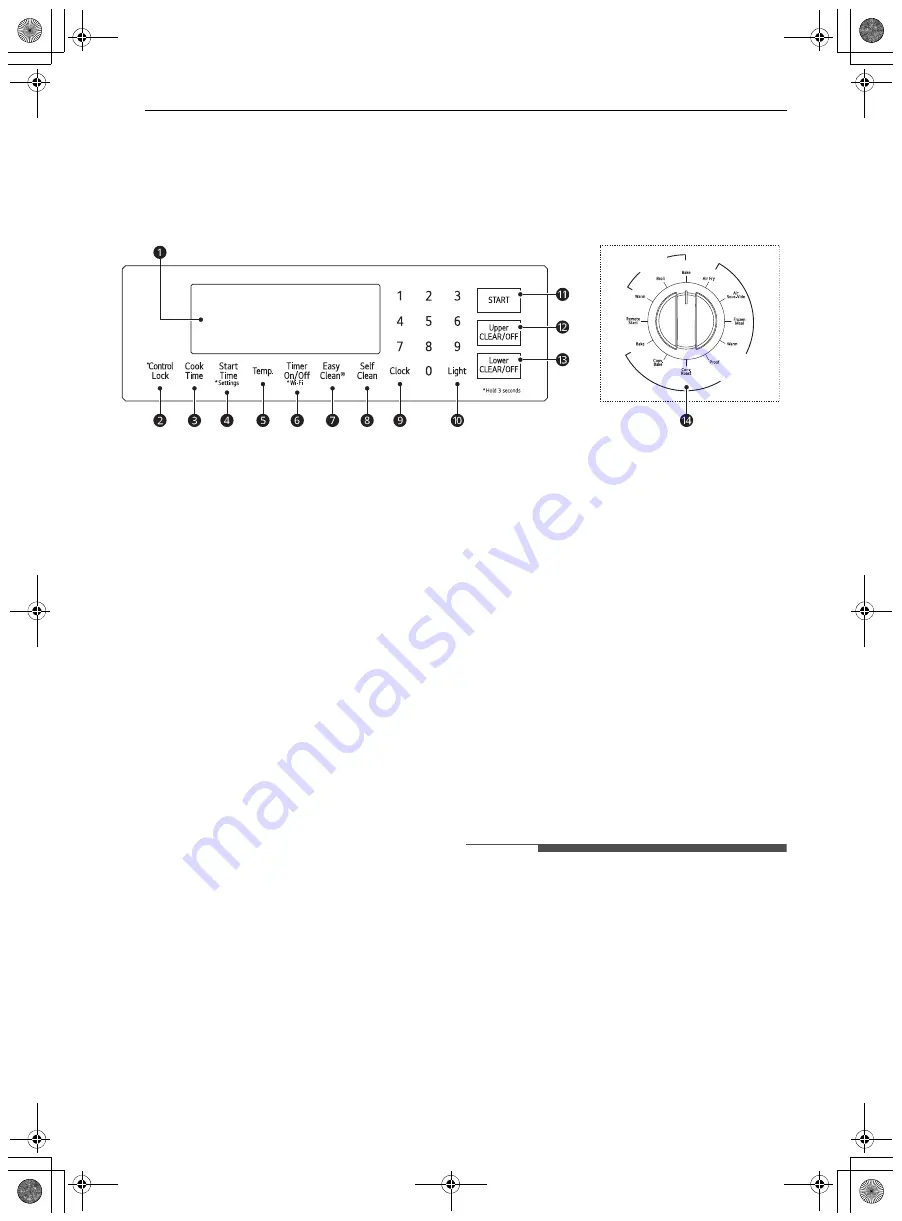
Panel de control

Funciones del panel de control

a

Pantalla

Presione cualquier botón del panel de control 

para activar la pantalla.

b

Control Lock

Mantenga presionado el botón durante 

3 segundos para bloquear el panel de control.

c

Cook Time


1

Presione el botón para configurar la cantidad 

de tiempo que desea cocinar la comida. El 

horno se apaga cuando se agota el tiempo de 

cocción establecido.

d

Start Time


1

 / 

Settings

• Presione el botón para configurar la cocción 

programada retrasada. El horno se inicia a la 

hora configurada.

• Mantenga presionado el botón durante 

3 segundos para seleccionar y ajustar las 

configuraciones del horno.

e

Temp.


1

Presione el botón para configurar la 

temperatura durante el uso del horno.

f

Timer On/Off

 / 

Wi-Fi

• Presione el botón para configurar o cancelar 

el temporizador del horno.

• Mantenga presionado el botón durante 

3 segundos para conectar el 

electrodoméstico a una red Wi-Fi.

g

Easy Clean


1

Presione el botón para configurar 

Easy Clean

.

h

Self Clean


1

Presione el botón para configurar 

Self Clean

.

i

Clock

Presione el botón para configurar la hora del 

día.

j

Light

Presione el botón para encender o apagar las 

luces de ambos hornos.

k

START

Presione el botón para iniciar todas las 

funciones del horno.

l

Upper CLEAR/OFF

Presione el botón para finalizar todas las 

funciones del horno superior.

m

Lower CLEAR/OFF

Presione el botón para finalizar todas las 

funciones del horno inferior.

n

Perilla de modo del horno

Gire la perilla para seleccionar el modo de 

operación del horno.

NOTA

1

 Presione una vez para el horno superior y dos 

veces para el horno inferior.

Reloj intermitente

Si el signo de dos puntos parpadea en la pantalla 

del reloj, presione 

Clock

 y restablezca la hora, o 

presione cualquier tecla para detener el 

parpadeo.

Configuración de la hora, el temporizador y la 

temperatura

Si introduce un dígito de un número 

incorrectamente, introduzca el número 

complete nuevamente para corregirlo. Por 

ejemplo, si presiona 1, 0, 3 y 1 para programar el 

/2

:

(

5

83

3(

5

ls_main.book.book  Page 24  Friday, July 8, 2022  1:24 PM

Summary of Contents for PrintProof LTGL6937 Series

Page 1: ...al thoroughly before operating the appliance and keep it handy for reference at all times ENGLISH LTGL6937 MFL68920543 Rev 02_070822 www lg com Copyright 2022 LG Electronics Inc All Rights Reserved us_main book book Page 1 Friday July 8 2022 1 22 PM ...

Page 2: ...rom a neighbor s phone Follow the gas supplier s instructions If you cannot reach your gas supplier call the fire department Installation and service must be performed by a qualified installer service agency or the gas supplier WARNING Never Operate the Top Surface Cooking Section of this Appliance Unattended Failure to follow this warning statement could result in fire explosion or burn hazard th...

Page 3: ...ers 18 Assembling the Surface Burners 18 Checking Ignition of the Surface Burners 18 Adjusting the Surface Burner to the Low Flame Simmer Setting 19 Optional Rear Filler 19 Installing the Rear Filler 19 Anti tip Device 19 Installing the Anti tip Device 20 Test Run 20 Test the Range Before Use 22 OPERATION 22 Control Panel 22 Control Panel Features 22 Knob Display Lighting 23 Changing Oven Settings...

Page 4: ... Wi Fi 49 RF Module Specifications 49 FCC Notice 50 FCC RF Radiation Exposure Statement 50 Open Source Software Notice Information 50 Smart DiagnosisTM Feature 50 Using LG ThinQ to Diagnose Issues 50 Using Audible Diagnosis to Diagnose Issues 52 MAINTENANCE 52 Cleaning 52 Interior 52 Exterior 53 Gas Surface Burners 55 EasyClean 57 Self Clean 60 Removing Assembling Lift Off Oven Doors 62 Removing A...

Page 5: ...e and or the range Verify the anti tip device has been properly installed and engaged by following the guide on the anti tip bracket template Engage the range to the anti tip device by following the guide on the anti tip bracket template Ensure the anti tip device is re engaged when the range is moved by following the guide on the anti tip bracket template Re engage the anti tip device if the rang...

Page 6: ...fied installer according to the installation instructions Any adjustment and service should be performed only by qualified gas range installers or service technicians Make sure your range is properly adjusted by a qualified service technician or installer for the type of gas natural or LP that is to be used Your range can be converted for use with either type of gas See the installation instructio...

Page 7: ...en door may cause the range to tip resulting in serious burns or other injury Never place fingers between the door hinge and front oven frame Hinge arms are spring mounted If accidentally hit the hinge will slam shut against the oven frame and injure your fingers Do not leave children alone or unattended where a range is hot or in operation They could be seriously burned Do not let anyone climb st...

Page 8: ...tible materials such as gasoline or other flammable vapors and liquids in the vicinity of this or any other appliance Do not place flammable materials in the oven or near the cooktop Do not allow cooking grease or other flammable materials in or near the range Do not use water on grease fires Never touch a flaming pan Turn the controls off Smother a flaming pan on a surface burner by covering the ...

Page 9: ...ay also protect you from getting burned by touching hot surfaces of the door or oven walls When placing or removing a griddle always wear oven mitts When using cooking or roasting bags in the oven follow the manufacturer s directions Use only glass cookware that is recommended for use in gas ovens For safety and better cooking performance always bake and broil with the oven door closed Open door b...

Page 10: ...c Upper Oven Door g Gasket d Lower Oven Door h Rack Oven Range Models LTGL6937 Description Gas Slide In Oven Range Electrical requirements 120 V 60Hz 8 5 Amp Exterior Dimensions 29 7 8 W x 37 1 8 H x 29 1 4 D D with door closed 75 9 cm W x 94 3 cm H x 74 3 cm D D with door closed Height to cooking surface 36 91 4 cm Net weight 210 3 lb 95 4 kg Capacity Upper Oven 2 6 cu ft Lower Oven 4 3 cu ft Tot...

Page 11: ...en Only Optional Accessories sold separately a Grid b Broiler pan NOTE Contact LG Customer Service at 1 800 243 0000 1 888 542 2623 in Canada if any accessories are missing For your safety and for extended product life only use authorized components The manufacturer is not responsible for product malfunction or accidents caused by the use of separately purchased unauthorized components or parts Th...

Page 12: ...o do so can result in back or other injury Do not use the door handles to push or pull the range during installation or when moving the range out for cleaning or service Doing so can result in serious damage to the door of the range To reduce the risk of burns do not move this appliance while it is hot NOTE Remove packing material tape and any temporary labels from your range before using Do not r...

Page 13: ... range may be placed with 0 clearance flush at the back wall Dimensions Dimensions LTGL6937 A Width 29 7 8 758 8 mm B Height 37 1 8 943 mm C Depth Includes Door Handle 29 17 64 743 2 mm D Height Excludes Vent Trim 36 913 0 mm E Depth Includes only the product body that is loaded into the cabinet Excludes door drawer and handles 24 3 4 629 4 mm F Depth Excludes Door Handle 26 7 8 683 mm G Depth whe...

Page 14: ...stion problems with the gas cooking appliance resulting in personal injury or unintended operation a Minimum distance from top of range to combustible surface overhead 30 76 2 cm b Minimum clearance to left right wall 5 12 7 cm c Maximum depth for cabinets above countertops 13 33 0 cm d Front edge of the range side panel forward from cabinet 2 1 4 6 3 cm e To cabinets below cooktop and at the rang...

Page 15: ...l First check direction a Then check direction b 2 If the level doesn t show that the rack is level adjust the leveling legs with a wrench Connecting Gas Providing Adequate Gas Supply Your range is designed to operate at a pressure of 5 of water column on natural gas or 10 of water column on LP Make sure you are supplying your range with the type of gas for which it is configured This range is con...

Page 16: ...ep it from turning 2 Install a male 1 2 flare union adapter to the 1 2 NPT internal thread at the inlet of the pressure regulator Use a backup wrench on the pressure regulator fitting to prevent damage Check that the gas pressure regulator valve is in the open position a Lever s open position b Lever s closed position NOTE The gas pressure regulator valve is open when shipped If the range does not...

Page 17: ...f this appliance is equipped with a 3 prong grounding plug which mates with a standard 3 prong grounding wall receptacle to minimize the possibility of electric shock hazard from this appliance Where a standard two prong wall receptacle is encountered it is the personal responsibility and obligation of the customer to have it replaced with a properly grounded three prong wall receptacle Ensure pro...

Page 18: ...burner knob and simultaneously push in and turn to the Lite position You will hear a clicking sound indicating proper operation of the spark module Once the air has been purged from the supply lines the burner should ignite within 4 seconds After the burner ignites rotate the knob out of the Lite position Try each burner in succession until all burners have been checked Quality of Flames The combu...

Page 19: ...Optional Rear Filler Installing the Rear Filler If the counter does not bridge the opening at the rear wall the rear filler kit which is provided with the slide in range will be needed NOTE If the countertop depth is greater than 25 3 8 there will be a gap between the filler kit and the back wall If the countertop depth is less than 24 3 4 the control panel will not sit flush with the countertop 1...

Page 20: ...ppliance Using the Anti Tip Bracket Template The anti tip bracket is packaged with an installation template The instructions include necessary information to complete the installation Read and follow the range installation instruction sheet Screws c must enter wood or concrete a Anti tip Bracket b Wall Plate Engaging the Anti tip Device a Anti tip Bracket b Leveling Leg 1 Slide the range against t...

Page 21: ...m inside the oven cavity 2 Turn oven mode knob to select Broil Hi appears in the display Make sure the door is closed 3 Press START NOTE It may take between 30 and 90 seconds for the burner to start heating us_main book book Page 21 Friday July 8 2022 1 22 PM ...

Page 22: ...et the Easy Clean h Self Clean 1 Press the button to set the Self Clean i Clock Press the button to set the time of day j Light Press the button to turn both oven lights on or off k START Press the button to start all oven features l Upper CLEAR OFF Press the button to end all upper oven features m Lower CLEAR OFF Press the button to end all lower oven features n Oven Mode Knob Turn the knob to se...

Page 23: ...t automatically turns on when the door is opened Press Light to manually turn both oven lights on NOTE The oven light cannot be turned on if the Self Clean function is active The oven light turns off automatically after 90 seconds Timer On Off The Timer serves as an extra timer in the kitchen that beeps when the set time has run out It does not start or stop cooking The Timer feature can be used d...

Page 24: ...elected Convection Auto Conversion automatically converts the standard recipe temperature entered to a convection temperature by subtracting 25 14 This auto converted temperature shows on the display For example select Conv Bake enter 350 and 325 shows on the display after preheat Convection Auto Conversion is enabled by default To change the setting follow these instructions 1 Press and hold the ...

Page 25: ...ss changed by the user 1 Press and hold the Start Time button for 3 seconds Press the Start Time button repeatedly until Unitappears in the display 2 Press 1 to select F Fahrenheit or C Celsius 3 Press START to accept the change Control Lock The Control Lock feature locks the control panel and oven mode knob When the Control Lock feature is activated the cooktop still functions but the oven mode k...

Page 26: ...of modes Setting a Timed Cook For example to bake at 300 F for 30 minutes first set the clock to the correct time of day 1 Turn the oven mode knob to select Bake for the upper or lower oven 350 F appears in the display 2 Set the temperature Press 3 0 and 0 3 Press Cook Time Timed flashes in the display Bake 0 00 and 300 F appear in the display 4 Set the baking time press 3 and 0 for 30 minutes The...

Page 27: ...r min Timer 12 hr 0 01 min sec 11 59 hr min 24 hr 0 01 min sec 11 59 hr min Cook Time 12 hr 0 01 hr min 11 59 hr min 24 hr 0 01 hr min 11 59 hr min Conv Bake 300 F 275 F 550 F 285 C 350 F 325 F 12 hr Conv Roast 300 F 275 F 550 F 285 C 350 F 325 F 12 hr Broil Lo 300 F 0 01 hr min Hi 400 F 3 00 hr min Hi 3 hr Bake 170 F 80 C 550 F 285 C 350 F 12 hr Proof 0 01 hr min 11 59 hr min 12 hr Warm 3 hr Prob...

Page 28: ...age turn cookware handles toward the side or back of the range without extending them over adjacent burners Never leave any items on the cooktop The hot air from the vent may ignite flammable items and will increase pressure in closed containers which may cause them to burst Carefully watch foods being fried at a high flame setting Always heat fat slowly and watch as it heats If frying combination...

Page 29: ... smallest burner is used for delicate foods such as sauces or foods that require low heat for a long cooking time c Dual burner Extra large burner The dual burner is the maximum output burner Like the other four burners it can be turned down from Hi to Lo for a wide range of cooking applications This burner is also designed to quickly bring large amounts of liquid to a boil It can be used with coo...

Page 30: ...poor heating properties and is usually combined with copper aluminum or other metals for improved heat distribution Combination metal skillets work satisfactorily if they are used with medium heat as the manufacturer recommends Enamelware Under some conditions the enamel of this cookware may melt Follow cookware manufacturer s recommendations for cooking methods Glass There are two types of glass ...

Page 31: ...e to fit securely in the wok grate The wok grate and griddle cannot be used at the same time For best performance place the wok grate over the extra large right front burner Do not use the wok grate with cookware other than a wok Clean the wok grate with hot soapy water Do not use oven cleaners steel wool or abrasive cleansers Do not clean with the self clean mode Using Stove Top Grills Do not pla...

Page 32: ...riod adjust the griddle temperature settings as the griddle retains heat In Case of Power Failure In case of a power failure you can light the gas surface burners on your range with a match Surface burners in use when an electrical power failure occurs will continue to operate normally CAUTION Use extreme caution when lighting burners with a match It can cause burns and other damage 1 Hold a lit m...

Page 33: ... ducts at the center above the burner grate Do not block the oven vent when cooking to allow for proper air flow Do not touch vent openings or nearby surfaces during any cooking operation Do not cover racks or oven bottom with aluminum foil You may see condensation on the oven door glass As the oven heats up the heated air in the oven may cause condensation to appear on the oven door glass These w...

Page 34: ...n The taps on the glass panel must be hard enough to be audible Loud noises near the oven may activate the InstaView function Knocking on either door activates InstaView in both ovens Bake Bake is used to prepare foods such as pastries breads and casseroles The oven can be programmed to bake at any temperature from 170 80 to 550 285 The default temperature is 350 175 Setting the Bake Function For ...

Page 35: ...et adjusted temperature a tone sounds and the oven light flashes on and off The display shows the auto converted oven temperature 350 F and the fan icon 4 When cooking has finished or to cancel press CLEAR OFF NOTE The oven fan runs while convection baking The fan stops when the door is open In some cases the fan may shut off during a convection bake cycle Tips for Convection Baking Use Convection...

Page 36: ...nv Roast 2 Set the oven temperature touch 3 7 and 5 until 375 F appears in the display 3 Press Start 4 Set the probe temperature touch 1 6 and 0 until 160 F appears in the display 5 Press Start NOTE The default probe temperature is 150 F 65 C but can be changed to any temperature between 80 F 27 C and 210 F 100 C The display shows the changing probe temperature When the set probe temperature is re...

Page 37: ...temperature together in one oven Rack and Pan Placement Category Desired Doneness Probe Temp Beef Lamb and Veal Rare 130 F 54 C Medium rare 140 F 60 C Medium 150 F 66 C Well done 160 F 71 C Pork Well done 170 F 77 C Poultry Breast Well done 170 F 77 C Thigh Well done 180 F 82 C Stuffing Well done 165 F 74 C Category Desired Doneness Probe Temp Multiple rack baking Offset rack Position 4 Heavy duty...

Page 38: ...zen 2 2 1 1 Pastry Crust From scratch Refrigerated 1 1 1 1 Breads Biscuit canned Biscuit from scratch Muffins 1 1 1 1 1 1 Desserts Fruit crisps and cobblers from scratch Pies from scratch 2 crust fruit 1 1 1 1 Food Rack position Lower Oven Beef Rib Rare Medium Well done 1 1 1 Boneless rib top sirloin Rare Medium Well done 1 1 1 Beef tenderloin Rare Medium 1 1 Pork Rib 1 Bone in sirloin 1 Ham cooke...

Page 39: ...hours after cooking has finished The Warm function may be used without any other cooking operations or can be used after cooking has finished using Timed Cook or Delayed Timed Cook Setting the Warm Function 1 Turn the oven mode knob to select Warm for the upper or lower oven 2 Press START 3 Press CLEAR OFF at any time to cancel NOTE The Warm function is intended to keep food warm Do not use it to ...

Page 40: ...to the intense heat associated with broiling it is normal to experience smoke during the cooking process This smoke is a natural byproduct of searing and should not cause you to worry If you are experiencing more smoke than you are comfortable with use the following tips to reduce the amount of smoke in your oven Always use a broiler pan Do not use saute pans or regular baking sheets for safety re...

Page 41: ...nce Beef Steaks 1 thick 1 to 11 2 lbs Rare 2 4 6 2 3 Steaks less than 1 thick cook through before browning Pan frying is recommended Slash fat Medium 2 5 7 3 4 Well done 2 6 8 4 5 11 2 thick 2 to 2 1 2 lbs Rare 1 8 3 4 Medium 1 9 4 5 Well done 1 10 5 6 Chicken 1 whole 2 to 21 2 lbs split lengthwise 1 8 10 5 7 Broil skin side down first 2 Breasts 1 8 9 5 6 Fish Fillets 1 4 to 1 2 thick 1 5 2 4 Hand...

Page 42: ... of bone in foil to reduce burning Seafood When broiling skin on fish always use the Lo broil setting and always broil the skin side last Seafood is best consumed immediately after cooking Allowing seafood to rest after cooking can cause the food to dry out It is a good idea to rub a thin coating of oil on the surface of the broiling pan before cooking to reduce sticking especially with fish and s...

Page 43: ...efits Healthier Compared to other cooking methods Air Sous Vide retains most of the original nutrients in food Safe and Convenient The long cooking times used in Air Sous Vide cooking allow food to be pasteurized Because food is vacuum packed before cooking the unopened pouches can be quickly chilled in an ice bath and stored in the freezer or refrigerator after cooking Crisp and Moist Results The...

Page 44: ...a wire rack inside a foil lined broiler pan a Broiler Pan For best results cook food on a single rack placed in positions suggested in the chart in this manual Spread the food out evenly in a single layer Use either the optional air fry tray available from LG or a dark baking tray with no sides or short sides that does not cover the entire rack This allows for better air circulation If desired spr...

Page 45: ...etting before you start Air Fry and leave it on for 15 minutes after you re done Open a window or sliding glass door if possible to make sure the kitchen is well ventilated Keep the oven free from grease buildup Wipe down the interior of the oven before and after air frying once the oven has cooled Run oven cleaning cycles Easy Clean or SelfClean regularly depending on how often and what types of ...

Page 46: ...d salt and pepper to taste Fresh Chicken Drumsticks 70 450 3 30 40 Thighs 40 450 3 30 35 Breasts 40 450 3 30 35 OTHER Frozen Onion Rings Breaded 20 400 3 20 30 Frozen Spring Rolls 0 7 oz each 45 425 3 25 35 Thin Sausage 2 5 oz each diameter 0 8 90 400 3 25 35 Frozen Coconut Shrimp 25 425 3 20 30 Brush or lightly spray the surface of food with oil Fresh Scallops on the half shell 35 oz 35 425 3 20 ...

Page 47: ...ture cannot be changed and the timer light and alarm functions are disabled When the Sabbath mode is activated the oven does not turn off until the Sabbath mode is deactivated In Sabbath mode all function buttons are inactive sb will appear in the display On double ovens either oven or both ovens can be put in Sabbath mode 1 Disconnect the probe The probe function is not available in Sabbath mode ...

Page 48: ...r or password delete the connected appliance from the LG ThinQ application and connect it again This information is current at the time of publication The application is subject to change for product improvement purposes without notice to users In the lower oven Scan to Cook cannot be used while the timer is running Cancel the timer operation to use Scan to Cook Before Using LG ThinQ Application 1...

Page 49: ...de notifications are sent to your smartphone when upgradable features are available 2 Press the upgrade notification on your smartphone to enter the LG UPgrade Center in the LG ThinQ app 3 In the LG UPgrade Center select a new function and press the Upgrade button Do not unplug the product during the upgrade as doing so may interrupt the upgrade process 4 After the upgrade is complete check the gu...

Page 50: ... equipment should be installed and operated with a minimum distance of 20 cm 7 8 inches between the antenna and your body Users must follow the specific operating instructions for satisfying RF exposure compliance Open Source Software Notice Information To obtain the source code that is contained in this product under GPL LGPL MPL and other open source licenses that have the obligations to disclos...

Page 51: ...e lock and then reactivate it 2 Hold the mouthpiece of your phone in front of the Smart Diagnosis logo located on the control panel a Max 3 8 10 mm 3 Keep the phone in place until the tone transmission has finished The display will count down the time Once the countdown is over and the tones have stopped the diagnosis will be displayed in the application NOTE For best results do not move the phone...

Page 52: ...e range For cleaning use a damp cloth and mild soapy water or a 50 50 solution of vinegar and water Rinse with clean water and polish dry with a soft cloth CAUTION Do not use abrasive cleansers strong liquid cleaners plastic scouring pads or oven cleaners on the manifold panel Doing so will damage the finish Do not try to bend the knobs by pulling them up or down and do not hang a towel or other o...

Page 53: ...proper container Wash and rinse the broiler pan and grid in hot water with a soap filled or plastic scouring pad If food has burned on sprinkle the grid with cleaner while hot and cover with wet paper towels or a dishcloth Soaking the pan will remove burned on foods Both the broiler pan and grid may be cleaned with a commercial oven cleaner or in the dishwasher Oven Racks Remove the oven racks bef...

Page 54: ...the burner heads in a solution of mild liquid detergent and hot water for 20 30 minutes For stubborn stains use a toothbrush or wire brush The burners will not operate properly if the burner ports or electrodes are clogged or dirty Burner caps and heads should be cleaned routinely especially after excessive spillover Burners will not light if the cap is removed After Cleaning the Burner Heads Caps...

Page 55: ...ld credit card 3 Clean the cooktop with a wet non scratch scouring sponge or pad NOTE EasyClean Stainless Steel Cooktop To avoid scratching the cooktop surface do not use abrasive or metal scouring sponges or pads Rub in the direction of the grain to avoid damaging the surface a Direction of the grain As with any cooktop some stains may not be removable To remove hardened residue on the cooktop us...

Page 56: ...EasyClean cycle will not be activated until the oven cavity cools down The range should be level to ensure that the bottom surface of the oven cavity is entirely covered by water at the beginning of the EasyClean cycle For best results use distilled or filtered water Tap water may leave mineral deposits on the oven bottom Soil baked on through several cooking cycles will be more difficult to remov...

Page 57: ... some light soils remain repeat the above steps making sure to thoroughly soak the soiled areas For models with Self Clean function If stubborn soils remain after multiple EasyClean cycles run the Self Clean cycle Be sure that the oven cavity is empty of oven racks and other accessories and that the oven cavity surface is dry before running the Self Clean cycle Consult the Self Clean section of yo...

Page 58: ...f Clean cycle of any range Do not line the oven walls racks bottom or any other part of the range with aluminum foil or any other material Doing so will destroy heat distribution produce poor baking results and cause permanent damage to the oven interior aluminum foil will melt to the interior surface of the oven Do not force the door open This can damage the automatic door locking system Use care...

Page 59: ...l racks and accessories from the oven 2 Turn the oven mode knob to select Self Clean The oven defaults to the recommended four hour Self Clean for a moderately soiled oven Press buttons as below to select a self clean time from 3 to 5 hours 1 3 hours 2 4 hours 3 5 hours 3 Press START 4 Once the Self Clean cycle is set the oven door locks automatically and the lock icon k displays You will not be a...

Page 60: ...ing the glass may weaken its structure causing an increased risk of breakage at a later time Be careful when removing and lifting the door Do not lift the door by the handle The door is very heavy Upper Oven Removing the Door 1 Fully open the door 2 Lift up and rotate the hinge locks toward the hinge until they stop 3 Close the door to 30 degrees a you will feel the door stop The hinge locks will ...

Page 61: ...ully closed If the position is correct the hinge arms will move freely a about 5 5 Lift door up and out until the hinge arms are clear of the slots Assembling the Door 1 Firmly grasp both sides of the door at the top 2 With the door at the same angle as the removal position seat the indentation of the hinge arms into the bottom edge of the hinge slots The notch in the hinge arms must be fully seat...

Page 62: ...ng the Oven Light The oven light is a standard 40 watt appliance halogen lamp It turns on when the oven door is open When the oven door is closed press Light to turn it on or off WARNING Make sure that the oven and lamp are cool Disconnect the electrical power to the range at the main fuse or circuit breaker panel Failure to do so can result in severe personal injury death or electrical shock 1 Un...

Page 63: ...63 MAINTENANCE ENGLISH 6 Plug in the range or reconnect the power us_main book book Page 63 Friday July 8 2022 1 22 PM ...

Page 64: ... and off more frequently on your new oven This is NORMAL Q Why is the time flashing A This means that the product has just been plugged in or that it has experienced a power interruption To clear the flashing time touch any button and reset the clock if needed Q During convection cooking the fan stops when I open the door Is that normal A Yes this is normal When the door is opened the convection f...

Page 65: ...ater it can negatively affect the cleaning performance Repeat the EasyClean process using sufficient water For models with Self Clean function Sugar based and certain greasy soils are especially hard to clean If some stubborn soils remain use the Self Clean feature to thoroughly clean your oven Q Soils on my oven walls are not coming off How can I get the oven walls clean A Soils on the side and r...

Page 66: ...n cycle on both ovens at the same time Some oven surfaces will be hot after the cycle completes running Avoid leaning or resting on the oven door glass while cleaning the oven cavities You cannot run the Self Clean cycle on both ovens at the same time Q Is it safe for water to spill into the oven bottom vents during cleaning A Some water spillage into the oven bottom vents gas range is okay Howeve...

Page 67: ...or the rack is not level See the Oven section in the Operation chapter Incorrect cookware or cookware of improper size being used See the Oven section in the Operation chapter Oven thermostat needs to be adjusted See the Adjusting the Oven Thermostat section in the Operation chapter The Clock is not set correctly See Changing Oven Settings in the OPERATION chapter Aluminum foil used improperly in ...

Page 68: ...any for service Oven smokes excessively during broiling Control not set properly Follow instructions under Setting Oven Controls Meat too close to the element Reposition the rack to provide proper clearance between the meat and the element Preheat broil element for searing Meat not properly prepared Remove excess fat from meat Cut remaining fatty edges to prevent curling Insert on broiler pan wron...

Page 69: ... Clean up heavy spillovers before starting the clean cycle Heavily soiled ovens may need to Self Clean again or for a longer period of time CLEAN and door flash in the display On some models The Self Clean cycle has been selected but the door is not closed Close the oven door Loc is on in the display when you want to cook On some models The oven is locked because of the Control Lock Lockout featur...

Page 70: ...f the range and should be considered normal operation Fan operation During Bake Mode This is to ensure even baking results It is normal for the fan to operate periodically throughout a normal bake cycle in the oven Problem Possible Cause Solution Crackling or popping sound This is the sound of the metal heating and cooling during both the cooking and Self Clean functions This is normal Fan noise A...

Page 71: ...outer To check the router frequency check with your Internet service provider or the router manufacturer The distance between the appliance and the router is too far If the appliance is too far from the router the signal may be weak and the connection may not be configured correctly Move the router closer to the appliance or purchase and install a Wi Fi repeater Problem Possible Cause Solution us_...

Page 72: ...RECT INCIDENTAL CONSEQUENTIAL SPECIAL OR PUNITIVE DAMAGES INCLUDING WITHOUT LIMITATION LOST GOODWILL LOST REVENUES OR PROFITS WORK STOPPAGE IMPAIRMENT OF OTHER GOODS COST OF REMOVAL AND REINSTALLATION OF THE PRODUCT LOSS OF USE OR ANY OTHER DAMAGES WHETHER BASED IN CONTRACT TORT OR OTHERWISE LG S TOTAL LIABILITY IF ANY SHALL NOT EXCEED THE PURCHASE PRICE PAID BY YOU FOR THE PRODUCT SOME STATES DO ...

Page 73: ...roduct Refurbished Product or any Product sold As Is Where Is With all Faults or similar disclaimer Products with original serial numbers that have been removed altered or cannot be readily determined Increases in utility costs and additional utility expenses Any noises associated with normal operation Products used for other than normal and proper household use e g commercial or industrial use or...

Page 74: ...be removed using a toothbrush Burner cap color change and lost shine Scratching Do not use steel wool or abrasive cleansers to clean Use of detergent or abrasive cleansers To remove burnt on food soak the burner heads in hot water for 20 30 minutes Do not use detergent a Shine is lost Knobs melt Improper usage Do not leave door at stop position during Broil Bake mode or right after cooking Problem...

Page 75: ...f the oven Flame or power is weak Gas pressure may be weak Check with gas supplier first Surface is not level Oven is tipping Range not leveled Check with installer first Use carpenter s level a to check level Anti tip device not installed correctly a Approximately 0 65 16 5 mm b Level both sides of range c Screw must enter wood or concrete d Anti tip bracket e Wall plate Check with installer firs...

Page 76: ... s closed position c Lever s open position Flames too big on converted cooktop NP LP The installer missed part of the conversion Check 3 parts regulator cooktop valve broil bake valve a Regulator b Cooktop valve c Broil Bake valve Check with installer first Refer to installation manual Flame is too small or too large 1 Variable gas pressure 2 Installer did not check Check with installer first Prob...

Page 77: ... kind whatsoever whether based in contract tort statute regulation ordinance fraud misrepresentation or any other legal or equitable theory arising out of or relating in any way to the sale condition or performance of the product or this Limited Warranty Notice of Dispute In the event you intend to commence an arbitration proceeding you must first notify LG in writing at least 30 days in advance o...

Page 78: ...fees will be governed by the AAA Rules Except as otherwise provided for herein LG will pay all AAA filing administration and arbitrator fees for any arbitration initiated in accordance with the AAA Rules and this arbitration provision If you prevail in the arbitration LG will pay your attorneys fees and expenses as long as they are reasonable by considering factors including but not limited to the...

Page 79: ...overage of the Limited Warranty in any way and you will continue to enjoy the full benefits of the Limited Warranty If you keep this product and do not opt out then you accept all terms and conditions of the arbitration provision described above us_main book book Page 79 Friday July 8 2022 1 22 PM ...

Page 80: ...80 Memo us_main book book Page 80 Friday July 8 2022 1 22 PM ...

Page 81: ... propietario detenidamente previo a operar el electrodoméstico y mantengalo al alcance para futuras referencias ESPAÑOL LTGL6937 www lg com Copyright 2022 LG Electronics Inc Todos los derechos reservados ls_main book book Page 1 Friday July 8 2022 1 24 PM ...

Page 82: ...as instrucciones de la compañía de gas Si no puede comunicarse con su compañía de gas llame al departamento de bomberos Un instalador calificado una agencia de servicio o la compañía de gas deben realizar la instalación y mantenimiento ADVERTENCIA Nunca deje la sección de cocción de superficie de este aparato sin supervisión El incumplimiento de esta advertencia puede provocar incendios explosione...

Page 83: ...eléctricos 19 Conexión a tierra 20 Quemadores de superficie 20 Ensamblaje de los quemadores de superficie 20 Verificación de encendido de los quemadores de superficie 21 Ajuste del quemador de superficie en la configuración Low Flame Simmer Llama baja Fuego lento 21 Relleno trasero opcional 21 Instalación de la placa trasera 22 Dispositivo antivuelco 22 Instalación del dispositivo antivuelco 23 Pr...

Page 84: ...h 53 FUNCIONES INTELIGENTES 53 Aplicación LG ThinQ 53 Funciones de la aplicación LG ThinQ 53 Antes de usar la aplicación LG ThinQ 54 Instalación de la aplicación LG ThinQ 54 Actualización de características LG 54 Conexión a Wi Fi 55 Especificaciones del módulo RF 55 Aviso de la FCC 55 Declaración sobre exposición a la radiación de RF de la FCC 55 Software de código abierto 55 Función Smart Diagnos...

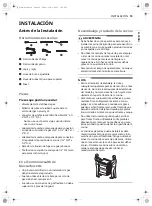
Page 85: ...strucciones ADVERTENCIA Un niño o adulto pueden volcar la cocina y morir Coloque el dispositivo antivuelco en la estructura y o cocina Verifique que el dispositivo antivuelco se haya instalado y acoplado correctamente siguiendo la guía del soporte antivuelco Enganche la cocina al dispositivo antivuelco conforme a la guía del soporte antivuelco Asegúrese que el dispositivo antivuelco se vuelva a ac...

Page 86: ...gas de la cocina y cómo cerrarla si es necesario Para cerrar el suministro de gas de la cocina cierre la válvula de corte de gas girándola hacia la derecha Haga que un instalador calificado instale y conecte a tierra su cocina de manera apropiada de acuerdo con las instrucciones de instalación Cualquier ajuste y servicio deben realizarlo instaladores de cocinas de gas calificados o técnicos de ser...

Page 87: ...el aire de combustión y ventilación al bloquear la ventilación del horno o las entradas de aire Si lo hace restringe la entrada de aire al quemador y esto puede provocar envenenamiento por monóxido de carbono Pararse apoyarse o sentarse sobre las puertas o los cajones de esta cocina podría causar lesiones personales graves y daños a la cocina No permita que los niños trepen a la cocina o jueguen c...

Page 88: ...r derivados a un técnico calificado Instrucciones de Conexión a Tierra Enchufe su cocina a un tomacorriente de pared conectada a tierra de 120 voltios solamente No quite la punta redonda de conexión a tierra del enchufe Si existen dudas acerca de la conexión a tierra del sistema eléctrico de la vivienda es su responsabilidad personal y su obligación reemplazarla por un tomacorriente adecuado para ...

Page 89: ...a cocina sobre baldosas de vinilo o linóleo porque no pueden resistir este uso Nunca la instale directamente sobre alfombras de cocina Funcionamiento No use el horno para guardar alimentos o utensilios de cocina Los elementos guardados en el horno pueden incendiarse Para prevenir daños en la puerta del horno no intente abrirla cuando aparezca Bloqueo en la pantalla en algunos modelos No use el hor...

Page 90: ... acabado del aparato Para prevenir manchas o decoloración limpie el electrodoméstico después de cada uso Use guantes al limpiar la cocina para evitar lesiones o quemaduras Limpie con el ciclo de autolimpieza solo las partes indicadas en este manual Antes de realizar la autolimpieza del horno retire la asadera todos los estantes del horno la sonda para carne y cualquier otro utensilio o alimento de...

Page 91: ... del horno superior g Junta d Puerta del horno inferior h Estante Modelos de cocinas con horno LTGL6937 Descripción Cocina con horno deslizante Requisitos eléctricos 120 V 60 Hz 8 5 Amp Dimensiones exteriores 29 7 8 Ancho x 37 1 8 Alto x 29 1 4 Profundidad Profundidad con la puerta cerrada 75 9 cm Ancho x 94 3 cm Alto x 74 3 cm Profundidad Profundidad con la puerta cerrada Altura hasta la superfic...

Page 92: ... u solamente en el horno inferior Accesorios opcionales se vende por separado a Rejilla b Asadera NOTA Comuníquese con el Servicio de atención al cliente de LG al 1 800 243 0000 1 888 542 2623 en Canadá si le falta algún accesorio Para su seguridad y una mayor duración del producto utilice únicamente componentes autorizados El fabricante no es responsable del mal funcionamiento del producto ni de ...

Page 93: ...cir lesiones en la espalda o de otro tipo No utilice las manijas de la puerta para empujar o tirar de la cocina durante la instalación ni al mover la cocina para tareas de limpieza o reparaciones Si lo hace podría causar daños graves a la puerta de la cocina Para reducir el riesgo de quemaduras no mueva el electrodoméstico mientras esté caliente NOTA Retire el material de embalaje la cinta y cualq...

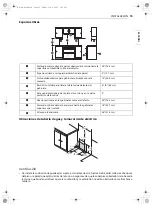
Page 94: ...ndo un espacio de 0 al ras de la pared posterior Dimensiones Dimensiones LTGL6937 A Ancho 29 7 8 758 8 mm B Alto 37 1 8 943 mm C Profundidad Incluye manija de la puerta 29 17 64 743 2 mm D Alto No incluye moldura de ventilación 36 913 0 mm E Profundidad Incluye solo el cuerpo del producto que se carga en el gabinete No incluye puerta cajón y manijas 24 3 4 629 4 mm F Profundidad No incluye manija ...

Page 95: ...perficie combustible sobre el artefacto 30 76 2 cm b Espacio mínimo a la izquierda derecha de la pared 5 12 7 cm c Profundidad máxima para gabinetes ubicados sobre la mesada 13 33 0 cm d Borde frontal del panel lateral de la cocina delante del gabinete 2 1 4 6 3 cm e Para gabinetes debajo de la placa de cocción y en la parte posterior de la cocina 0 f Abertura mínima en los gabinetes sobre el arte...

Page 96: ...istir temperaturas de 167 F 75 C como mínimo Consulte las Instrucciones de seguridad de instalación incluidas en este manual Temperatura ambiente Asegúrese de que los revestimientos de las paredes que rodeen su cocina puedan resistir el calor de hasta 194 F 90 C generado por la cocina Consulte las Instrucciones de seguridad de instalación incluidas en este manual Nivelando Nivelación de la cocina ...

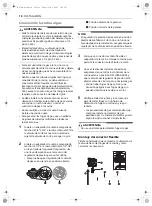
Page 97: ...r debe estar entre 10 y 13 de columna de agua Al verificar el funcionamiento correcto del regulador la presión de entrada debe ser como mínimo 1 más que la presión operativa del colector según se indica anteriormente El regulador de presión ubicado en la entrada de la cocina debe permanecer en la línea de suministro independientemente del tipo de gas que se utilice Un conector metálico flexible ut...

Page 98: ... de sujetar la válvula de corte para que no gire 2 Instale un adaptador de unión acampanada macho de 1 2 a la rosca interna de 1 2 NPT en la entrada del regulador de presión Use una llave de sujeción en el accesorio del regulador de presión para evitar daños Compruebe que el regulador de la válvula de gas se encuentre en posición abierta a Posición abierta de la palanca b Posición cerrada de la pa...

Page 99: ...debe contar con una conexión a tierra adecuada Por ninguna razón debe cortar o quitar la tercera clavija tierra del cable de alimentación El cliente debe solicitar que un electricista calificado verifique el receptáculo en la pared y el circuito para asegurarse de que la conexión a tierra sea adecuada El cable de alimentación de este aparato está equipado con un enchufe de 3 puntas conexión a tier...

Page 100: ...e tamaño grande uno ovalado en el centro y uno de tamaño extragrande 2 Asegúrese de que las tapas y los cabezales estén en las ubicaciones correctas 3 Asegúrese de que el orificio del cabezal del quemador esté ubicado sobre el electrodo a Juego de cabezal tapa del quemador ovalado central b Cabezal y tapa del quemador mediano c Cabezal y tapa del quemador pequeño d Cabezal y tapa del quemador gran...

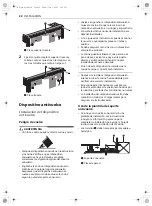
Page 101: ...ire la perilla de Hi a Lo con rapidez Si la llama se apaga aumente el tamaño de la llama y vuelva a probar Prueba 2 Con el quemador en la configuración Lo abra y cierre la puerta del horno rápido Si la llama se apaga por la corriente de aire creada debido al movimiento de la puerta aumente la altura de la llama y vuelva a probar 8 Repita los pasos del 1 al 7 para cada quemador de superficie NOTA E...

Page 102: ...puede ocasionar la muerte o quemaduras graves en niños o adultos Se debe asegurar la cocina con un dispositivo antivuelco aprobado La cocina puede inclinarse si una persona se pone de pie se sienta o apoya en la puerta abierta y el dispositivo antivuelco no está instalado de manera adecuada El uso de este dispositivo no impide que la cocina se caiga si no está bien instalado Después de instalar el...

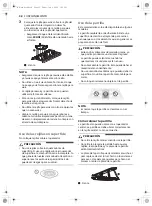
Page 103: ...emador para hornear siga los pasos que se indican a continuación 1 Retire todos los materiales de embalaje del interior de la cavidad del horno 2 Gire la perilla de modo del horno para seleccionar el modo Bake Aparece 350 F en la pantalla Asegúrese de que la puerta esté cerrada 3 Presione START NOTA El quemador podría demorar entre 30 y 90 segundos para comenzar a calentar Verificación del funcion...

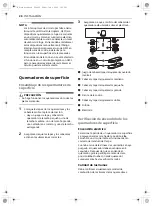
Page 104: ...i Fi g Easy Clean 1 Presione el botón para configurar Easy Clean h Self Clean 1 Presione el botón para configurar Self Clean i Clock Presione el botón para configurar la hora del día j Light Presione el botón para encender o apagar las luces de ambos hornos k START Presione el botón para iniciar todas las funciones del horno l Upper CLEAR OFF Presione el botón para finalizar todas las funciones de...

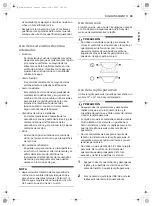
Page 105: ...tones numéricos dentro de los 25 segundos después de presionar el botón Clock la pantalla vuelve a la configuración original Si puede verse una hora parpadeando en la pantalla se ha experimentado un corte de energía Reconfigure el reloj Luz del horno La luz interior del horno se enciende de forma automática cuando se abre la puerta Presione Light para encender las luces de ambos hornos de forma ma...

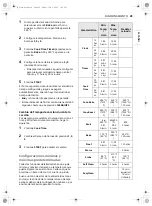
Page 106: ... A continuación presione la tecla Start Time varias veces para alternar entre las diferentes configuraciones del horno y modificarlas El botón Settings permite Configurar el modo de horas en el reloj 12 o 24 horas Habilitar inhabilitar la conversión automática a convección Ajustar la temperatura del horno Activar desactivar la luz de alarma de precalentamiento Configurar el volumen del indicador s...

Page 107: ...as veces para aumentar o disminuir 4 Presione START para aceptar el cambio NOTA Este ajuste no afecta a las temperaturas de asado o SelfClean El ajuste se retiene en la memoria después de una falla eléctrica Es posible aumentar o disminuir la temperatura del horno hasta 35 F o 19 C Una vez que haya subido o bajado la temperatura la pantalla mostrará la temperatura ajustada hasta que la misma se vu...

Page 108: ...be configurar el reloj para la hora correcta del día 1 Gire la perilla de modo del horno para seleccionar el modo Bake para el horno superior o inferior En la pantalla aparecerá 350 F 2 Configure la temperatura presione los botones 3 0 y 0 3 Presione Cook Time Tiempo de cocción y configure el tiempo de horneado con los botones numéricos 4 Presione Start Time 5 Configure la hora de inicio presione ...

Page 109: ...eado presione 1 3 0 3 Presione START para aceptar el cambio Configuraciones mínimas y máximas predeterminadas Todas las funciones detalladas tienen un ajuste mínimo y máximo de tiempo o temperatura que puede ingresarse en el control Cada vez que se presiona un botón de control suena un pitido Suena un tono de error de la entrada dos tonos cortos si la entrada de la temperatura o tiempo está por de...

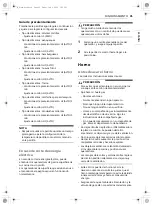
Page 110: ...as Qué hacer si huele gas Abra las ventanas No intente encender ningún aparato No toque ningún interruptor eléctrico No use ningún teléfono en su edificio Llame a su compañía de gas inmediatamente desde el teléfono de un vecino Siga las instrucciones de la compañía de gas Si no puede comunicarse con su compañía de gas llame al departamento de bomberos Asegúrese de que todos los controles de superf...

Page 111: ...iente en especial una freidora Espere hasta que la grasa de enfríe No deje artículos de plástico sobre la placa de cocción Se pueden derretir si se dejan muy cerca de la ventilación Aleje todos los artículos plásticos de los quemadores de superficie Para prevenir quemaduras siempre asegúrese de que los controles para todos los quemadores estén en la posición OFF y que todas las rejillas estén fría...

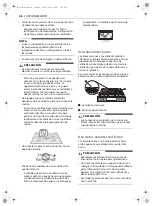
Page 112: ...or de la placa de cocción con el tamaño del utensilio en uso El uso un elemento grande para una olla pequeña desperdicia energía térmica y la superficie expuesta del elemento constituye un riesgo de quemadura o incendio 1 Asegúrese de que todos los quemadores de superficie y las rejillas estén colocados en las posiciones adecuadas 2 Coloque el utensilio de cocina sobre la rejilla 3 Empuje la peril...

Page 113: ... las cocinas de gas NOTA Haga coincidir el tamaño de los utensilios de cocina con la cantidad de comida que cocine para ahorrar energía al calentar Calentar 1 2 litro de agua requiere más energía en una olla de 3 cuartos que en una de 1 cuarto Uso de un wok Si utiliza un wok use uno de 14 pulgadas o menos con fondo plano Asegúrese de que la base del wok quede nivelada sobre la rejilla PRECAUCIÓN N...

Page 114: ...superiores a los estándares permitidos Esto puede ser riesgoso para su salud Uso de la parrilla Esta característica solo está disponible en algunos modelos La parrilla recubierta antiadherente brinda una superficie de cocción extragrande para carnes panqueques u otros alimentos que en general se preparan en sartén de freír PRECAUCIÓN Evite cocinar alimentos demasiado grasos ya que podría producirs...

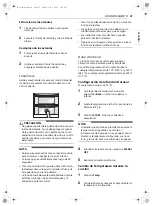
Page 115: ...illo Esto puede causar quemaduras u otros daños 1 Sostenga una cerilla encendida cerca del quemador y luego empuje la perilla 2 Gire la perilla de control hasta llegar a la posición Lo Horno Antes de usar el horno Lea todas las instrucciones antes de usar PRECAUCIÓN Para evitar que se decolore con el uso siga los consejos en la sección de Mantenimiento Qué hacer si huele gas Abra las ventanas No i...

Page 116: ...ondo del horno con papel de aluminio Podría notar condensación en el vidrio de la puerta del horno A medida que el horno se calienta el aire caliente del horno puede hacer que aparezca condensación en el vidrio de la puerta del horno Estas gotas de agua son inofensivas y se evaporarán a medida que el horno siga calentándose Ventilación del horno Las áreas cercanas a la ventilación podrían calentar...

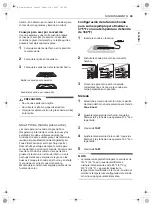
Page 117: ...Tocar los bordes del panel de vidrio no activa la función InstaView Los golpes en el panel de vidrio deben ser lo suficientemente fuertes para que se oigan Los ruidos fuertes cerca del horno pueden activar la función InstaView Si golpea en cualquiera de las puertas activa la función InstaView en ambos hornos Bake Hornear La función Hornear se utiliza para preparar alimentos como pasteles panes y e...

Page 118: ...o Conv Roast En la pantalla aparece 350 F 2 Ajuste la temperatura del horno presione los botones 3 7 y 5 3 Presione START La pantalla muestra Conv Bake o Conv Roast y la temperatura convertida comienza en 100 F A medida que el horno se precalienta se muestran incrementos de temperatura cada 5 grados Una vez que el horno alcanza la temperatura deseada suena un tono y la luz del horno se enciende y ...

Page 119: ...slo interno o en la pechuga de las aves alejada de la grasa o los huesos Coloque la comida en el horno y enchufe la sonda para carne al conector hembra Mantenga la sonda lo más alejada posible de las fuentes de calor Configuración de la función Sonda para carne ejemplo para Rostizar a 375 F con una temperatura de Sonda de 160 F 1 Inserte la sonda en la carne 2 Enchufe la sonda para carne al conect...

Page 120: ...irarla No guarde la sonda para carne dentro del horno No tire del cable para quitar la sonda Al insertar o retirar la sonda sostenga el cabezal de la sonda no el cable Cuadro de temperatura de sonda recomendada Guía de recomendaciones para hornear y rostizar Si cocina en varios estantes coloque los estantes del horno en las posiciones indicadas La cocción en varios estantes ahorra tiempo y energía...

Page 121: ...nte Posición 1 Horneado en un solo estante Estante Horno superior Estante Horno inferior Comida Posición del estante Superior Horno Inferior Horno Pasteles Pasteles en capas Pasteles en savarín 1 1 1 1 Galletas Galletas azucaradas Con chispas de chocolate Con chocolate y nueces 2 2 2 1 1 1 Pizza Fresca Congelada 2 2 1 1 ls_main book book Page 41 Friday July 8 2022 1 24 PM ...

Page 122: ...anes Bizcochos enlatados Bizcochos caseros Madalenas 1 1 1 1 1 1 Postres Frutas azucaradas y crujientes caseras Pasteles caseros con frutas de doble corteza 1 1 1 1 Comida Posición del estante Horno inferior Carne de res Costilla Poco cocidos Término medio Bien cocidas 1 1 1 Costillas deshuesadas solomillo superior Poco cocidos Término medio Bien cocidas 1 1 1 Carne de res de carne de res Poco coc...

Page 123: ...nte la función Calentar La función Calentar seguirá activa durante hasta 3 horas a menos que se presione CLEAR OFF Asar solamente en el horno superior La función Asar utiliza calor intenso del elemento calentador superior para cocinar los alimentos La función Asar funciona mejor cuando se asan cortes de carne pescado y vegetales tiernos y finos Algunos modelos pueden incluir un asador híbrido comp...

Page 124: ...seguridad La asadera debe estar siempre limpia y a temperatura ambiente al comienzo de la cocción Siempre encienda el sistema de ventilación de la placa de cocción o la campana de ventilación durante el asado Mantenga el interior del horno lo más limpio posible Los restos de comidas anteriores pueden quemarse o incendiarse Evite los adobos grasos y los glaseados azucarados Ambos aumentarán la cant...

Page 125: ... 5 7 3 5 Espaciar de manera uniforme Se pueden asar hasta 9 hamburguesas Bistecs de carne vacuna 1 de espesor 1 a 11 2 lb Poco cocidos 2 4 6 2 3 Los bistecs de menos de 1 de espesor se cocinan totalmente antes de dorarse Se recomienda usar una sartén Corte la grasa Término medio 2 5 7 3 4 Bien cocidas 2 6 8 4 5 11 2 de espesor 2 a 2 1 2 lb Poco cocidos 1 8 3 4 Término medio 1 9 4 5 Bien cocidas 1 ...

Page 126: ...rno y jugoso Los trozos de carne que tengan más de dos pulgadas de espesor deben sacarse del refrigerador 30 minutos antes de cocinarlos Esto permitirá cocinar de manera más rápida y uniforme y producirá Fetas de jamón precocidas 1 2 de espesor 1 6 7 2 3 Aumente el tiempo de 5 a 10 minutos por lado para un espesor de 1 1 2 o para jamón ahumado casero Chuletas de cerdo Bien cocidas 1 1 2 de espesor...

Page 127: ... Comida congelada no se requiere precalentamiento Para obtener mejores resultados con la pizza congelada cocine los alimentos en un solo estante colocado en la posición b o c a 400 F Configuración de la función Comida congelada 1 Gire la perilla de modo del horno para seleccionar el modo Frozen Meal Frozen aparece en la pantalla 2 Seleccione la temperatura de cocción utilizando los botones de núme...

Page 128: ...Sous Vide 3 Ajuste la temperatura deseada del horno Rango de 100 F a 205 F 4 Presione START 5 Una vez finalizada la cocción deje que el horno se enfríe por completo Guía de cocción al vacío por flujo de aire recomendada Freír con aire solamente en el horno inferior Esta función aumenta automáticamente la temperatura ingresada a 50 F para un rendimiento óptimo cuando se usa Freír con aire La funció...

Page 129: ...agregue algunas hojas de papel de horno para absorber la grasa Controle los alimentos con frecuencia y agítelos o gírelos para obtener resultados más crujientes Con el modo Freír con aire los alimentos congelados preparados pueden cocinarse más rápido de lo que se indica en el paquete Reduzca el tiempo de cocción en aproximadamente un 20 verifique los alimentos con anticipación y ajuste el tiempo ...

Page 130: ...stante en la posición 1 para que caigan las gotas Si es necesario agregue papel de horno para absorber el aceite y reducir el humo Dé vuelta los alimentos durante la cocción para evitar que se quemen Los alimentos con mucha grasa pueden producir más humo si se los cocina con la función Air Fry Freír con aire Para reducir el humo cocine con el modo de Rostizado por convección Puntos recomendados Ca...

Page 131: ...OLLO fresco con piel Alitas de pollo frescas 40 450 3 25 35 Pinte o rocíe ligeramente con 1 cucharadas de aceite Agregue sal y pimienta a gusto Patitas de pollo frescas 70 450 3 30 40 Muslos 40 450 3 30 35 Pechugas 40 450 3 30 35 OTRAS Aros de cebolla empanados congelados 20 400 3 20 30 Rollos primavera congelados 0 7 onzas c u 45 425 3 25 35 Salchichas 2 5 onzas c u 0 8 de diámetro 90 400 3 25 35...

Page 132: ...no o ambos hornos en modo Sabbath 1 Desconecte la sonda La función Sonda no está disponible en modo Sabbath 2 Gire la perilla de modo del horno para seleccionar Bake 3 Ajuste la temperatura deseada y el tiempo de cocción 4 Presione START 5 Si está utilizando los dos hornos ajuste la temperatura y el tiempo de cocción del segundo horno antes de presionar Start Time 6 Mantenga presionado Start Time ...

Page 133: ...iagnosisTM Esta función brinda información útil para diagnosticar y resolver problemas con el producto conforme a su patrón de uso Actualización de Firmware Mantiene el electrodoméstico actualizado NOTA Si cambia de enrutador inalámbrico proveedor de Internet o contraseña borre el electrodoméstico conectado desde la aplicación LG ThinQ y conéctelo de nuevo Esta información está actualizada en el m...

Page 134: ...scargar e instalar la aplicación Actualización de características LG Disfrute de nuevas características mediante la actualización de su producto a través de la aplicación LG ThinQ Si una función actualizable está disponible aparece una notificación de actualización en la pantalla y suena una melodía después de que la cocción haya terminado y se presiona CLEAR OFF Por ejemplo es posible que las luc...

Page 135: ...e dispositivo que no cuente con la aprobación expresa de la parte responsable del cumplimiento puede anular la autorización del usuario para operarlo Declaración sobre exposición a la radiación de RF de la FCC Este equipo cumple con los límites de exposición a la radiación de la FCC establecidos para entornos no controlados Este transmisor no se debe ubicar ni operar junto con ninguna otra antena ...

Page 136: ...nuación para utilizar el método de diagnóstico audible Inicie la aplicación LG ThinQ y seleccione la función Smart Diagnosis en el menú Siga las instrucciones para el diagnóstico audible provistas en la aplicación LG ThinQ 1 Mantenga presionado el botón START durante tres segundos Si la pantalla ha sido bloqueada debe desactivar el bloqueo y luego reactivarlo 2 Mantenga el micrófono de su teléfono...

Page 137: ...ivos Perillas y panel del múltiple delantero Se recomienda limpiar el panel del múltiple después de cada uso de la cocina Para limpiarlo use un paño húmedo y una solución de agua jabonosa suave o una solución mitad agua y mitad vinagre Enjuague con agua limpia y seque con un paño suave PRECAUCIÓN No use limpiadores abrasivos limpiadores líquidos fuertes esponjas abrasivas plásticas ni limpiadores ...

Page 138: ... puerta Asadera y rejilla No guarde una asadera o rejilla sucia en ninguna parte de la cocina No limpie la asadera ni la rejilla en el modo de autolimpieza Disponible en algunos modelos Retire la rejilla de la asadera Vierta la grasa de la asadera en un recipiente adecuado con cuidado Lave y enjuague la asadera y la rejilla con agua caliente y una esponja abrasiva plástica o jabón Si hay comida qu...

Page 139: ...sivos para limpiar los quemadores Lave las tapas del quemador con agua jabonosa caliente y enjuáguelas con agua limpia Deje correr el agua sobre el quemador ovalado desde el vástago inferior para eliminar la suciedad Limpie la placa de cocción con cuidado Los extremos de metal puntiagudos de los electrodos de chispa pueden producir lesiones Si golpea un electrodo con un objeto rígido puede dañarlo...

Page 140: ...anchas de grasa difíciles se pueden eliminar solo con agua tibia PRECAUCIÓN Antes de limpiar gire todos los controles a la posición OFF y deje enfriar la placa de cocción Para evitar quemaduras no limpie la superficie de la placa de cocción hasta que se haya enfriado No levante la superficie de la placa de cocción Si levanta la superficie de la placa de cocción puede dañar la cocina o hacer que fu...

Page 141: ...o con la función EasyClean en lugar de usar Self Clean Cuando sea necesario la cocina ofrece también la opción de Self Clean más prolongada y profunda del horno para quitar la suciedad más difícil acumulada Para limpiar áreas difíciles de alcanzar como la superficie trasera del horno es mejor usar el ciclo Self Clean Beneficios de EasyClean Ayuda a aflojar la suciedad leve antes de la limpieza man...

Page 142: ...ua de la botella para saturar completamente la suciedad en las paredes y las esquinas del horno 5 Rocíe o vierta el agua restante 8 oz o 240 ml en el centro de la base de la cavidad del horno La hendidura en la base del horno debe estar totalmente cubierta para sumergir toda la suciedad Agregue agua si fuera necesario NOTA Si limpia varios hornos use una botella de agua entera para cada uno No roc...

Page 143: ...ño o una esponja impregnada en vinagre para quitarlos Es normal que el ventilador funcione durante el ciclo EasyClean No es recomendable el uso de limpiadores comerciales o blanqueadores para limpiar el horno Utilice un limpiador líquido suave con un valor de pH inferior a 12 7 para evitar que el esmalte pierda el color Self Clean Autolimpieza Esta característica solo está disponible en algunos mo...

Page 144: ...o no se puede encender hasta que la temperatura sea inferior a 500 F 260 C después de completar el ciclo Self Clean Durante el ciclo Self Clean no se pueden usar los elementos de la placa de cocción ni el cajón de calentamiento Limpie el marco del horno y la puerta con agua jabonosa caliente Enjuague bien No limpie la junta La fibra de vidrio de la junta de la puerta del horno no resiste la abrasi...

Page 145: ...l tiempo de autolimpieza de 3 a 5 horas 1 3 horas 2 4 horas 3 5 horas 3 Presione START 4 Una vez que se haya configurado el ciclo de autolimpieza la puerta del horno se traba automáticamente y aparece el icono del candado k No podrá abrir la puerta del horno hasta que el horno se haya enfriado El bloqueo se libera de manera automática cuando baja la temperatura PRECAUCIÓN No fuerce la puerta del h...

Page 146: ...e vibrar o fuerza el vidrio se puede debilitar su estructura lo que aumenta el riesgo de rotura más adelante Tenga cuidado al retirar y levantar la puerta No levante la puerta con la manija porque es muy pesada Horno superior Extracción de la puerta 1 Abra la puerta totalmente 2 Levante y haga girar las trabas hacia la bisagra hasta que hagan tope 3 Cierre la puerta a 30 grados a notará el tope de...

Page 147: ... a mitad de camino entre la posición de tope del asador y totalmente cerrada Si la posición es correcta los brazos de las bisagras se moverán libremente a Aproximadamente 5 5 Levante la puerta y tire hacia afuera hasta que los brazos de las bisagras salgan de las ranuras Colocación de la puerta 1 Tome firmemente ambos lados de la puerta desde la parte superior 2 Con la puerta en el mismo ángulo qu...

Page 148: ...adamente 1 4 3 Levante la moldura de ventilación Montaje de la moldura de ventilación Coloque la moldura de ventilación en la secuencia inversa a la de su extracción Mantenimiento periódico Cambio de la luz del horno La luz del horno es una bombilla estándar halógena para electrodomésticos de 40 vatios Se enciende cuando se abre la puerta del horno Cuando la puerta del horno está cerrada presione ...

Page 149: ...e trasera del horno gírela hacia la izquierda 3 Retire la bombilla halógena del enchufe 4 Inserte la nueva bombilla halógena 5 Inserte la tapa de vidrio de la bombilla y gírela hacia la derecha 6 Enchufe la cocina o reconecte la corriente eléctrica ls_main book book Page 69 Friday July 8 2022 1 24 PM ...

Page 150: ...e escuche los elementos calentadores del horno hacer un chasquido al encenderse y apagarse con más frecuencia en su horno nuevo Esto es NORMAL P Por qué parpadea el reloj R Esto significa que el producto acaba de enchufarse o que hubo una interrupción del suministro eléctrico Para eliminar el parpadeo del reloj toque cualquier botón o reinicie el reloj si es necesario P Durante la cocción por conv...

Page 151: ...está sucia después de ejecutar el ciclo EasyClean Qué más debo hacer R El ciclo EasyClean solo ayuda a aflojar la suciedad leve de la cocina para ayudar en la limpieza manual del horno No quita automáticamente toda la suciedad después del ciclo Es posible que necesite fregar la cocina después de haber ejecutado el ciclo EasyClean P Probé fregar el horno después de ejecutar EasyClean pero queda suc...

Page 152: ...más información P Qué se necesita para EasyClean R Un envase rociador con 1 taza 10 oz o 300 ml de agua un raspador plástico una esponja que no raye y una toalla No debe usar esponjas abrasivas como las de trabajo pesado ni lana de acero Excepto por la toalla todos los materiales necesarios se incluyen en un kit de limpieza especial con su cocina nueva P Puedo ejecutar el ciclo EasyClean en ambos ...

Page 153: ... ubicados de manera correcta Asegúrese de que los cabezales y las tapas de los quemadores estén completamente secos y ubicados de manera correcta Las llamas del quemador son muy altas o amarillas Puede ser debido a una mala instalación o configuración de la cocina Si la cocina está conectada a gas LP comuníquese con el técnico que instaló la cocina o que realizó la conversión Los quemadores de la ...

Page 154: ...un ciclo Self Clean durante un mínimo de 3 horas Consulte la sección Self Clean Autolimpieza En algunos modelos El horno no funciona El enchufe de la cocina no está introducido completamente en el tomacorriente Verifique que el enchufe eléctrico esté conectado a un tomacorriente con tensión y adecuada conexión a tierra Es posible que se haya quemado un fusible o saltado el disyuntor de la vivienda...

Page 155: ...el enchufe esté conectado a un tomacorriente con tensión y adecuada conexión a tierra Reemplace el fusible o reinicie el disyuntor Configuración de control del horno inadecuada Consulte Cambio de configuración del horno en el capítulo FUNCIONAMIENTO La luz del horno no funciona Es hora de reemplazar la bombilla o la bombilla está floja Reemplace o ajuste la bombilla Consulte la sección Cambio de l...

Page 156: ...se limpiaron en un ciclo Self Clean En algunos modelos Los estantes brillantes color plateado se limpiaron en un ciclo Self Clean Aplique una pequeña cantidad de aceite vegetal en una toalla de papel y limpie los bordes de los estantes del horno con ella No utilice rociadores lubricantes Los dos puntos del reloj parpadean Esto significa que el producto se ha enchufado recién o que se ha interrumpi...

Page 157: ... ventilador de convección puede encenderse y apagarse automáticamente Esto es normal Al encender un solo quemador se oye un sonido de clic en todos los quemadores Los encendedores con chispa eléctrica de los quemadores hacen un sonido de clic Todos los encendedores de chispa de la placa de cocción se activarán cuando se encienda solo un quemador Esto es normal Problemas Causas posibles y solución ...

Page 158: ... y el enrutador es muy grande Si el electrodoméstico se encuentra muy lejos del enrutador puede que la señal sea débil y que la conexión no sea configurada correctamente Coloque el enrutador más cerca del electrodoméstico o compre e instale un repetidor Wi Fi Problemas Causas posibles y solución ls_main book book Page 78 Friday July 8 2022 1 24 PM ...

Page 159: ...SADA BAJO NINGUNA CIRCUNSTANCIA DEBERÁ LG O SUS DISTRIBUIDORES REPRESENTANTES SER RESPONSABLE POR CUALQUIER DAÑO INDIRECTO INCIDENTAL CONSECUENTE ESPECIAL O PUNITIVO LO CUAL INCLUYE PERO NO SE LIMITA A PÉRDIDA DE FONDOS DEL COMERCIO GANANCIAS PERDIDAS INTERRUPCIÓN DEL TRABAJO DETERIORO DE OTROS BIENES COSTO DE REMOVER Y REINSTALAR EL PRODUCTO PÉRDIDA DE USO O CUALQUIER OTRO DAÑO YA SEA BASADO EN C...

Page 160: ...ervicios no autorizados por LG Daños o artículos faltantes con la caja abierta o que hayan estado en exhibición Productos reacondicionados o cualquier producto vendido con los avisos En el estado actual En el sitio actual Con todos sus defectos o similares Productos cuyos números de serie originales hayan sido retirados alterados o no se puedan determinar fácilmente Aumentos en los costos de los s...

Page 161: ...s endurecidos deben removerse con un cepillo de dientes La tapa del quemador cambió de color y perdió brillo Rayas No use esponjas metálicas ni limpiadores abrasivos Uso de detergente o limpiadores abrasivos Para remover los alimentos quemados sumerja los cabezales de los quemadores en agua caliente durante 20 a 30 minutos No use detergente a Se pierde el brillo Perillas derretidas Uso inadecuado ...

Page 162: ...puede ser baja Consulte primero con su proveedor de gas La superficie no está nivelada El horno está inclinado La cocina no está nivelada Primero consulte con el instalador Use un nivelador de carpintero a para verificar la nivelación El dispositivo antivuelco no está instalado correctamente a Aproximadamente 0 65 16 5 mm b Nivele ambos lados de la cocina c El tornillo debe ser apto para madera u ...

Page 163: ...osición abierta de la palanca Las llamas son demasiado grandes en la placa de cocción convertida NP LP El instalador no realizó parte de la conversión Revise 3 partes regulador válvula de placa de cocción válvula de asar hornear a Regulador b Válvula de placa de cocción c Válvula de asar hornear Primero consulte con el instalador Consulte el manual de instalación La llama es demasiado pequeña o de...

Page 164: ... proveedores las referencias a conflicto o reclamación incluirán cualquier conflicto reclamo o controversia de cualquier tipo sin importar ya sea basado en contrato agravio estatuto regulación ordenanza fraude falsa representación o cualquier teoría legal o equitativa que surja de o esté relacionada con cualquier forma de venta condición o desempeño del producto o de esta Garantía Limitada Aviso d...

Page 165: ...dencia regirá esta Garantía Limitada así como todas las disputas entre nosotros salvo que sea invalidada o inconsistente con leyes federales aplicables Tarifas Costos Usted no debe pagar ninguna tarifa para comenzar un arbitraje Al recibir su solicitud de arbitraje por escrito LG pagará todos los gastos administrativos rápidamente a la AAA a menos que usted solicite más de 25 000 00 por daños en c...

Page 166: ...odel Serial Number Sólo puede excluirse del procedimiento de resolución de conflictos en la forma descrita anteriormente es decir por correo electrónico o por teléfono ninguna otra forma de notificación será efectiva para hacerlo Excluirse de este procedimiento de resolución de controversias no afectará de ninguna manera la cobertura de la Garantía Limitada por lo que usted continuará disfrutando ...

Page 167: ...87 Memorándum ls_main book book Page 87 Friday July 8 2022 1 24 PM ...

Page 168: ...88 Memorándum ls_main book book Page 88 Friday July 8 2022 1 24 PM ...

Page 169: ...89 Memorándum ls_main book book Page 89 Friday July 8 2022 1 24 PM ...

Page 170: ...90 Memorándum ls_main book book Page 90 Friday July 8 2022 1 24 PM ...

Page 171: ...91 Memorándum ls_main book book Page 91 Friday July 8 2022 1 24 PM ...

Page 172: ...mer Information Center Register your product Online www lg com For inquiries or comments visit www lg com or call 1 800 243 0000 U S A 1 888 542 2623 CANADA ls_main book book Page 87 Friday July 8 2022 1 24 PM ...

Reviews: