16
Chapter 3. System information
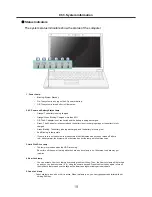
- Web Camera
·
1.3 Mega pixels USB camera module
·
UVC (USB Video Class) driver supported
※
Web Camera is optional, and so it may not be installed in some models
- External I/O Interface
·
External VGA Monitor Port: 1
·
Microphone: 2
·
Microphone Input Port (Mic in): 1
·
Headphone Port: 1
·
HDMI Port: 1
·
USB 2.0 Ports: 3
·
Multi-card Slot: 1
·
Express Card Slot: 1
·
RJ 45 (LAN) Port: 1
·
RJ 11 (Modem) Port: 1
·
e-SATA (USB Combo) Port: 1
※
The support availability may differ by model type.
- Video
·
NVIDIA Geforce GT 105M w/512MB or GT 130M w/1GB with TurboCache 576MB ~ 2815MB
TurboCache - This technology actively utilizes part of the System Memory when processing large graphic
data like 3D graphics. The size of the utilized memory is determined by the Video Memory size and System
Memory Sizes.
If TurboCache technology is applied to the Graphics Memory, the System Memory can allot up to 576MB out
of 512MB and up to 2815MB out of 4096MB for large graphic data.
※
The specifications may differ depending on the model type and the video driver.
- Sound
·
Realtek High Definition Audio Codec (ALC262) HDMI is supported
·
Built-in Stereo Speakers
- LAN
·
Realtek RTL8103/8111 10/100/1000 PCI Express Fast Ethernet Controller
·
RJ 45 Jack
※
Specifications may differ by model type.
- Wireless LAN
·
Ralink RT2700E / Intel 512AN_MMW / 533AN_MMW
※
Wireless LAN specifications may differ by model type and cannot be arbitrarily changed by the user.
- Weight
·
Full Installation: About 2.7kg
·
Battery: About 320g
※
Weight descriptions may differ by model type.
Summary of Contents for R580 Series U.ARC3BA9
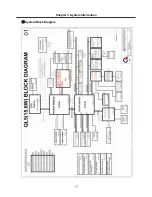
Page 17: ...17 System Block Diagram Chapter 3 System information ...
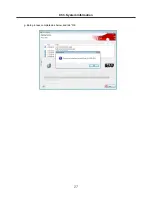
Page 27: ...27 Ch3 System information g Burn process completed as below and tab OK ...
Page 60: ...60 Ch5 Removing and replacing a part 5 Remove the HDD Shield ...
Page 63: ...63 Ch5 Removing and replacing a part 3 Remove the WLAN Module ...
Page 66: ...66 3 Remove the ODD Ch5 Removing and replacing a part 4 Remove the ODD Bezel Bezel ...
Page 69: ...69 69 Ch5 Removing and replacing a part 5 Remove the Keyboard 6 Remove the Retainer ...
Page 71: ...71 71 Ch5 Removing and replacing a part 3 Remove the Display Module ...
Page 74: ...74 Ch5 Removing and replacing a part 3 Remove the Keyboard deck ...
Page 79: ...79 Ch5 Removing and replacing a part 3 Remove the Mainboard Case ...
Page 86: ...86 Ch5 Removing and replacing a part 3 Remove the Hinge Cap ...
Page 98: ...NLCD07 NLCD05 NLCD09 NLCD03 NLCD01 NLCD04 NLCD08 NLCD02 NWEBC01 ...
Page 100: ...NMINI02 NMINI01 NKDECK01 NKDECK02 NRTN01 NKEYBD01 ...
Page 102: ...NMRY01 NMRY01 NMINI04 NTHMO01 NRBS01 NMINI03 NCPU01 NMLB01 ...
Page 105: ...NCVR02 NCVR03 NCVR01 NHDD02 NHDD01 NBATT01 NODD02 NODD01 NBOTM01 NBOTM03 NHDD03 NBOTM02 ...

