- 15 -
ADJUSTMENT INSTRUCTIONS
6-2. Caution
(1) Keep the procedure and caution to prevent the screen
strange phenomenon. Don’t make a scratch.
(2) When DMD stains with dust, polish the front and back
DMD with soft wiper. Then, polish the front and back DMD
after rotating 180 degree the DMD. If necessary, take a
inspection.
(3) Don’t clean the DMD with the high pressure. Because the
electric static and pollution influence to DMD.
7. EDID Data Input
7-1. Required Test Equipment
(1) A jig for adjusting PC, DDC.
(PC serial to D-sub. Connection equipment)
(2) S/W for writing DDC (EDID data write & read)
(3) D-sub terminal
7-2. Setting of Devices
7-3. Preparation for Adjustment
(1) Set devices as above and turn the PC, jig on.
(2) Put the S/W for writing DDC (EDID data write & read) into
operation.
7-4. Sequence of Adjustment
(1) Put the SET(or Digital Board) on the table and turn the
power on.
(2) Input the product code, production week / year, serial
number (if it is not input, write “01”) to the S/W for writing
DDC.
(3) Put the EDID write instruction into operation.
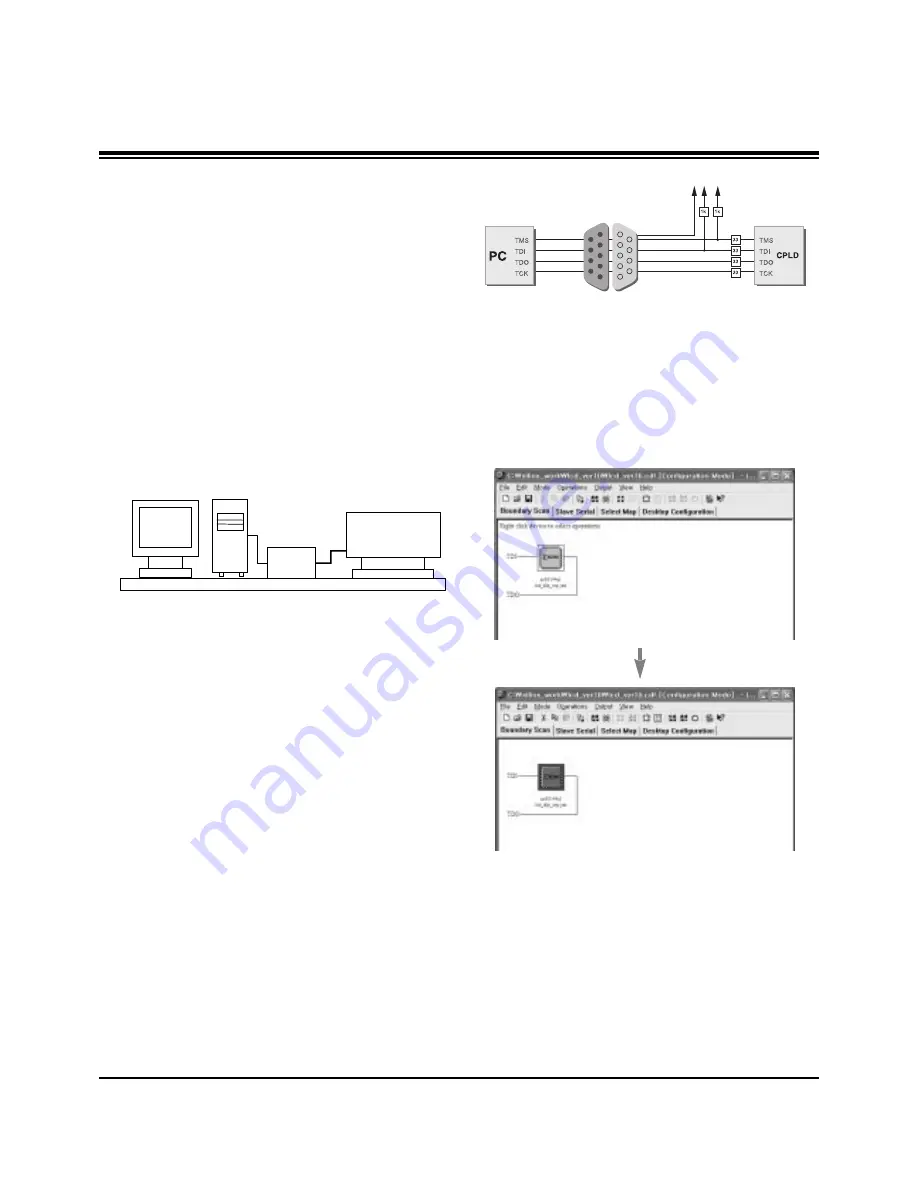
8. CPLD Download Work
8-1. Required Test Equipments &
Preparation for Adjustment
(1) Connect the PC and memory JIG as shown (fig8).
(2) Turn on JIG MAIN POWER SW.
(3) After turn on the PC and moniter, operate the device
programming.
8-2. Adjustment Sequence
(1) After program running, displayed [OPTION MODE
SELECTION] window.
Check the “Load configuration File(.cdf, .pdr)” in this
window and click the finish button
(2) When the screen displays the open window, select the
suitable file(*.cdf) according to model.
(3) IC figure is change to green by clicking it. (Fig. 9)
(4) Select the program of operations.
(5) Check the [Erase before programming] and [Verify] menu
as shown <Fig4> and press the OK button.
(6) At this time, the download starts. The download finished
after 10 seconds.
PC
DLP PJTV SET
(or Digital Board)
JIG
<Fig 8> How to connect the MEMORY JIG and PC
<Fig.9>
Summary of Contents for RU-44SZ51D - - 44" Rear Projection TV
Page 19: ... 19 BLOCK DIAGRAM ...
Page 20: ... 20 BLOCK DIAGRAM ...
Page 21: ... 21 BLOCK DIAGRAM ...
Page 22: ... 22 BLOCK DIAGRAM ...
Page 23: ... 23 NOTES ...
Page 37: ...Jan 2004 Printed in Korea P NO 3828VD0148S ...
Page 38: ......
Page 39: ......
Page 40: ......
Page 41: ......
Page 42: ......


