Additional Information
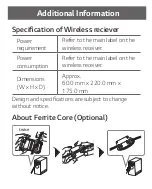
Specification of Wireless reciever
Power
requirement
Refer to the main label on the
wireless receiver.
Power
consumption
Refer to the main label on the
wireless receiver.
Dimensions
(W x H x D)
Approx.
60.0 mm x 220.0 mm x
175.0 mm
Design and specifications are subject to change
without notice.
About Ferrite Core (Optional)
twice
Surround Sound On/Off
When you turn on surround function, you can enjoy
magnificent surround sound for all the input sound
source with rear speakers.
The initial setting for the surround function is
OFF, turn the surround function ON to use it.
SK5Y
Surround On: Press and hold
REAR
o
button on the
remote control about 2 seconds.
Surround Off: Press and hold
REAR
p
button on the
remote control about 2 seconds.
SK10Y/SK9Y/SK8Y/SK6Y
Surround On: Press and hold
AUTO VOL
button on the
remote control about 2 seconds and then press
AUTO
VOL
button repeateadly to select ON - SURROUND in
the display window.
Surround Off: Press and hold
AUTO VOL
button on the
remote control about 2 seconds and then press
AUTO
VOL
button repeateadly to select OFF - SURROUND in
the display window.
SL4Y/SL5Y/SL5YF/SL6Y/SL6YF/SL7Y/SL7YF/SL8Y/
SL8YG/SL9Y/SL9YG/SL10Y/SL10YG/
SN5Y/SN6Y/SN7CY/SN7Y/SN8Y/SN8YG/SN9Y/
SN9YG/SN10Y/SN10YG/GX
Surround On: Press and hold button on the remote
control about 3 seconds and then press button
repeateadly to select ON - SURROUND in the display
window.
Surround Off: Press and hold button on the remote
control about 3 seconds and then press button
repeateadly to select OFF - SURROUND in the display
window.
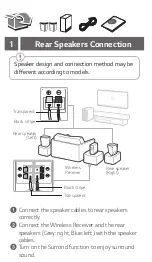
Rear Speakers Connection
1
a
Connect the speaker cables to rear speakers
correctly.
b
Connect the Wireless Receiver and the rear
speakers (Grey: right, Blue: left) with the speaker
cables.
c
Turn on the Surrond function to enjoy surround
sound.
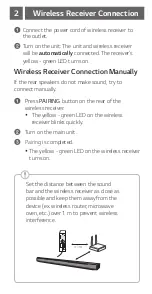
a
Connect the power cord of wireless receiver to
the outlet.
b
Turn on the unit: The unit and wireless receiver
will be
automatically
connected. The receiver's
yellow - green LED turns on.
Wireless Receiver Connection Manually
If the rear speakers do not make sound, try to
connect manually.
a
Press
PAIRING
button on the rear of the
wireless receiver.
y
The yellow - green LED on the wireless
receiver blinks quickly.
b
Turn on the main unit.
c
Pairin
g is completed.
y
The yellow - green LED on the wireless receiver
turns on.
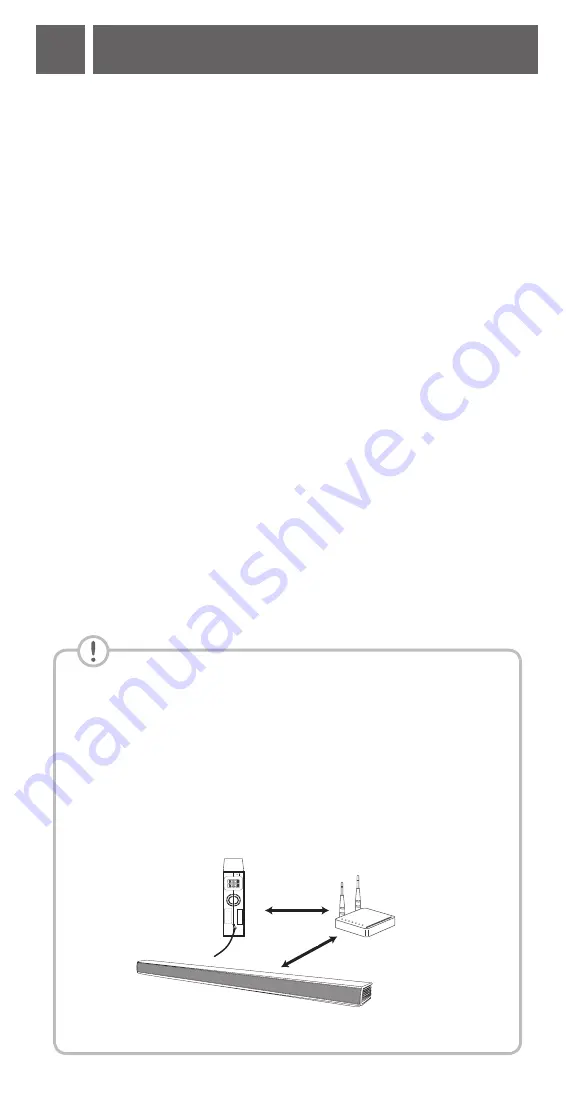
Set the distance between the sound
bar and the wireless receiver as close as
possible and keep them away from the
device (ex. wireless router, microwave
oven, etc.) over 1 m to prevent wireless
interference.
!P
> 1 m
Wireless Receiver Connection
2
Speaker design and connection method may be
different according to models.
Rear speaker
(Left)
Wireless
Receiver
Rear speaker
(Right)
Transparent
Black stripe
Transparent
Black stripe
SP9YA/DSP9YA/SP8YA/DSP8YA/SP7Y/DSP7Y/
SPD7Y/SP70Y/DSPD7Y/SPD75YA/DSPD75YA/
SP60Y
Press Settings button. The product enters the
setting mode and you can see “OFF-AUTO POWER” or
“ON-AUTO POWER”.
While the “OFF-AUTO POWER” or “ON-AUTO
POWER” is scrolling in the status display, press Left/
Right button to select the surround sound setting.
You can see the status of the surround sound, “OFF-
SURROUND” or “ON-SURROUND”.
While the “OFF-SURROUND” or “ON-SURROUND” is
scrolling in the status display, press Up/Down button to
turn on or off the surround sound.


