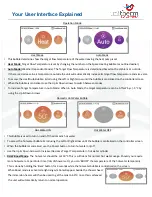
The Up / Down keys allow you to adjust the set temperature .......................................
When you press either key, you will see the word SET and the desired
temperature value. Use the Up / Down keys to adjust the SET value ............................
Press Tick to confirm settings and return to the main display…………………………………….
Temperature Control
Set Temperature
Set Icon
Note: This new temperature is maintained only until the next programmed comfort
level. At this time, the thermostat will revert back to the programmed levels
Thermostat Settings (Neo)
14
Slimline
Series
1.
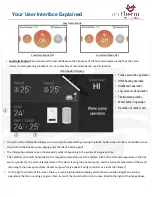
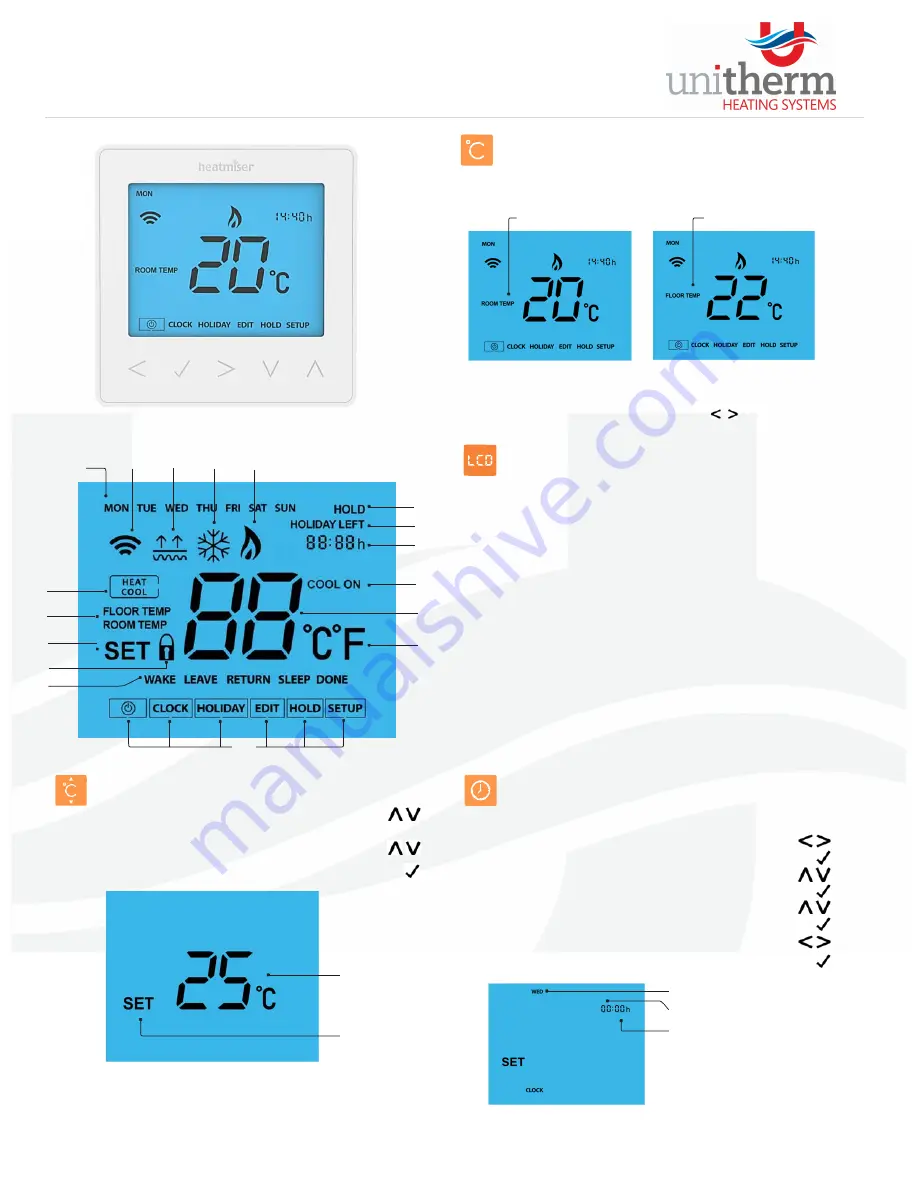
Day Indicator ‐ Displays the day of the week.
2.
Mesh Symbol – Displayed when connected to the neoHub.
3.
Floor Limit Symbol – Displayed when the floor probe has reached the temperature limit set
on feature 07.
4.
Frost Symbol – Displayed when frost protection mode is active.
5.
Flame Symbol – Displayed when the thermostat is calling for heat, flashes when optimum
start is active.
6.
Heat/Cool – Indicates the current operation mode, only shown when neoChill is connected
to the system.
7.
Floor/Room Temp – Indicates the current sensor mode.
8.
Set – Displayed when changes are being made to the program schedule or current set
point.
9.
Key Lock Indicator – Displayed when the KeyLock is Locked.
10.
Program Indicator – Displayed during programming to show which period is being altered.
11.
Main Menu – Displays which option is currently selected.
12.
Temperature Format – Degrees Celsius or Fahrenheit.
13.
Temperature – Displays the current sensor temperature.
14.
Cool On – Displayed when cooling is active
15.
Clock ‐ Time displayed in 24 hour format.
16.
Holiday Left – Displayed when the thermostat is in holiday mode.
17.
Hold Left – Displayed when a temperature hold is active, the remaining time will be shown.
LCD Display
1.
2.
3.
4.
5.
6.
Temperature Display
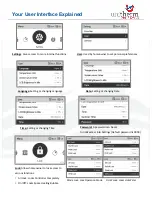
This neoStat can be configured for different sensor options such as built in air sensor, floor sensor
or both. The display will clearly indicate which sensor is being used by showing either “Room
Temp” or “Floor Temp” before the actual temperature value.
When the neoStat is set to use both the air & the floor sensor, the room temperature will be
displayed by default.
To view the current floor temperature, press and hold the Left and Right arrow keys for 5
seconds, the floor temperature will then be displayed. ............................
Room Temperature
Floor Temperature
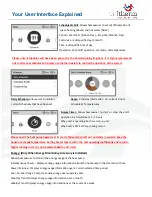
To set the clock, follow these steps.
Setting the Clock
•
Use the Left / Right keys to scroll to CLOCK .............................................................
•
Press Tick to confirm selection ..................................................................................
•
Use the Up / Down keys to set the hours (24 hour format) .....................................
•
Press Tick to confirm selection ..................................................................................
•
Use Up / Down keys to set the minutes ....................................................................
•
Press Tick to confirm selection ..................................................................................
•
Use Left / Right keys to set the day ...........................................................................
•
Press Tick to confirm selection and return to the main display ................................
Day Hours
Minutes
2
3
1
4
5
10
11
9
12
14
13
15
16
17
8
7
6


