

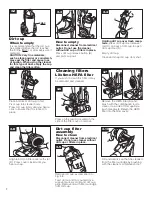
3-1
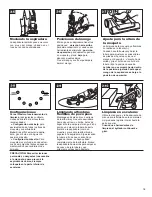
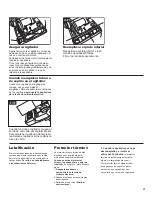
Select proper tool
C. Combination tool
use with brush
attached for carved furniture, table
tops, books, lamps, lighting fixtures,
venetian blinds, baseboards, shut-
ters, and registers.
Remove brush to clean upholstered
furniture, draperies, mattresses,
clothing, and carpeted stairs.
D. Powered hand tool
may be
used for upholstered furniture,
draperies, mattresses, clothing,
automobile interiors, and carpeted
stairs.
E. Crevice wand
may be used in
tight spaces, corners and along
edges in such places as dresser
drawers, upholstered furniture,
stairs and baseboards. It can also
be used for extra reach with the
dusting brush.
2-13
2-14
F
A
B
A
2-12
E
D
C
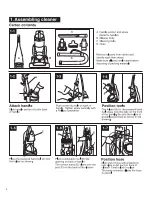
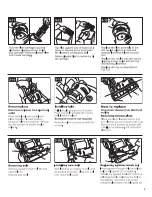
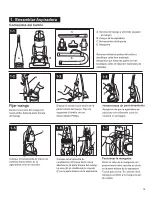
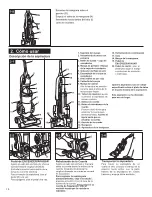
3. Maintenance
Familiarize yourself with these home
maintenance tasks as proper use
and care of your cleaner will ensure
continued cleaning effectiveness.
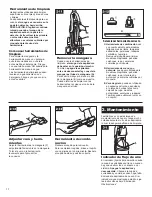
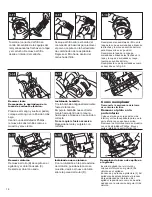
Attach wand and tools
Attach tool to the hose (F) by push-
ing it firmly onto hose.
Twist wand or tool slightly to tighten
or loosen the connection.
2-11
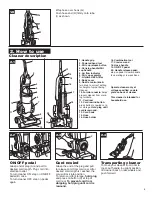
Removing hose
When using cleaning tools,
cleaner
handle should be in the upright
position.
Also,
turn cleaner OFF
before disconnecting and con-
necting hose to hose tube (A).
To use hose, lift hose end (B) as
shown.
When you are finished cleaning with
the tools, reposition hose end onto
tube.
Cleaning tools
Tools allow for cleaning surfaces
above the floor and for reaching
hard to clean areas.
The cleaner is ready for tool use
when
handle is in upright
position
.
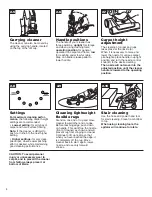
CAUTION: The agitator continues
to rotate while cleaner handle is
in upright position. Avoid tipping
cleaner or setting it on furniture,
fringed area rugs or carpeted
stairs during tool use.
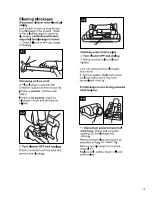
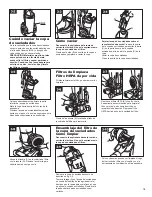
How to clean tools
To clean the hose and powered
hand tool, wipe off dirt with a cloth
dampened in a mild detergent.
Rinse with a damp cloth. DO NOT
submerge powered hand tool in
water.
Cleaning tools may be washed in
warm water with a detergent. Rinse
and air dry before using.
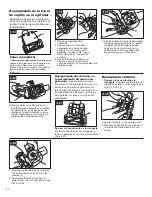
Combination tool
Slide brush to remove.
To replace brushes, align brush with
grooves on tool. Slide brush into
place.
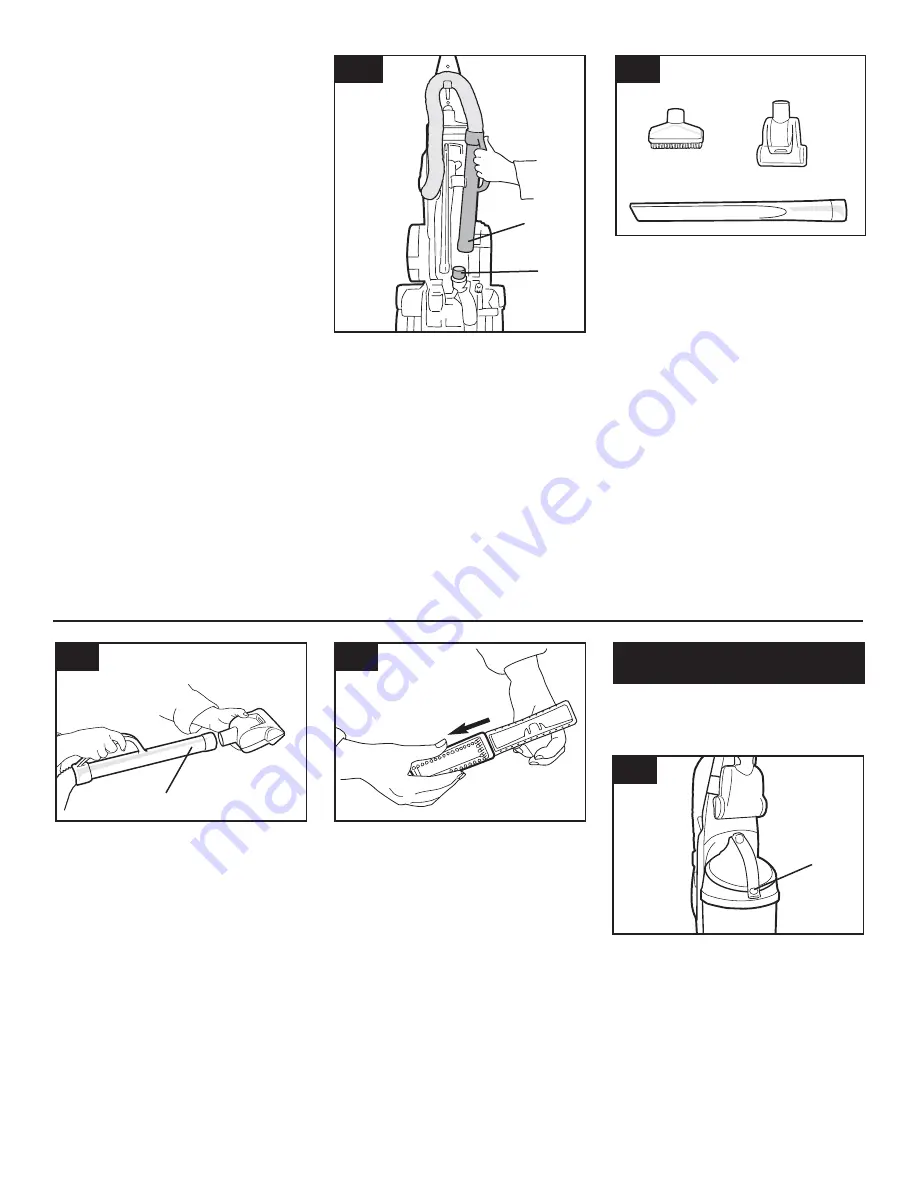
Air flow indicator
The indicator (A) will show yellow when
the dirt cup is full or there is a block-
age or clog in the system.
Turn
cleaner OFF and unplug.
Check
the dirt cup and empty if necessary.
Turn cleaner back on. If the indicator
still shows yellow, follow the instruc-
tions under “Clearing blockages”.
6
Summary of Contents for VTUP843NB
Page 1: ...MODEL VTUP843NB P No 38288I2002P ...
Page 3: ...3 ...
Page 8: ...8 ...
Page 9: ...9 ...
Page 10: ...10 ...
Page 11: ...11 ...
Page 12: ...3 15 and 3 18 12 ...
Page 14: ...14 ...
Page 15: ...15 ...
Page 24: ......


