7
INSTALLATION
EN
G
LI
SH
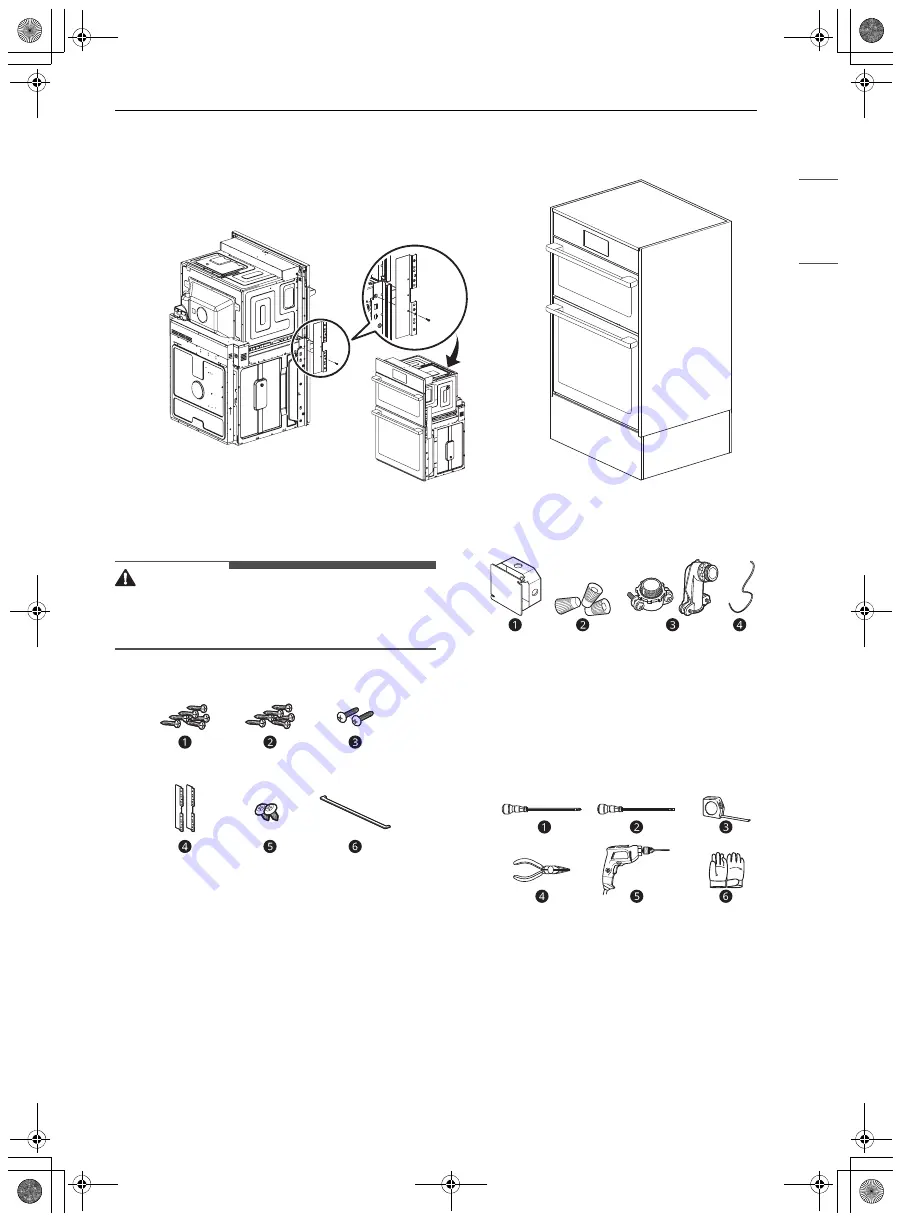
• Remove one screw from the left and right sides as shown. These screw holes will be used to mount the
cover brackets. Install the cover brackets on the sides of the oven with the provided self-tapping screws.
Parts / Tools
WARNING
• Mounting screws must be used. Failure to do so
can result in the oven falling out of the cabinet
causing serious injury.
Parts Provided
a
4X14 6 Wood screws for mounting (4 needed
for installation and 2 extras)
b
4X24 6 Wood screws for mounting (for flush
installation)
c
4X22 2 Self-tapping screws for cover bracket
d
2 Cover brackets for flush installation
e
4X10 2 Screws for bottom decorative trim
f
Bottom decorative trim
Parts Not Provided
a
Junction Box
b
Wire Nuts
c
3/4” Conduit Connector
d
36” (91 cm) of String
Tools Needed
a
Phillips screwdriver
b
Flat-blade screwdriver
c
Tape measure
d
Pliers
e
Drill
f
Gloves
us_main.book.book Page 7 Thursday, December 9, 2021 8:44 AM


