background image

O P T I O N A L   AC C E S S O R I E S

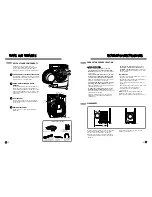
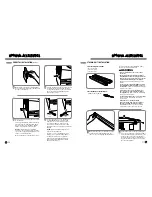
This stacking kit includes:

 •     Two (2) side rails
•   One (1) front rail
•   Four (4) screws

To ensure safe and secure installation, please 

observe the following instructions.

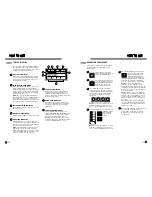
1

Make sure the surface of the washer is clean 

and dry. Remove paper backing from the 

tape on one of the stacking kit side brackets.

2

Fit the side bracket to the side of the washer 

top as shown in the above illustration. Firmly 

press the adhesive area of the bracket to the 

washer surface. Secure the side bracket to 

the washer with a screw on the back side of 

the bracket. Repeat steps 1 and 2 to attach 

the other side bracket.

STACkING kIT INSTALLATION 

Tools Needed for Installation:

•  Phillips-head screwdriver

w

WARNING

•  

Incorrect installation can cause serious 

accidents.

•   

The weight of the dryer and the height of 

installation make this stacking procedure too 

risky for one person. Two or more people are 

required when installing the stacking kit. 

There is a risk of serious back injury or other 

injuries.

•  

Do not use the stacking kit with a gas dryer 

in potentially unstable conditions such as a 

mobile home.

 Failure to follow this warning can 

result in serious injury.

•  

Place the washer on a solid, stable, level 

floor capable of supporting the weight of 

both appliances.

 Failure to follow this warning 

can result in serious injury.

•  

Do NOT stack the washer on top of the dryer.

Failure to follow this warning can result in 

serious injury.

•  

If appliances are already installed, 

disconnect them from all power, water, or 

gas lines and from draining or venting 

connections.

 Failure to do so can result in 

electrical shock, fire, explosion, or death.

O P T I O N A L   AC C E S S O R I E S

PEDESTAL INSTALLATION 

(cont.)

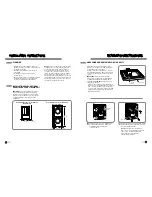
5

Install 2 screws to securely attach the bracket 

to the pedestal.

Once properly attached, firmly press the top 

part of the bracket with the double-sided 

tape to the side of the appliance. Repeat 

steps 2–4 to attach the other brackets.

NOTE:

 If the brackets are not installed 

properly, noise and vibration may result. Be 

sure to remove paper backing and to use all 

screws to install the brackets.

Move the appliance to the desired location.

3

Make sure the side surface of the appliance 

is clean and dry. Remove paper backing from 

the tape on the bracket.

4

Position the bracket as shown. The bent part 

of the bracket should rest along the edge 

of the pedestal, and the holes in the bottom 

part of the bracket should align with the 

holes in the pedestal.

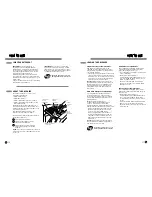
6

Loosen the locknuts on all 4 leveling feet 

of the 

pedestal

 until you can turn them 

with the wrench. Turn clockwise to raise 

or counterclockwise to lower. Once the 

pedestal is level and all 4 feet are solidly 

against the floor, securely tighten all locknuts 

by hand.

NOTE:

 Noise and vibration may result if 

locknuts are not tightened. 

Be sure to connect the appliances to all 

water, power, or gas lines and draining or 

venting connections before operation. 

If there is excessive vibration during the  

first operation after installation, slightly  

adjust the leveling feet.

Raise

Lower

Summary of Contents for WM3988H series

Page 1: ...talación para futuras consultas Model Modelo WM3988H Designed specially to use only HE High Efficiency detergent Diseñada específicamente para usar con el detergente tipo HE Alta eficiencia Front Loading Steam Combo GUÍA DEL USUARIO E INSTRUCCIONES DE INSTALACIÓN Lavadora a Vapor de Carga Frontal To contact LG Electronics 24 hours a day 7 days a week 1 800 243 0000 Or visit us on the Web at us lge...

Page 2: ...sly injured if you don t follow instructions All safety messages will tell you what the potential hazard is tell you how to reduce the chance of injury and tell you what can happen if the instructions are not followed INSTALLATION INSTRUCTIONS Choose the Proper Location 9 Clearances 9 Flooring 10 Installations With Optional Pedestal Base or Stacking kit 10 Unpacking and Removing Shipping Bolts 11 ...

Page 3: ...n using this appliance follow basic precautions including the following SAFETY INSTRUCTIONS FOR INSTALLATION wWARNING For your safety the information in this manual must be followed to minimize the risk of fire or explosion electric shock or to prevent property damage personal injury or loss of life READ ALL INSTRUCTIONS BEFORE USE IMPORTANT SAFETY INSTRUCTIONS IMPORTANT SAFETY INSTRUCTIONS Before...

Page 4: ...ngs could result in serious personal injuries Keep laundry products out of children s reach To prevent personal injury observe all warnings on product labels Failure to comply with these warnings could result in serious personal injuries Remove the door to the washing compartment to avoid the danger of children or small animals getting trapped inside before your washer is removed from service or d...

Page 5: ...eferenced in this manual Ultra Capacity Stainless Steel Drum The ultra large stainless steel drum offers extreme durability and is tilted to improve efficiency and allow easier access for large items Water Circulation AND Steam Nozzles The water circulation nozzles spray the water detergent solution directly onto garments for super cleaning performance During LG s unique high efficiency STEAM cycl...

Page 6: ... and rigid enough to support the weight of the washer when fully loaded without flexing or bouncing If your floor has too much flex in it you may need to reinforce it to make it more rigid A floor that is adequate for a top loading washer may not be rigid enough for a front loading washer due to the difference in the spin speed and direction If the floor is not solid your washer may vibrate and yo...

Page 7: ...ttach the cold water line to the blue cold water inlet on the back of the washer Tighten the fittings securely 2 Water Inlets IMPORTANT Use new hoses when installing the washer Do NOT reuse old hoses IMPORTANT Use ONLY the inlet hoses provided by LG with this laundry product Aftermarket hoses are not guaranteed to fit or function correctly Other hoses may not tighten correctly and could cause leak...

Page 8: ... that they are empty Items such as clips matches pens coins and keys can damage both your washer and your clothes Close zippers hooks and drawstrings to prevent these items from snagging or tangling on other clothes Pretreat heavily stained areas for best results Combine large and small items in a load Load large items first Large items should not be more than half of the total washload The washer...

Page 9: ...1 2 the amount recommended for the main wash cycle For example if the main wash cycle requires one measure of detergent add 1 2 measure for the Prewash option NOTE If liquid detergent is to be used for the main wash when using the pre wash option the liquid detergent cup accessory must be used in main wash dispenser to prevent the main wash liquid detergent from being dispensed immediately Main Wa...

Page 10: ... BUTTONS The option buttons allow you to select additional cycle options and will light when selected Certain buttons also allow you to activate special functions by pressing and holding the button for 3 seconds For detailed information about the individual options please see the following pages 5 6 3 4 7 Cycle Steam FreshTM Dress shirts blouses Heavily soiled underwear work clothes diapers etc La...

Page 11: ...ropriate settings button NOTE To protect your garments not every wash rinse temperature spin speed soil level or option is available with every cycle 5 6 3 4 7 8 1 8 2 3 4 5 6 7 OPERATING THE WASHER Press the ON OFF button to turn on the washer The lights around the cycle selector knob will illuminate Turn the cycle selector knob to the desired cycle The display will show the preset Rinse Wash Tem...

Page 12: ... spin speed soil level or option is available with every cycle See the Cycle Guide for details SOIL LEVEL Adjusts the selected cycle to allow more time for heavily soiled clothes or less time for lightly soiled clothes 1 2 3 WASH RINSE Selects the wash and rinse temperature combination for the selected cycle Press the WASH RINSE button repeatedly to scroll through available settings Your washer fe...

Page 13: ...For delicate fabrics LESS For damp drying fabrics NORMAL For general drying MORE For heavier fabrics 30 60 90 120 For timed drying 1 2 3 4 5 CYCLE OPTION BUTTONS Your Steam Washer features several additional cycle options to customize cycles to meet your individual needs Certain option buttons also feature a special function see the following page for details that can be activated by pressing and ...

Page 14: ...spenser After the cycle has ended open the door and allow the drum interior to dry completely NOTE Do NOT use this cycle with clothes and do NOT add detergent or fabric softener CYCLE OPTION BUTTONS cont EXTRA RINSE This option will add an extra rinse cycle to the selected cycle Use this option to help ensure the removal of detergent or bleach residue from fabrics STAIN CYCLE Select this option fo...

Page 15: ...ay be removed from the stainless steel drum using a stainless steel cleaner Do NOT use steel wool or abrasive cleansers they can damage the surface Storing the Washer If the washer will not be used for an extended period of time and is in an area that could be exposed to freezing temperatures Turn off water supply tap Disconnect hoses from water supply and drain water from hoses Plug the power cor...

Page 16: ...g water from the washer at the end of a cycle Splashing Clothes tumbling in the drum during the wash and rinse cycles BEFORE CALLING FOR SERVICE Your Steam Washer is equipped with an automatic error monitoring system to detect and diagnose problems at an early stage If your washer does not function properly or does not function at all check the following before you call for service Vibrating noise...

Page 17: ...outlet Reset circuit breaker or replace fuse Do not increase fuse capacity If the problem is a circuit overload have it corrected by a qualified electrician Make sure that the door is closed properly and press the START PAUSE button After starting a cycle it may take a few moments before the drum begins to turn or spin The washer will not spin unless the door is locked DOOR LOCK will appear in the...

Page 18: ...16 PSI 100 800 kPa Dimensions 27 W X 293 4 D X 3811 16 H 51 D with door open 68 6 cm W X 75 6 cm D X 98 3 cm H 129 5 cm D with door open Net Weight 201 lb 91 kg Max Spin Speed 1320 RPM The appearance and specifications listed in this guide may vary due to constant product improvements SPECIFICATIONS OPTIONAL ACCESSORIES OPTIONAL ACCESSORIES For these and other LG products contact your local LG dea...

Page 19: ...n serious injury If appliances are already installed disconnect them from all power water or gas lines and from draining or venting connections Failure to do so can result in electrical shock fire explosion or death OPTIONAL ACCESSORIES PEDESTAL INSTALLATION cont 5 Install 2 screws to securely attach the bracket to the pedestal Once properly attached firmly press the top part of the bracket with t...

Page 20: ...NTY DOES NOT APPLY TO Service trips to your home to deliver pick up and or install the product instruct or replace house fuses or correct wiring or correction of unauthorized repairs Damages or operating problems that result from misuse abuse operation outside environmental specifications or contrary to the requirements of precautions in the Operating Guide accident vermin fire flood improper inst...

Page 21: ...iones por su compra y bienvenido a la familia LG Su nueva Steam Washer LG combina la tecnología de lavado más avanzada con funcionamiento sencillo y alta eficiencia Al seguir las instrucciones de funcionamiento y mantenimiento de este manual su lavadora le brindará muchos años de servicio confiable GRACIAS Su Seguridad y la de los demás son de suma importancia En este manual y en su electrodomésti...

Page 22: ...ara minimizar el riesgo de incendio o explosión descarga eléctrica o para prevenir lesiones personales cuando use electrodomésticos se deben seguir precauciones básicas de seguridad incluyendo las siguientes INSTRUCCIONES IMPORTANTE DE SEGURIDAD INSTRUCCIONES IMPORTANTE DE SEGURIDAD wADVERTENCIA Por su seguridad debe seguir la información indicada en este manual para minimizar el riesgo de incendi...

Page 23: ...n todas las advertencias que figuran en las etiquetas de los productos Si estas advertencias no se cumplen se podrían producir heridas graves Retire la puerta del compartimiento de lavado para evitar el riesgo de que los niños o animales pequeños queden atrapados dentro si dejará de usar definitivamente o se deshará de su lavadora Si no se cumple con esto se podrán producir heridas o muerte PIEZAS...

Page 24: ...Además de los componentes y las características descritos en la sección de Características especiales hay varios componentes importantes adicionales a los cuales se hace referencia en este manual Tambor de acero inoxidable de ultra capacidad El tambor de acero inoxidable ultra grande ofrece una durabilidad extraordinaria y está inclinado para mejorar la eficiencia y permitir el acceso fácil para p...

Page 25: ...e fuerte y rígido para soportar el peso de la lavadora cuando se encuentra completamente cargada sin flexionarse ni rebotar Si su piso tiene mucha flexión podría necesitar reforzarlo para hacerlo más rígido Un piso adecuado para una lavadora de carga por la parte superior podría no ser lo suficientemente rígido para una de carga frontal debido a la diferencia en la dirección y velocidad del centri...

Page 26: ...a a la entrada azul de agua fría en la parte posterior de la lavadora Ajuste las conexiones con firmeza 2 Entradas de agua IMPORTANTE Cuando instale la lavadora use mangueras nuevas NO reutilice mangueras viejas IMPORTANTE Usar SOLAMENTE las mangueras de la entrada proporcionadas por LG de este producto del lavadero Las mangueras del mercado de accesorios no están garantizadas para caber o para fu...

Page 27: ...estos artículos se enganchen o enreden en otras prendas Trate previamente las áreas muy manchadas para obtener los mejores resultados Combine prendas grandes y pequeñas en una carga Cargue primero las prendas grandes Las prendas grandes no deberán ser más de la mitad de la carga de lavado total Se puede cargar la lavadora completamente pero el tambor no puede quedar colmado de prendas La compuerta...

Page 28: ... agregado para la opción de prelavado debe ser la mitad de la cantidad para el ciclo de lavado principal Por ejemplo si el ciclo de lavado principal requiere una medida de detergente añada media medida para la opción de prelavado NOTA Si usted use el detergente líquido para el lavado principal cuando se usa la opción de prelavado el accessorio de la taza de detergente debe ser usado en el depósito...

Page 29: ...pciones le permiten seleccionar opciones adicionales de ciclo y se encenderán cuando se seleccionan Ciertos botones también le permitirán activar funciones especiales apretando y manteniendo apretado el botón por 3 segundos Para obtener información detallada sobre las opciones individuales consulte las siguientes páginas 5 6 3 4 7 Ciclo Steam FreshTM Camisas de etiqueta blusas Ropa interior muy su...

Page 30: ...e el botón de ajustes adecuado NOTA Para proteger sus prendas de vestir no todas las temperaturas de lavado enjuague velocidades de centrifugado niveles de suciedad u opciones están disponibles en cada ciclo 5 6 3 4 7 8 FUNCIONAMIENTO DE LA LAVADORA Apriete el botón de ENCENDIDO APAGADO para encender la lavadora Las luces alrededor de la perilla selectora de ciclos se iluminarán Gire la perilla se...

Page 31: ...stán disponibles en cada ciclo Vea la Guía de ciclos para obtener más detalles WASH RINSE lavado enjuague Selecciona la combinación de temperatura de lavado y enjuague para el ciclo seleccionado Apriete el botón WASH RINSE lavado enjuague repetidamente para navegar a través de los ajustes disponibles Su lavadora contiene un elemento de calentamiento que propulsa la temperatura del agua caliente pa...

Page 32: ...las b Cortinas y trapos de mesa c Batas de baño Fibra de Vidrio No seque prendas de fibra de vidrio en la secadora Es posible que las partículas de vidrio que queden dentro de la secadora se adhieran a la ropa en el siguiente lavado lo cual irritará su piel DRY Secado Las opciones de secado se seleccionan fácilmente con el botón DRY secado Para un secado aún mayor asegúrese que las prendas a carga...

Page 33: ...LIGHT luz del tambor TUB CLEAN LIMPIEZA DEL LAVADERO SPINSENSE e LANGUAGE idioma Apriete y mantenga apretado el botón de opción marcado con la función especial por 3 segundos para activar CHILD LOCK LAVAR DE TONEL Use esta función para prevenir el uso no deseado de la lavadora o para impedir cambiar los ajustes de un ciclo mientras la lavadora se encuentra en funcionamiento Apriete y mantenga apre...

Page 34: ...ifugado y deje que la lavadora centrifugue por 1 minuto para drenar el agua NOTA NO todo el anticongelante para vehículo recreacional será expulsado Desconecte el cable eléctrico seque el interior del tambor con un trapo suave y cierre la compuerta Quite los insertos del depósito Drenecualquier resto de agua en los compartimientos y séquelos Almacene la lavadora en posición vertical Para eliminar ...

Page 35: ...mba de drenaje Se pueden acumular pelusas y otros objetos y taponar el filtro de la bomba de drenaje Si la lavadora no drena adecuadamente desconéctela y deje enfriar el agua de ser necesario antes de continuar Abra el filtro del panel de acceso de la bomba de desagüe 1 Desenganche la manguera de drenaje y tírela hacia fuera Coloque el extremo de la manguera de drenaje en una cacerola balde o dren...

Page 36: ... manchadas Agregue los productos de lavado en el tambor de la lavadora No ha descargado la lavadora con rapidez No han sido clasificadas las prendas correctamente Cargue los productos de lavado en los compartimientos adecuados Siempre retire las prendas de la lavadora una vez completado el ciclo Siempre lave las prendas de colores oscuros separadas de las de colores claros y de color blanco para e...

Page 37: ... CLEAN limpieza de tubo de manera regular Asegúrese de limpiar alrededor y debajo del sello de la compuerta con frecuencia La lavadora programa automáticamente el tiempo de lavado según la cantidad de prendas de lavado presión del agua temperatura del agua y otras condiciones de funcionamiento Esto es normal La lavadora programa automáticamente el ciclo de tiempo para brindar resultados óptimos pa...

Page 38: ...para la instalación Destornillador Phillips Llave provista 1 Asegúrese de que las patas niveladoras del electrodoméstico están replegadas completamente ver los detalles de nivelación de la lavadora en el Paso 2 luego coloque el electrodoméstico encima del pedestal Las patas de la lavadora coincidirán en las posiciones esquineras extremas y las de la secadora coincidirán con las posiciones extremas...

Page 39: ...LES Este kit de apilado incluye Dos 2 rieles laterales Un 1 riel frontal Cuatro 4 tornillos Para asegurar la instalación segura siga las siguientes instrucciones 1 Asegúrese de que la superficie de la lavadora esté limpia y seca Quite el papel de respaldo de la cinta ubicado en una de las abrazaderas laterales del kit de apilado 2 Haga coincidir la abrazadera lateral del lado de la parte superior ...

Page 40: ...ajes de mantenimiento desde su hogar para entrega recepción y o instalación del producto instrucción o reemplazo de fusibles del hogar o cableado adecuado o corrección de reparaciones no autorizadas Los daños o problemas operativos que resulten de la negligencia en el uso el abuso el funcionamiento fuera de las especificaciones medioambientales o inconsistentes con los requisitos de precauciones e...

Page 41: ...P No MFL31245118 ...

Reviews: