contact your authorized LGB
retailer or an LGB service station
(see Authorized Service).
Hint: If this model is equipped
with a decoder, the digital/analog
DIP switches on the loco circuit
board will be set to OFF. On deco-
der-equipped models, the DIP
switches remain in this setting,
even if the model is used on an
analog layout.
Pantograph control with Multi-
Train System
If this model is equipped with
Multi-Train System Decoders,
both pantographs will rise auto-
matically. The pantographs then
can be lowered by remote control
using the loco function buttons on
the Loco Remote or Universal
Remote:
Button 2 - Raise/lower front pan-
tograph
Button 3 - Raise/lower rear panto-
graph
If using the MTS Train Mouse,
push the loco function button the
respective number of times (e.g.,
for “2 - front pantograph” push the
button twice).
CAUTION! If this model is equip-
ped with a Multi-Train System
decoder, it must not be operated
with catenary power. Operate
decoder-equipped locos with
track power only.
Lighting
This model features directional
lighting: three white lights on the
front and two red lights on the
rear. The cabs are equipped with
a white light for background illumi-
nation along with small LEDs on
the instrument panels.
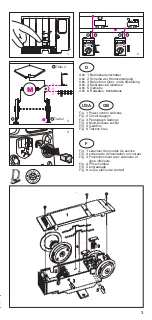
The model has two „flat“ multi-
purpose sockets, with a remova-
ble cover, at the front and rear of
the loco (Fig. 4). These sockets
can be used to provide track
power to cars with lighting or
sound electronics.
To remove the cover of the
socket, pull it straight out. If the
cover is tight, gently use a small
straight screwdriver to pry it out.
(Do not pull out the rectangular
outer housing.)
If your cars have the older,
„round“ lighting connectors, use
the Light Socket Adapter (68334).
Power Supply
Attention! For safety and reliabi-
lity, operate this model with LGB
power supplies (transformers,
power packs and controls) only.
The use of non-LGB power sup-
plies will void your warranty.
Use this model with LGB power
supplies with an output of more
than 1 amp. For more information
on LGB power supplies for indoor,
outdoor and multi-train operation,
see the LGB catalog.
Attention! After extended opera-
tion, this model may leave carbon
dust or other debris around the
track. This dust and debris can
stain carpet and other materials.
Consider this when setting up
your layout. Ernst Paul Lehmann
Patentwerk and LGB of America
are not liable for any damages.
SERVICE
Do-It-Yourself Service Levels
Level 1 - Beginner
Level 2 - Intermediate
Level 3 - Advanced
Attention! Improper service will
void your warranty. For quality
service, contact your authorized
retailer or an LGB factory service
station (see Authorized Servi-
ce).
Cleaning 1
This model can be cleaned exter-
nally using a mild detergent and
gentle stream of water. Do not
immerse this model.
Replacing the light bulbs 1
Lanterns: Carefully pry the lens
away from the lantern. Using
tweezers, remove and replace the
bulb. Reassemble.
Cab lights: Using tweezers,
remove and replace the bulb.
Replacing the traction tire 2
- Use a small, straight-blade scr-
ewdriver to pry the old traction
tire out of the wheel groove.
- Use a small, straight-blade scr-
ewdriver to gently pry the new
traction tire into the wheel groo-
ve.
- Make sure that the traction tire is
seated properly in the wheel
groove.
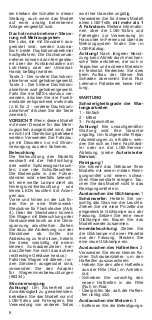
Replacing the motors 3
-
Remove the truck mounting
plate from the chassis by remo-
ving two screws (Fig. 5).
- Pull the truck away from the
chassis.
- Disconnect the wiring cable.
- Remove the top of the gearbox
by removing two screws. Repla-
ce the motor. Reassemble.
Attention! If the motor is repla-
ced, generously lubricate the
gears with LGB Gear Lubricant
(51020).
9

