background image


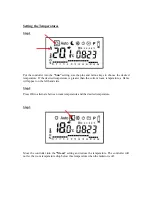
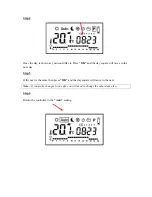
Step 4 
 

Turn 

ON

 the thermostat TEI6 and put into the 

“Sun”

 position using the left and right arrows, 

indicated in the LCD tool bar at the top of the display. 

 
Step 5 
 

Push the 

“OK” 

button for 5 seconds until 

“nrf in it” 

is displayed and a quick moving LCD 

light flashes across the bottom of the display. This indicates that the thermostat is attempting 
to link itself to the receiver. Push the 

“OK”

 button again. 

 
Step 6 


The green light will go off on the receiver, indicating that the pair is now linked. 


Summary of Contents for Radiator

Page 1: ...LHZ USER GUIDE ...

Page 2: ...ake the time to read and understand all the directions and tips to ensure that you are operating the radiator efficiently and correctly Before you get started you should be aware that your radiator has been sized correctly for the room you would like heated As with any heating device leaving windows and doors open will affect the performance of the radiator as will the level of insulation in your ...

Page 3: ...ing a program Holiday Function Other Functions Recommended operating guidelines Wireless Controller Operating Guidelines Lights on the receiver Operating temperatures Program settings Positioning of the controller Manual Control Setting the temperature Ensuring the temperature Troubleshooting Customer service pullout ...

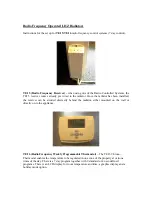
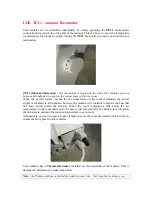
Page 4: ...s been installed the receiver can be situated discreetly behind the radiator either mounted on the wall or directly on to the appliance TEI 6 Radio Frequency Weekly Programmable Thermostat The TEI 6 Chrono Thermostat enables the temperature to be regulated in one zone of the property at various times of the day There is a 7 day program together with 9 standard or 4 user defined programs There is a...

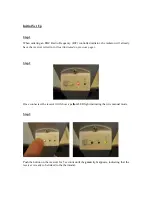
Page 5: ...ve the receiver wired in to it as illustrated on previous page Step 2 Once connected the receiver will show a yellow LED light indicating that it is manual mode Step 3 Push the button on the receiver for 5 seconds until the green light appears indicating that the receiver is ready to be linked to the thermostat ...

Page 6: ...he display Step 5 Push the OK button for 5 seconds until nrf in it is displayed and a quick moving LCD light flashes across the bottom of the display This indicates that the thermostat is attempting to link itself to the receiver Push the OK button again Step 6 The green light will go off on the receiver indicating that the pair is now linked ...

Page 7: ...stops a red LED light will light up on the receiver indicating that now the radiator is ready to heat up Step 8 Once the room receives the required temperatures set on the thermostat the red LED light will go OFF on the receiver To test this simply push the minus button on the to drop the temperature setting on the display below the current room temperature and the red light will go off indicating...

Page 8: ...inutes using the and buttons Step 3 Press OK again and the hour will start flashing again adjust the hour using the and buttons Beware that it is a 24 hour clock Step 4 Press OK again and set the correct day of the week using the and or the arrow keys The days are numbered 1 Monday through to 7 Sunday This important because it is a seven day timer so the controller knows when it is the weekend ...

Page 9: ...erature is greater than the current room temperature a flame will appear on the left hand side Step 2 Press OK to alternate between room temperature and the desired temperature Step 3 Move the controller into the Moon setting and reduce the temperature The controller will not let the room temperature drop below this temperature when the radiator is off ...

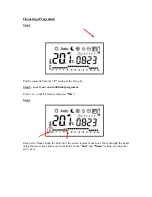
Page 10: ... right Step 2 to set your own individual programm Press or until U1 flashes and press OK Step 3 Each of the blocks along the bottom of the screen represent one hour Move through the hours using the arrow keys and move them between the Sun and Moon setting by using the and keys ...

Page 11: ... and the day square will move to the next day Step 5 If the next is the same then press OK and the day square will move to the next Note If you make changes to one day you will need to change the other days also Step 6 Return the controller to the Auto setting ...

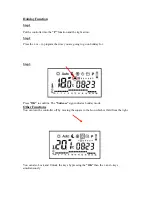
Page 12: ...m the time you are going to go on holiday for Step 3 Press OK to confirm The Suitcase sign indicates holiday mode Other Functions You can turn the controller off by moving the square to the Icon which is third from the right You can also Lock and Unlock the keys by pressing the OK then the and keys simultaneously ...

Page 13: ...herefore depending on what the room is used for and the comfort levels required we recommend that you set the temperature or the sun setting between 16 degrees and 20 degrees i e at the times when you require the heating on We recommend that you set the moon setting between 5 degrees and 10 degrees when you do not require the heating Suggested program settings You can see how to set up a user prog...

Page 14: ...ature on the room thermostat the power supply is disabled to all radiators however the radiator will continue to radiate the heat that has been stored within the radiator When the room temperature falls below the set temperature on the room thermostat the power will automatically be enabled this will allow the radiators to maintain the required temperature in each room Alternatively you can reques...

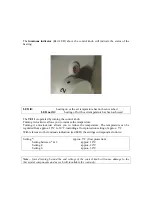
Page 15: ...erature Turning it anti clockwise allows you to reduce the temperature The temperature can be regulated from approx 10 C to 30 C including a frost protection setting of approx 5 C With reference to the luminous indication red LED the settings correspond as follows Setting approx 5 C frost protection Setting between 1 approx 10 C Setting 4 approx 20 C Setting 6 approx 30 C Note forced turning beyon...

Page 16: ...urn the radiator off at the wall plug Wireless control Move the controller to the moon setting and reduce the temperature of the moon setting down to 5 degrees by pressing the minus button The radiator is not heating the room sufficiently Manual radiator Turn the dial up slightly until the red light shines However make sure the radiator still cycles on the thermostat light goes out regularly Wirel...

Page 17: ...adiator is not in manual mode if the yellow light on the radiator is showing press the button on the radiator receiver until the yellow light is no longer showing Make sure that the controller is in a position where it can measure the temperature of the room in the same room as a radiator and between 1m and 1 5m from the floor Controller is locked Press and hold the ok button and simultaneously pr...

Page 18: ...o How to change the programming Yes No How the radiator needs to cycle on the Thermostat Yes No The importance of the positioning of the Controller Yes No How I can tell when the radiator is using electricity Yes No Has the following been completed to you satisfaction Please circle Have I cleaned up properly after installing the radiator Yes No Has the radiator been positioned as to my liking Yes ...

Page 19: ...ur retailer If you have circled NO in any area above a Customer Service representative will contact you directly To be signed by the purchaser Signed Date Name Address For office use only Installed by Account Number Processed by Date ...

Reviews: