Troubleshooting
Finding Leaks
Using the LI-6400
20-37
¥
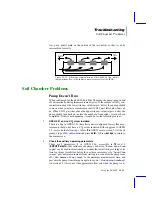
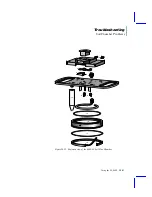
The Air Passage O-rings
There is a small O-ring around each air passage tube to the console
(Figure 2-1 on page 2-3). Are they there? Are they clean and lightly lubricat-
ed? Are the chemical tubes fully seated against the console? DonÕt overtight-
en the attachment screw, or youÕll never get it back off without tools. Lightly
snug is sufficient.
¥
The End Cap O-rings
There is a large O-ring on each end cap that should be compressed slightly
when the end cap is tightened on. If there is a gap, itÕs probably because the
threads are dirty. Clean the threads with water if necessary, and keep them
clean each time you change chemicals. See
Hose Barbs
Internally, there are a number of single flute hose barbs; visually inspect all
hose barbs and check for tightness. Although the tubing might rotate freely
5
on the hose barb flute, the hose barb itself must be threaded tightly into its
threaded mounting hole. If you can't turn a hose barb with your fingers, then
it is
probably
tight enough to not leak. Hose barbs can be tightened with a 1/4
inch end wrench or (in a pinch) needle nose pliers. They have rubber gaskets,
so if they physically touch the surface they screw into, that might be tight
enough.
Be careful not to overtighten; hose barbs can break
. Note that there
are also four hose barbs on the block to which the chemical tubes are attached.
Quick Connectors
Inside the quick connector is a rubber seal, similar to an O-ring. When a hose
is inserted into a quick connector, it pushes in rather easily until encountering
the internal clamping device; it must then be pushed an additional 0.25 inch
(0.5 cm) to make contact with the rubber seal. Variations in the outside diam-
eter of the Bev-a-line tubing can make the insertion of the tubing into the
quick connectors difficult; in such cases, improperly inserted tubing may
work loose and cause a leak. Hint: Wet the end of the tubing before insertion.
The red collet on the quick connector is for hose removal: press the collet in
towards the center of the connector before pulling on the hose to remove it. If
you can easily pull a hose out of a quick connector without depressing the red
collet, it means that the hose was not inserted far enough. The clamp ring
leaves a mark on the end of the hose; if this mark is 1/4Ó from the end, the
hose was inserted correctly.
5.
Actually, if it does rotate freely, it could be leaking.
Summary of Contents for LI-6400
Page 1: ...Using the LI 6400 Portable Photosynthesis System ...
Page 15: ...Part I The Basics ...
Page 16: ......
Page 174: ...Making Measurements Answers to Questions 4 56 Using the LI 6400 4 ...
Page 175: ...Part II Useful Details ...
Page 176: ......
Page 200: ...Standard Tools Power ON Hooks 5 24 Using the LI 6400 5 ...
Page 214: ...Real Time Data Real Time Graphics 6 14 Using the LI 6400 6 ...
Page 234: ...Environmental Control Light Control 7 20 Using the LI 6400 7 ...
Page 244: ...Light Sensor Considerations Gallium Arsenide Phosphide GaAsP Sensor 8 10 Using the LI 6400 8 ...
Page 288: ...Data Logging Making Your Own AutoPrograms 9 44 Using the LI 6400 9 ...
Page 289: ...Part III Working With Files ...
Page 290: ......
Page 312: ...The LPL File System Troubleshooting 10 22 Using the LI 6400 10 ...
Page 340: ...Downloading Files Using a Data Capture Program 11 28 Using the LI 6400 11 ...
Page 375: ...Part IV Configuration Issues ...
Page 376: ......
Page 420: ...Defining User Variables Old Style vs New Style 15 18 Using the LI 6400 15 ...
Page 454: ...Using an Energy Balance Further Reading 17 12 Using the LI 6400 17 ...
Page 455: ...Part V Maintenance Troubleshooting ...
Page 456: ......
Page 572: ...Troubleshooting Useful Information 20 46 Using the LI 6400 20 ...
Page 593: ...Part VI Programming ...
Page 594: ......
Page 622: ...Programming with LPL Compiler Directives 22 28 Using the LI 6400 22 ...
Page 846: ...Index I 16 Using the LI 6400 ...


