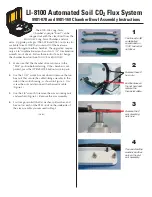
5
Install the arm
assembly over
the mounting
flange.
Remove the
mounting
hardware from
the new arm
assembly.
Tighten each nut
hand tight only.
LI-COR, inc.
●
4647 Superior Street
●
P.O. Box 4425
●
Lincoln, Nebraska 68504 USA
Phone: 402-467-3576
●
FAX: 402-467-2819
Toll-free 1-800-447-3576 (U.S. & Canada)
envsales@licor.com
●
envsupport@licor.com
●
www.licor.com
ACU-119
®
5.
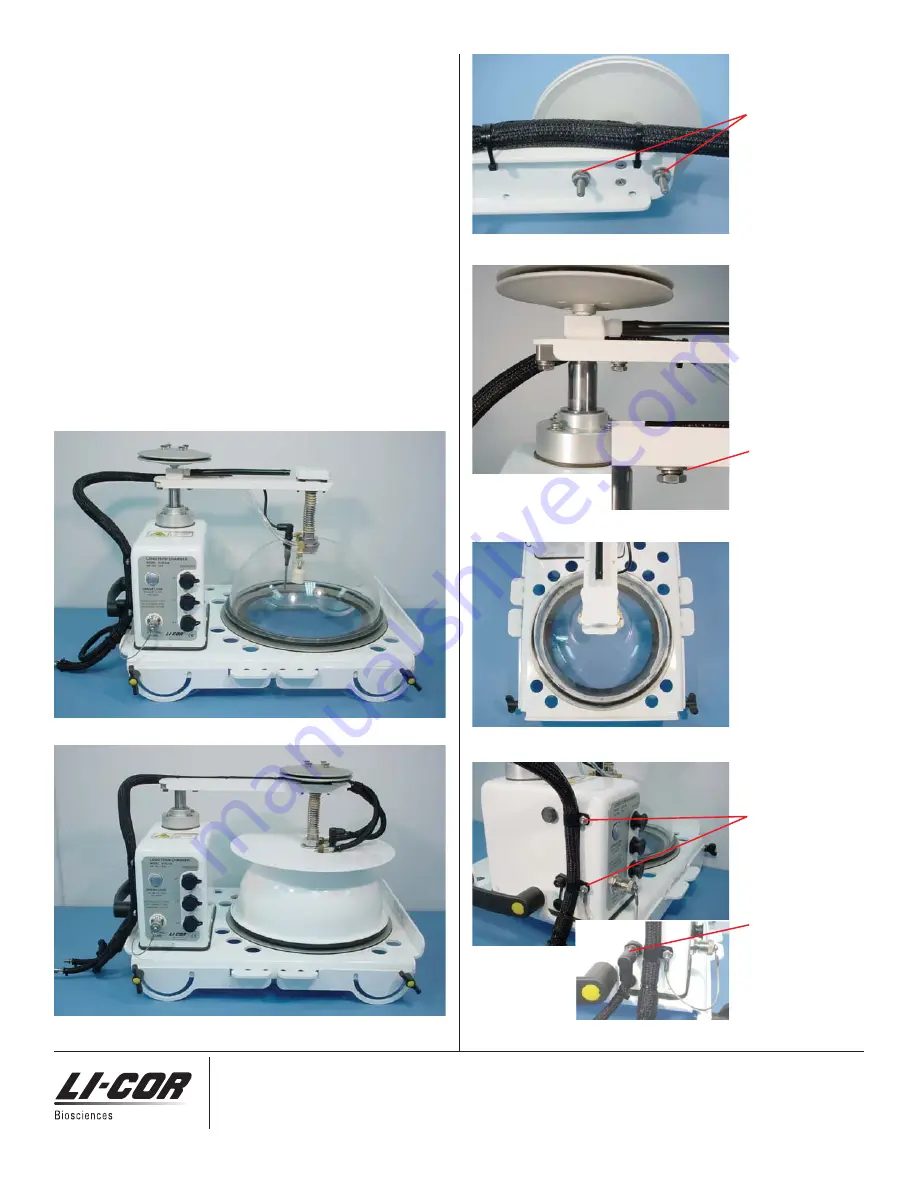
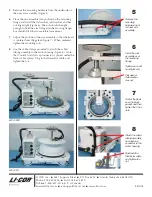
Remove the mounting hardware from the underside of
the new arm assembly (Figure 5).
6.
Place the arm assembly into position on the mounting
flange and install the flat washer, split washer, and hex
nut finger tight (Figure 6). The nuts should be tight
enough to hold the arm flat against the mouting flange,
but should still allow some lateral movement.
7.
Adjust the position of the arm assembly so that the bowl
is centered over the gasket (Figure 7). When centered,
tighten the mounting nuts.
8.
Use the cable clamps provided to attach the cable/
tubing assembly to the motor housing (Figure 8). Note
that Control Unit dust cap connector is placed under the
lower cable clamp. Plug in the thermistor cable and
tighten the nut.
6
Flat washer
Split washer
Hex nut
Center the bowl
over the black
gasket, and then
tighten the 2 hex
nuts.
7
Attach the cable/
tubing assembly
and dust cap
connector to the
motor housing.
8
8100-104C
8100-104
Reattach the
thermistor cable
and tighten the
nut.


