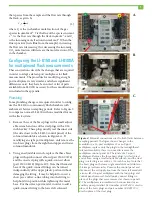
manifold, the hose connecting the lower left solenoid
manifold to the pump will have to be temporarily
removed. First, remove the two thumb screws that
secure the control panel to the LI-8150 and the
ribbon cable from the side of the control panel, and
set the control panel aside (Figure
4
B). Carefully
remove the hose from the quick-connect fitting by
pressing down on the orange ring and pulling out on
the hose. Rotate the fitting out of the way. After the
second quick-connect fitting has been added replace
the hose, seating it firmly in the fitting, and reinstall
the control panel (Figure
4
C).
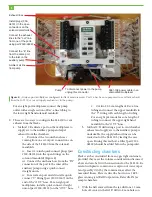
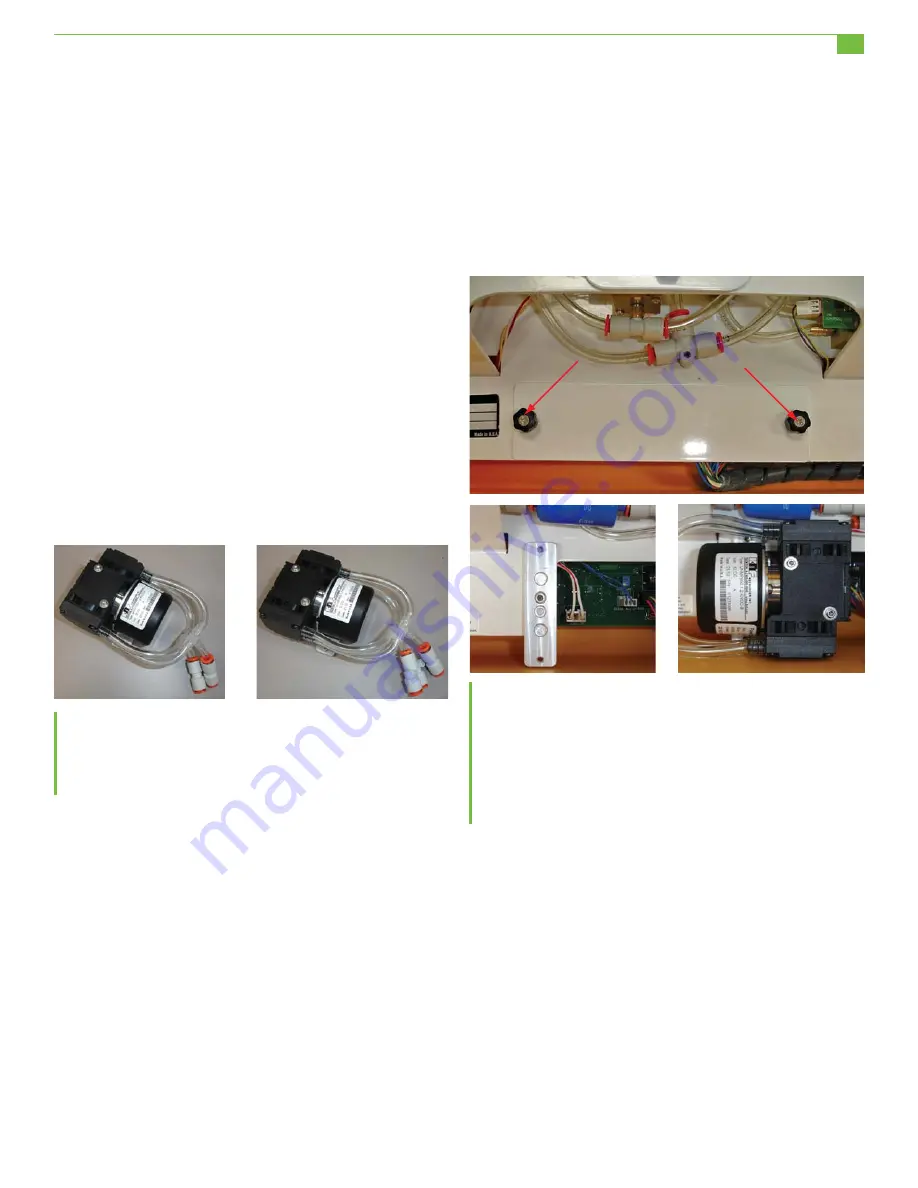
3. Ventilation to the flasks is provided with an 8 L/min
diaphragm pump (part #9981-173) that can be
installed inside the LI-8150. If installing this pump
in a sixteen port multiplexer remove the quick-
connect straight union installed on the pump outlet
and replace with a quick-connect “Y” fitting (part
#300-03367) as shown in Figure 6B. If installing in an
eight port multiplexer no modification is needed
(Figure 6A).
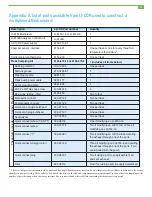
6. Locate the main power supply cable inside the
LI-8150 (part #9981-108; Figure 8). One end of this
cable terminates in a four-pin slip connector con-
nected to the main circuit board and the other in a
four-pin Eurofast bulkhead mounted to the side of
the LI-8150 case. Remove the cable by disconnecting
the four pin slip connector from the circuit board
and removing the nut on the outside of the LI-8150
from the Eurofast bulkhead.
4. Before installing the pump, attach the pump assem-
bly power cable (part #9981-177). This cable con-
nects to the pump via a three-pin slip connector on
the underside of the pump.
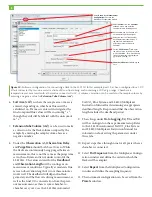
5. Remove the cover plate from the instrument by
loosening the two thumb screws (Figure 7A). Mount
the pump in the LI-8150 case by attaching the
mounting plate to one of the two threaded holes
normally used to attach the cover plate (Figure 7B).
Use one of the three 3/8 inch #6-32 hex cap screws
(part #140-04315) and the 7/64 inch long arm hex
key (provided) to attach the mounting plate to the
LI-8150. Use the remaining two hex cap screws to
attach the pump to the plate.
Figure 7.
The pump mounting plate can be installed inside
the LI-8150 case using one of the two threaded holes
normally used to attach the cover plate.
A.
Loosen the two
thumb screws (indicated with arrows) to remove the cover
plate.
B.
Use one 3/8 inch long #6-32 hex cap screw to
install the mounting plate in place of the cover.
C.
Use the
remaining two screws to attach the pump to the mounting
plate.
7. Install the pump assembly power cable into the
multiplexer in place of the power cable removed in
step 6 (Figure 8). When the new Eurofast bulkhead is
installed the nut on the bulkhead needs to be tight-
ened to 72 inch-lbs of torque to ensure a water tight
seal.
8. Cut two (one for an eight port multiplexer) 48 cm
sections of Bev-a-line tubing. The two pieces of
tubing are kept at the same length to help ensure that
flow from the pump is split equally between the two
manifolds. For a 16-port multiplexer insert one end
of each hose into the “Y” fitting (part #300-03367)
installed in step 3, and insert the other end into one
of the quick-connect fittings added to the lower
solenoid manifolds in step 2.
Figure 6.
A.
No modifications are needed to the pump if
installing it in an eight port multiplexer.
B.
This pump is
being installed in a sixteen port multiplexer, so a quick
connect “Y” union is installed on the outlet, in place of the
straight union the pump comes with.
A.
B.
A.
5
B.
C.


