6 | EN
Copyright © Liberty Pumps, Inc. 2019 All rights reserved.
4617000L
6.
Attach the 2” check valve to the discharge pipe as close to the
top of the tank as possible. Make sure that the arrow on the
check valve is pointing up, away from the pump.
Do not reduce the discharge pipe size below 2".
7.
Complete the discharge piping to the house waste line using
a minimum number of turns.
8.
Install a 2" vent pipe into the vent opening on the cover.
9.
Connect the vent pipe to the house vent line or directly to the
atmosphere. Unit must be vented in accordance with local
plumbing codes.
Do not use an air admittance valve or a mechanical
spring-loaded venting device.
10.
If installing a finished floor above the LowPro tank system,
continue with steps 11 through 13, otherwise, resume
installation at step 14.
11.
The rough opening size required for installation using
standard 2” x 6” floor joists will vary depending on the actual
installation and the orientation of the tank. The overall rough
opening size needed to enclose the entire LowPro tank is 42”
.
12.
Measure the finished flooring thickness and determine the
number of closet flange spacers needed to bring the closet
flange up to the finish floor.
13.
Set the proper number of plastic closet flange spacers onto
the brass closet flange.
The foam gasket material on the
spacer(s) must be facing down.
The spacer(s) will not be
secured to the closet flange, so use care not to move them
during the installation of the toilet.
14.
Install the provided wax toilet bowl seal ring onto the toilet
following the directions included with the toilet.
15.
Install the toilet onto the closet flange following the
directions included with the toilet.
16.
Hook up the water line to the toilet.
17.
Turn the water on and fill the toilet tank. Test for leaks. Flush
the toilet several times and allow the pump to cycle to ensure
proper operation.
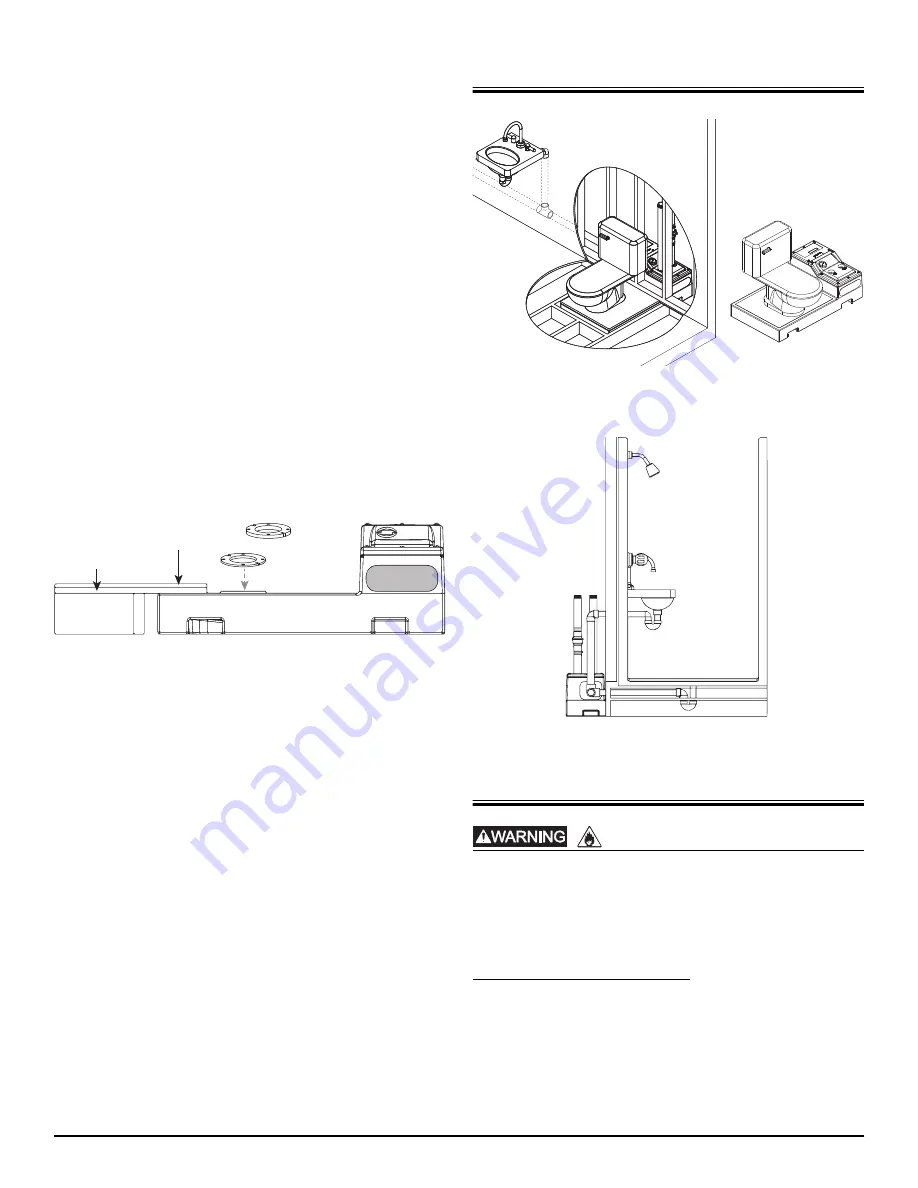
Sample Illustrations
Figure 1. Typical Finished Installation and
Optional Toilet Orientation
Figure 2. Elevated Shower Side View
Maintenance and Troubleshooting
Accidental contact with electrically live parts, items, fluid, or
water can cause serious injury or death.
Always disconnect the pump from power source before
attempting to service the pump. Fatal electrical shock could
occur.
Maintenance
The LowPro system requires no routine maintenance. The exterior
of the unit may be cleaned with a damp cloth and normal
household cleaners. Never spray or dump water or chemicals
directly on the unit.
If a washing machine is connected, periodically remove the access
cover to clean lint and debris from the float switch.
2 x 6 Floor Joist
LowPro Tank
Subfloor
(plywood, etc.)
Finish Flooring
(tile, linoleum, etc.)
Two supplied
(1/4” and 1/2”)
May be stacked for
total of 3/4”
Spacers
RISK OF FIRE


