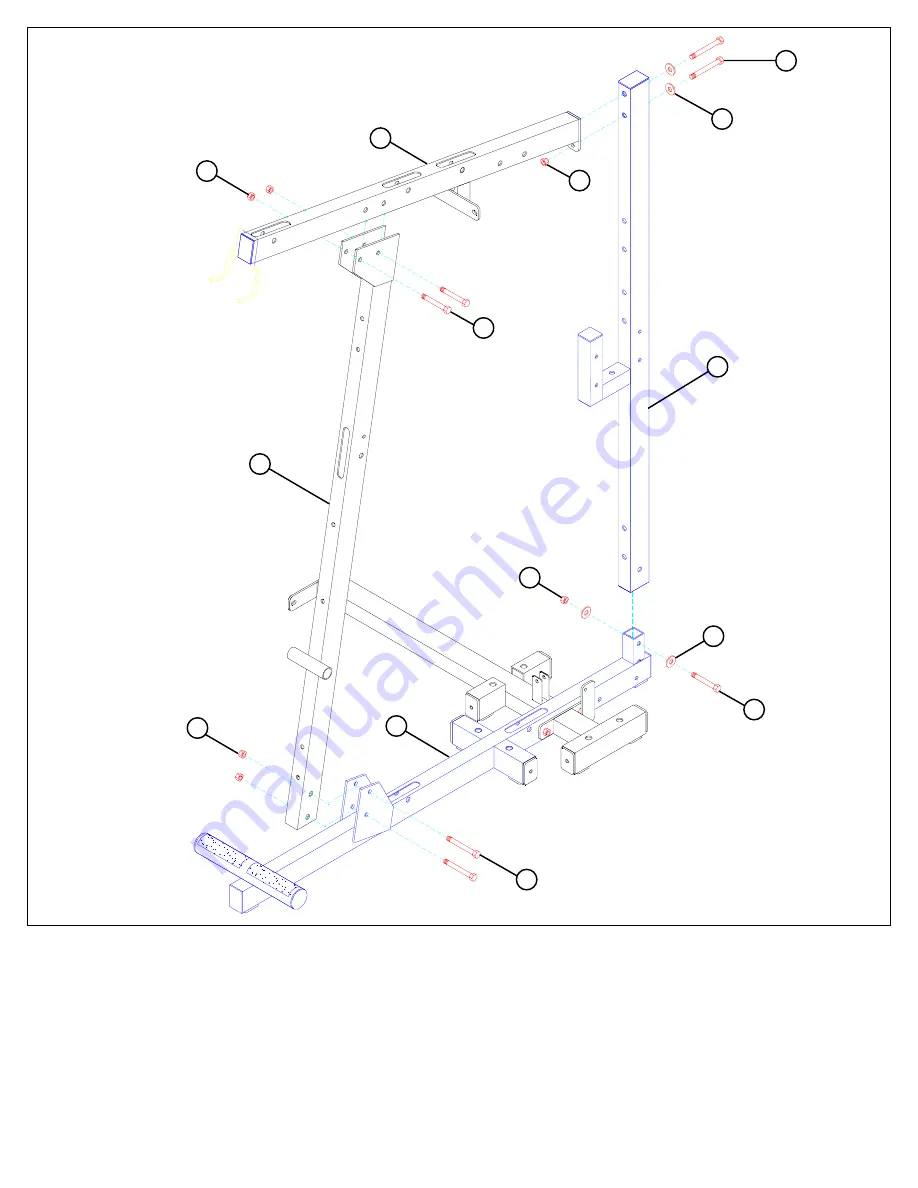
STEP 2:
FIGURE 2
5
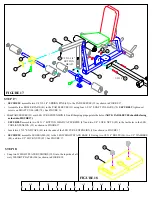
•
LOOSELY
assemble the FRONT UPRIGHT (29) to the BASE (25) using two 1/2 X 3-1/4” BOLTS (95) and two 1/2” LOCK NUTS (85)
as shown in FIGURE 2.
•
LOOSELY
assemble the REAR UPRIGHT (1) to the BASE (25) using one 1/2 X 3” BOLT (94), two 1/2” WASHERS (84), and one 1/2”
LOCK NUT (85) as shown in FIGURE 2.
•
LOOSELY
assemble the TOP BOOM (30) to the FRONT UPRIGHT (29) using two 1/2 X 3-1/4” BOLTS (95) and two 1/2” LOCK NUTS
(85) as shown in FIGURE 2.
•
LOOSELY
assemble the TOP BOOM (30) to the REAR UPRIGHT (1) using two 1/2 X 4” BOLTS (96), two 1/2” WASHERS (84), and
one 1/2” LOCK NUT (85) as shown in FIGURE 2.
TIGTEN ALL LOOSE FRAME CONNECTIONS MADE TO THIS POINT!
25
85
85
84
1
84
85
30
85
95 1/2 X 3-1/4”
95 1/2 X 3-1/4”
94 1/2 X 3”
96 1/2 X 4””
29


