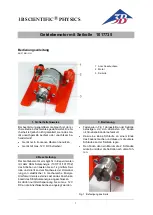


List of Components:
“Airway Larry” Airway Management
Trainer
8 oz. Bottle of Lubricant
Left and Right Simulated Lungs
Simulated Stomach
1
About the Simulator…
The
Life/form
®
Airway Management
Trainer, “Airway Larry”, is the most real-
istic simulator available for the training
of intubation and other airway manage-
ment skills.
This particular trainer has been specially
designed to build students’ confidence
and expertise with an easy-to-use model,
while still providing a realistic intubation
experience.
NASCO has taken great care to create
an airway management trainer that is
anatomically correct in respect to both
size and detail. Landmarks include:
nostrils, teeth, tongue, oral and nasal
pharynx, larynx, cricoid ring, epiglottis,
arytenoid, false and true cords, trachea,
esophagus, self-deflating lungs, and
stomach.
NASCO’s “Airway Larry” allows you
to practice oral, digital, and nasal
intubation. E.T., E.O.A., PTL®, and
Combitube® insertion can all be prac-
ticed as well (please see section titled
“Using the Combitube®”). Suction tech-
niques and proper cuff inflation can also
be performed and evaluated.
In addition, this model also allows stu-
dents to apply cricoid pressure dur-
ing the intubation procedure (Sellick’s
Maneuver). By locating the larynx and
depressing the cricoid ring, the student
may realistically lower the vocal cords
farther into the field of view. This also
effectively closes off the esophagus of
the simulator.
The Airway Management Trainer head
can be detached from the training stand
and placed on
CPARLENE
®
or Resusci®
Disinfecting the Airway:
To disinfect, repeat the standard cleaning
procedure, but this time using a bleach
solution, as specified by the Centers
for Disease Control instead of soapy
water. Fill the system with the solution
until it reaches the corners of the mouth.
Remember to start filling with the head
flat, and finish with the neck slightly ele-
vated to ensure that the solution com-
pletely fills all airway passages. Once
completely filled with the bleach solu-
tion, allow the head to sit for at least 10
minutes. Drain as described earlier and
repeat the rinsing process to flush out
all of the bleach solution. Set the head
aside and allow it to dry completely.
4
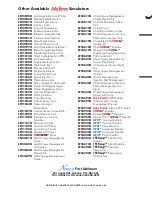
Supplies/Replacement Parts for the
“Airway Larry” Airway Management
Trainer:
LF03605U Replacement Lung Kit
LF03606U Replacement Stomach Kit
LF03644U NASCO Pump Spray
Lubricant
W09919U REN Cleaner
Cleaning the Face:
Normal soil can be removed from the
face of the trainer with mild, soapy water.
REN Cleaner (W09919U) will remove
stubborn stains. Simply apply REN to
the soiled area and wipe clean with a
soft cloth or paper towel. NOTE: Do not
use REN Cleaner around the mouth and
nostrils, as the residue of the cleaner
could be toxic.
Caution
:
Never place the trainer on any kind of
printed paper or plastic. These materi-
als will transfer indelible stains. Ballpoint
pens will also make indelible stains. Do
not use cosmetics.
*Resusci® Anne™ is a trademark of Laerdal
Medical Corporation.
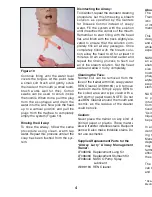
Continue filling until the water level
covers the tongue. At this point, take
a small soft brush and gently scrub
the inside of the mouth (a small tooth-
brush works well for this). Cotton
swabs can be used to scrub inside
the nostrils. When done, pull the plug
from the esophagus and drain the
water into the sink. Now pick the head
up to a vertical position and pull the
plugs from the trachea to completely
empty the system (Figure 10).
Rinsing the Airway:
To rinse the airway, follow the same
procedure using clean, warm tap
water. Repeat this process until all the
soap has been flushed from the sys-
tem.
Anne™* brand manikins, creating a
valuable mega-code component. With
proper care, your
Life/form
®
Airway
Management Trainer will provide years
of valuable service. Please review the
instructions carefully for set-up, clean-
up, and maintenance procedures.
Figure 1
Figure 2
Figure 10
Set Up:
The Airway Management Trainer is
ready to use upon delivery. Simply
remove it from the carton and unwrap
the packaging material. The lung and
stomach bags are already in place
and ready to use.
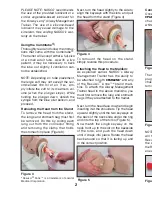
Lubrication:
Before using the Airway Management
Trainer, lubricate both the simula-
tor and supplies being used with the
NASCO lubricant provided (Figures 1
& 2).