
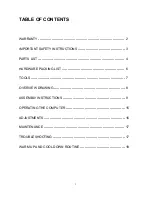
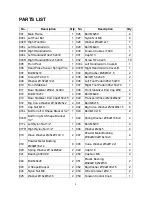
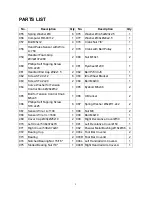


9
ASSEMBLY INSTRUCTIONS
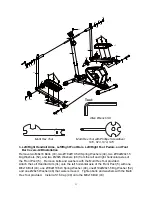
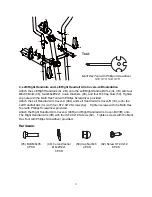
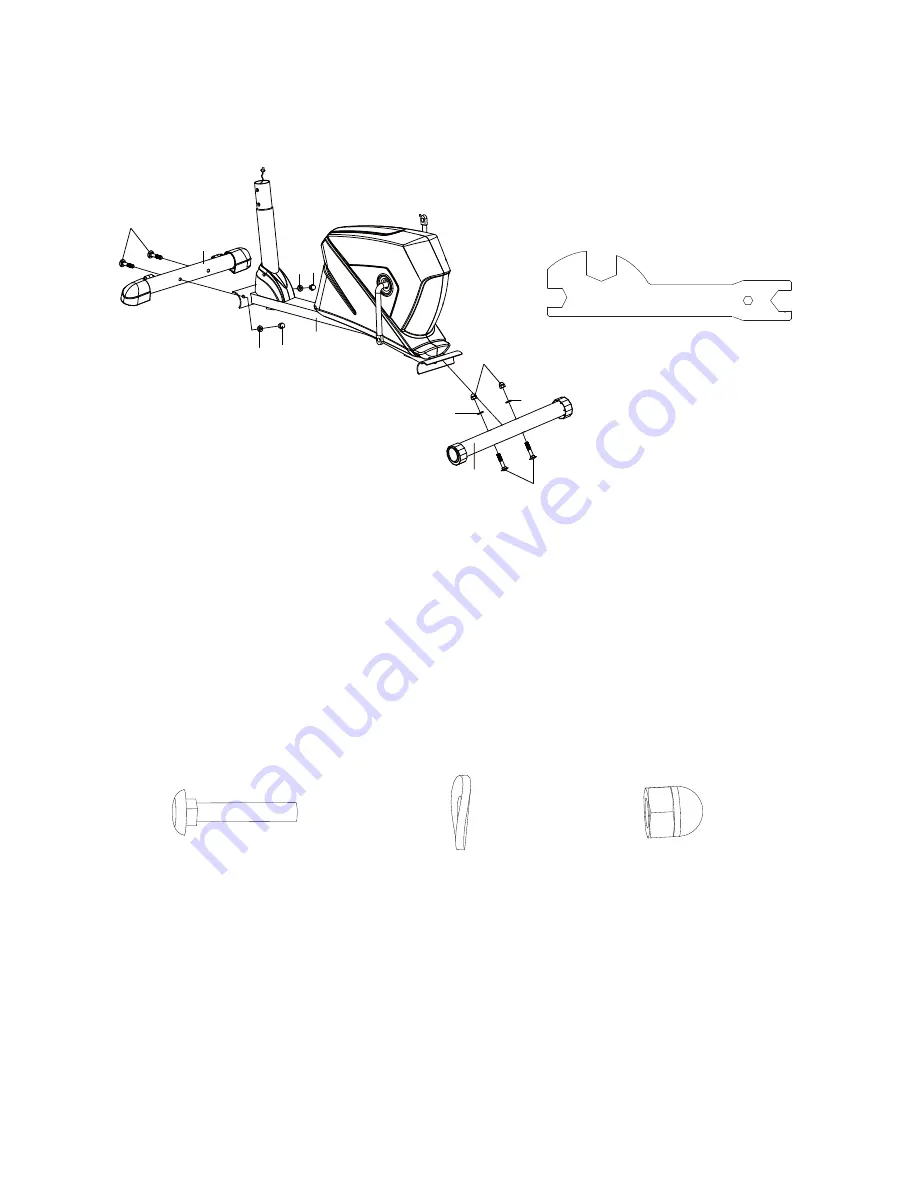
1. Front and Rear Stabilizers Installation
Position the Front Stabilizer (10) in front of Main Frame (1) and align bolt holes.
Attach the Front Stabilizer (10) onto the front curve of the Main Frame (1) with two M10x57
Bolts (12), two Ø10xØ25x2 Big Curve Washers (14), and two M10 Cap Nuts (15). Tighten
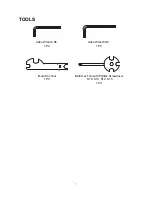
cap nuts with the Multi Hex Tool provided.
Position the Rear Stabilizer (11) behind the Main Frame (1) and align bolt holes.
Attach the Rear Stabilizer (11) onto the rear curve of the Main Frame (1) with two M10x57
Bolts (12), two Ø10xØ25x2 Big Curve Washers (14), and two M10 Cap Nuts (15). Tighten
cap nuts with the Multi Hex Tool provided.
Hardware:
Multi Hex Tool
Tool:
12
11
14
15
14 15
14
14
15
10
12
1
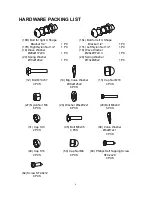
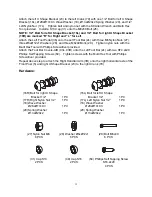
(12) Bolt M10x57
4 PCS
(14) Big Curve Washer
Ø10xØ25x2
4 PCS
(15) Cap Nut M10
4 PCS


