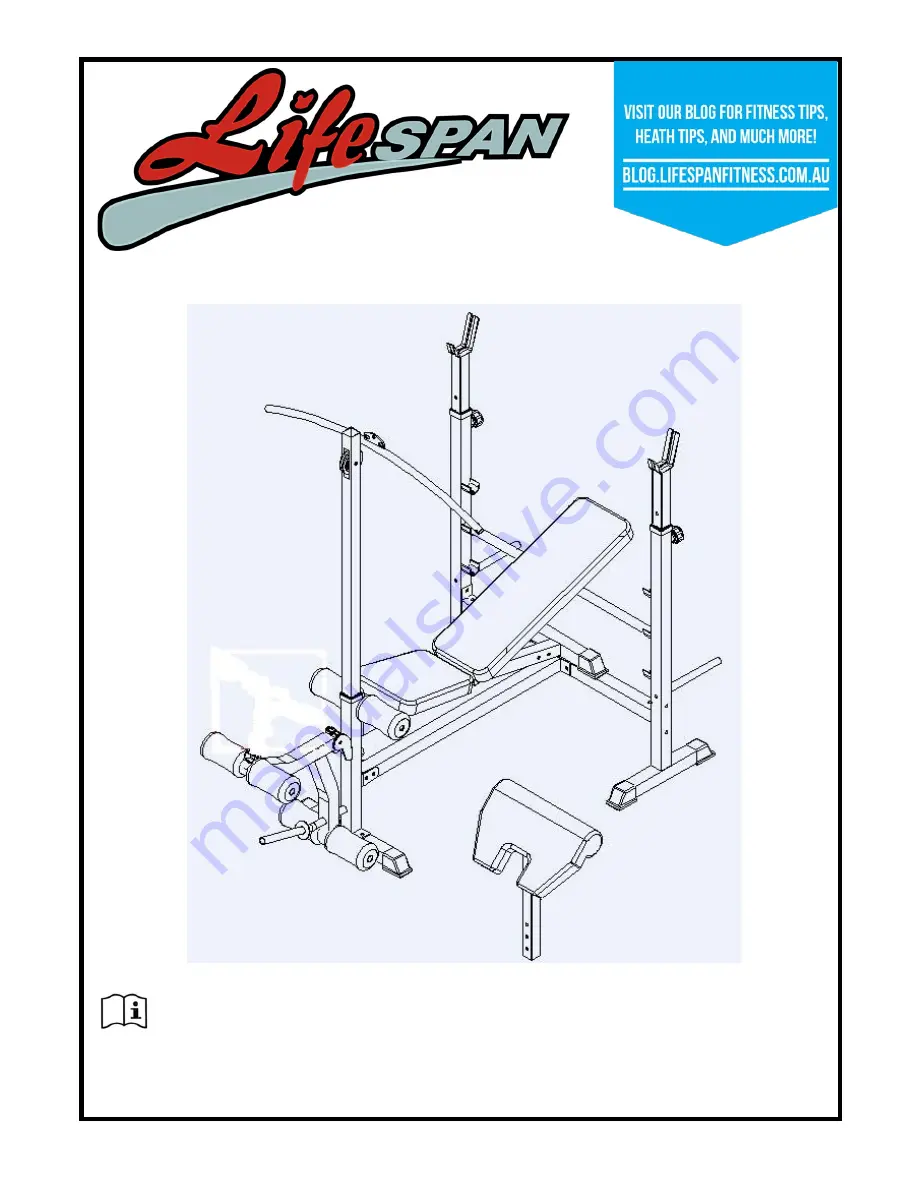
background image

NOTE: This manual may be subject to updates or changes. Up to date manuals are available through our website at www.lifespanfitness.com.au 


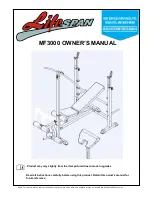
Product may vary slightly from the item pictured due to model upgrades


Read all instructions carefully before using this product. Retain this owner’s manual for 
future reference. 

MF3000 OWNER’S MANUAL 

Summary of Contents for MF3000

Page 1: ...nuals are available through our website at www lifespanfitness com au Product may vary slightly from the item pictured due to model upgrades Read all instructions carefully before using this product Retain this owner s manual for future reference MF3000 OWNER S MANUAL ...

Page 2: ...2 MF3000 TABLE OF CONTENTS 1 IMPORTANT SAFETY INSTRUCTIONS 3 2 ASSEMBLY INSTRUCTIONS 4 3 WARRANTY 14 ...

Page 3: ...me should use the machine If the user experiences dizziness nausea chest pain or any other abnormal symptoms STOP the workout at once CONSULT A PHYSICIAN IMMEDIATELY Do not use the machine near water or outdoors Keep hands away from all moving parts Always wear appropriate workout clothing when exercising DO NOT wear robes or other clothing that could become caught in the machine Running or aerobi...

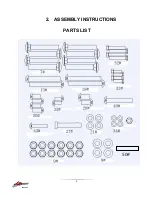
Page 4: ...4 MF3000 2 ASSEMBLY INSTRUCTIONS PARTS LIST 50 ...

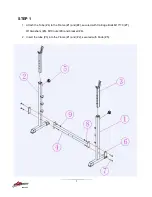
Page 5: ...5 MF3000 STEP 1 1 Attach the Tube 4 to the Frame 1 and 2 secured with Carriage Bolts M10 70 7 Φ10washers 8 M10 nuts 9 and bracket 6 2 Insert the tube 3 into the Frame 1 and 2 secured with Knob 5 ...

Page 6: ... Attach the Tube 11 to 10 secured with Carriage Bolts M10 70 7 Φ10washers 8 M10 nuts 9 and bracket 6 2 Attach 12 to 11 and 4 secured with Hex bolts M10 72 13 Carriage Bolts M10 70 7 Φ10washers 8 M10 nuts 9 and bracket 6 ...

Page 7: ...7 MF3000 ...

Page 8: ...with Hex Bolts M8 20 20 Φ8washers 21 Then attach the 16 to the 11 secured with Hex bolts M10 75 19 Φ10washers 8 M10 nuts 9 2 Attach the tube 15 to the two uprights tube 1 and 2 by placing it into the arch brackets on each side 3 Attach the two tubes 18 to 17 ...

Page 9: ...9 MF3000 ...

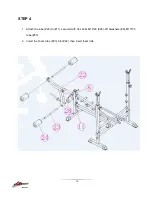
Page 10: ...10 MF3000 STEP 4 1 Attach the tube 22 to 11 secured with Hex bolts M10 20 28 Φ10washers 8 M10 55 tube 50 2 Insert the Foam tube 23 into 22 then insert foam rolls ...

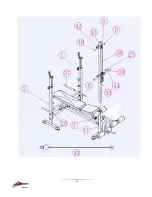
Page 11: ...ube 18 with Hex bolt M6 38 32 Φ6 washers 34 2 Secure the seat pad 30 to the tube 17 with Hex bolt M6 16 33 Φ6 washers 34 3 Secure the pad 31 to tube 36 with Hex bolt M8 20 35 Φ8 washers 21 then put the tube 36 into the tube 11 secured with knob 5 ...

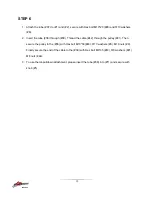
Page 12: ...hrough 39 Thread the cable 42 through the pulley 41 Then secure the pulley to the 38 with Hex bolt M10 50 40 Φ10 washers 8 M10 nuts 9 Finally secure the end of the cable to the 39 with Hex bolt M8 35 43 Φ8 washers 21 M8 nuts 44 3 To use the lat pulldown attachment please insert the tube 38 into 11 and secure with knob 5 ...

Page 13: ...13 MF3000 ...
Page 14: ...ation for any other reasonably foreseeable loss or damage You are entitled to have the goods repaired or replaced if the goods fail to be of acceptable quality and the failure does not amount to a major failure Full details of your consumer rights may be found at www consumerlaw gov au Please visit our website to view our full warranty terms and conditions http www lifespanonline com au Warranty P...

Reviews: