Optional Wireless Timer - Part #99-DET02
Continued
Installation of Wireless Timer
1.
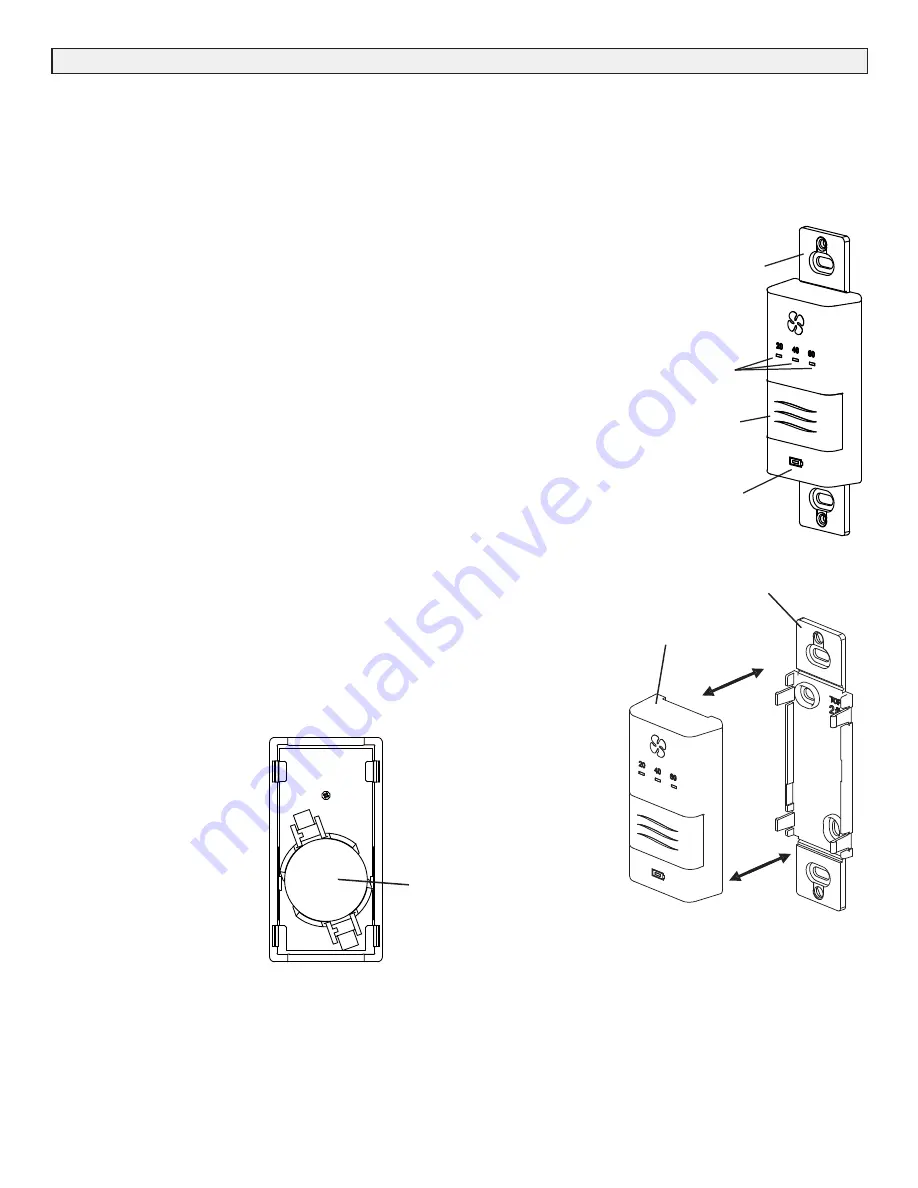
Separate the Face Plate from the Back Plate by firmly pulling apart (Figure A).
2.
For mounting the control without a Decora plate, break off top and bottom tabs and refer to Figure C for mounting.
3.
Place the Back Plate of the control in the desired location on the wall and pencil mark the top and bottom screw holes (Figure B
or C). Drill two 1/8" holes.
4.
Attach the Back Plate to the wall using the 2 supplied screws and anchors.
5.
Attach the Face Plate to the Back Plate (Figure A).
15
Overview of Lifebreath Wireless 20/40/60 Minute Timer
Initiates HIGH speed Ventilation for 20, 40 or 60 minutes. The
20/40/60 minute Status Lights indicate HIGH speed operation.
Wireless Timers have an estimated range of 40' with no obstructions. To
increase the range of a Wireless Timer a 99-RX02 Repeater may be used.
Using the Wireless Timer
When paired to the main wall control, the Wireless Timer may be moved to
a remote location in the home such as a bathroom.
Pressing the Select Button on the Timer will initiate HIGH speed
fan operation. The corresponding Status Light will illuminate under the
number on the Timer to indicate either 20, 40 or 60 minutes of HIGH
speed fan operation. To cancel the call for HIGH speed fan operation, press
the Select Button until the Status Lights are no longer illuminated.
Replacing the Battery
When the battery needs to be replaced in the Wireless Timer, the red LED
Battery Indicator will illuminate.
To replace the battery, first remove the Face Plate by pulling it off the wall.
On the back of the Timer Face Plate the battery will be exposed. Replace
the battery and re-attach the Face Pate to the Back Plate. Be careful not to
damage the tabs on the Back Plate when re-attaching the Face Plate.
Removable
Backplate
20/40/60
Minute Status
Lights
Select Button
initiates high speed
ventilation for 20, 40
or 60 min.
Battery Indicator
Back Plate
Face Plate
Back of
99-DET02
Face Plate
Battery


