background image

Page | 24  


rights that vary from State to State.  LifeCORE does not and has not authorized any person or entity to create for it 
any other obligation, promise, duty or obligation in connection with this Product. 

Warranty  Registration

.  PLEASE  SEND  IN  THE  ATTACHED  WARRANTY  CARD  WITHIN  (10)


DAYS  OF  PURCHASE  TO 

REGISTER  YOUR  PRODUCT  WITH  LIFECORE  FITNESS.  PLEASE  MAIL  WARRANTY  CARD  TO:  LIFECORE  FITNESS,  INC,  2575 
Pioneer  Ave.  Suite  101.  Vista,  CA  92081.  Phone  (760)599-4555,  Fax  (760)  946-7602  or  register  online  at 
LifeCOREfitness.com,  Customer  Service:  888-815-5559.  Unless otherwise  prohibited  by  law,  in  order  to validate  the 
warranty  this  Product  must  have  been  registered  through  LifeCORE  Fitness  Inc.,  and/or  a  copy  of  the  proof  of 
purchase, transferred warranty letter, and serial number must be presented at time of service. If these items are not 
presented at the time of requesting parts or service LifeCORE Fitness Inc. will not cover any warranty.  

Warranty Claim Processing

. To obtain warranty service, you must contact the original place of purchase.  LifeCORE 

may at its option may repair or replace any defective Product frame or parts with new or serviceable used parts 
that are equivalent in function to the original parts. All exchanged frames and parts replaced under this warranty 
will at the time of service become the property of LifeCORE. LifeCORE reserves the right to change manufacturers 
of any parts to cover any existing warranty. Any parts determined to be defective must be returned to LifeCORE to 
obtain  warranty  service.  You  must  prepay  any  shipping  charges,  export  taxes,  custom  duties  and  taxes,  or  any 
other  charges  associated  with  transportation  of  the  parts  or  Product.  In  addition,  you  are  responsible  for  insuring 
any parts or Product shipped or returned. You assume the risk of loss during shipment.  

Please see other LifeCORE Fitness Products at www.LifeCOREfitness.com.  

THANK YOU FOR YOUR BUSINESS! 


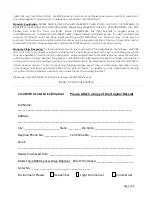
LC-CD450 Center Drive Elliptical        Please Attach a Copy of the Original Receipt


Full Name: 
_______________________________________________________________________ 

Address: 
________________________________________________________________________ 

City: ______________________State: ________ Zip Code: ________________________ 

Daytime Phone No.:_______________   Cell Phone No.:___________________________ 

Email: 
________________________________________________________________________ 

Dealer Purchased from: ____________________________________________________ 

Model: LC-CD450 Center Drive Elliptical    Date Of Purchase: _______________________ 

Serial No._____________________________________ 

Environment Placed:  

 Residential   

Light Commercial 


Commercial 


Summary of Contents for LC-CD450

Page 1: ...User s Product Manual LifeCORE LC CD450 Center Drive Elliptical...

Page 2: ...th LifeCORE the best it can be please review the enclosed user s manual prior to assembly and first use Be sure to keep the instructions for reference and or maintenance We also offer a complete line...

Page 3: ...of Contents Safety instructions and Warnings Assembly Instructions Console Operation Instructions English and Metric Setting Touch Screen Adjusting Steps Monitoring Your Heart Rate Heart Rate Monitor...

Page 4: ...times Product safety instructions 1 Start your exercise program gradually Exercise only for a few minutes the first day to let your body adjust to the new exercise 2 Slowly increase your exercise tim...

Page 5: ...ut on the floor Double check all packaging material for missing pieces do not dispose of any packing material until assembly is complete and unit is working properly The final location of the machine...

Page 6: ...res Additional help maybe needed to help line up holes to frame Note Do not tighten screws until you have fully completed Step 2 1 Locate bag labeled Figure 1 2 Locate console tube 3 Slide console tub...

Page 7: ...rews 4 Tighten all hardware from Step 1 Step 3 Tools Needed 17 mm socket wrench 2JAX Tube of grease 2K81 Note Arms are labeled Right and Left Note Apply about a finger tips worth of assembly grease on...

Page 8: ...JAX 17 mm wrench 2JAW Tube of grease 2K81 Note It is recommended that two adults help align and secure the pedal tube assemblies to the handrail assemblies Note Apply about a finger tips worth of asse...

Page 9: ...ail assembly by lining up the hole and using a Philips screw driver to tighten Qty one M5X0 8 12 screw into handrail assembly Repeat for other side Step 7 Tools Needed 6mm Allen wrench 2JC7 1 Locate b...

Page 10: ...e way 1 Locate bag labeled Figure 8 2 Locate computer console 3 Connect the computer cable wire into the connector on the board 4 Place the computer console on the console mast Make sure the wires fit...

Page 11: ...rom the console tube 3 Secure the pulse handlebar assembly to the console tube by screwing Qty six M6x10 hex socket head bolts into frame Using a 4mm Allen Wrench tighten bolts Step 10 Tools Needed Ph...

Page 12: ...to tighten Plug the AC adaptor into a power outlet and into the machine The AC inlet is located on the user left side of the machine Only a DC 9V 1000mA that comes with the unit should ever be used t...

Page 13: ...tart in order to get a better understanding of the functions Below is the console layout and detailed operation instructions Make sure the console is powered up before you start using this console Thi...

Page 14: ...you are currently in and show your workout progress Classic programs There are also 10 rows representing 20 levels of resistance Each row represents 2 levels of resistance The appropriated row will li...

Page 15: ...isplays from upper row to lower row or vice versa by pressing the DISPLAY key next to it g Segment time window Note Display sleep mode If there is no RPM the display will shut down and enter sleep mod...

Page 16: ...ifferent program You can always press START key anytime to start the program right away C User keys User 1 User 2 There are 2 User programs for you to save the favorite workouts If you wish to save a...

Page 17: ...mply press the START key once and all data will start counting Pressing START key once during Pause will resume the program Pressing START key at program ending will re start the same program again an...

Page 18: ...o adjust HR anytime during Target HR and HR interval program execution When program time is up and the program ends the message display will scroll thru the workout totals for your review At this time...

Page 19: ...t interval The default work interval is 80 and rest interval is 65 and can be adjusted to low at 60 and high at 90 by pressing HR Up Down keys during program Note During program execution if there is...

Page 20: ...play accuracy 1 When the console is ON the message display shows SELECT A PROGRAM at this time press QUICK START HR PROGRAM keys at the same time to start the display adjusting sequences 2 The LCD wil...

Page 21: ...your neck or against your wrist over the main artery After finding your pulse count the number of beats in 10 seconds Multiply the number of beats by six to determine your resting pulse rate per minut...

Page 22: ...of the hands are touching the contact area of each hand pulse grip Maintain an even pressure on the grips Do not hold the hand pulse grips too tightly Chest Strap Optional The CD450 is equipped with a...

Page 23: ...d cleaner such as Windex to remove dirt The purpose of cleaning the unit is to remove body sweat which contains salt Salt is the number one factor that will cause the unit to rust and the electronics...

Page 24: ...than LifeCORE or an authorized LifeCORE service provider This Limited Warranty is void if the Product serial number has been defaced or removed Should any Product be submitted for warranty service be...

Page 25: ...nged frames and parts replaced under this warranty will at the time of service become the property of LifeCORE LifeCORE reserves the right to change manufacturers of any parts to cover any existing wa...

Page 26: ...omer Service Toll Free 888 815 5559 Mon Friday 7 30 5 30 PT Service LifeCOREfitness com LifeCORE Fitness Inc 2575 Pioneer Ave Suite 101 Vista CA 92081 Visit our website for assembly videos www LifeCOR...

Reviews: