


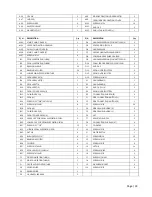
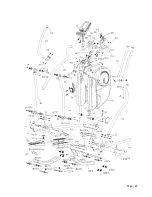


Page
|
14
4. Programs
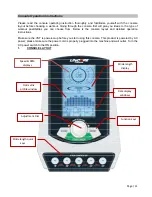
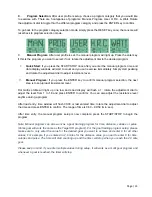
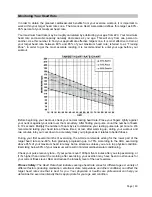
When the console is first powered ON or the RESET button is pressed for 2 seconds, the console will
enter an idle mode and the LCD display will light up every segment with a 2 second beep sound. It will
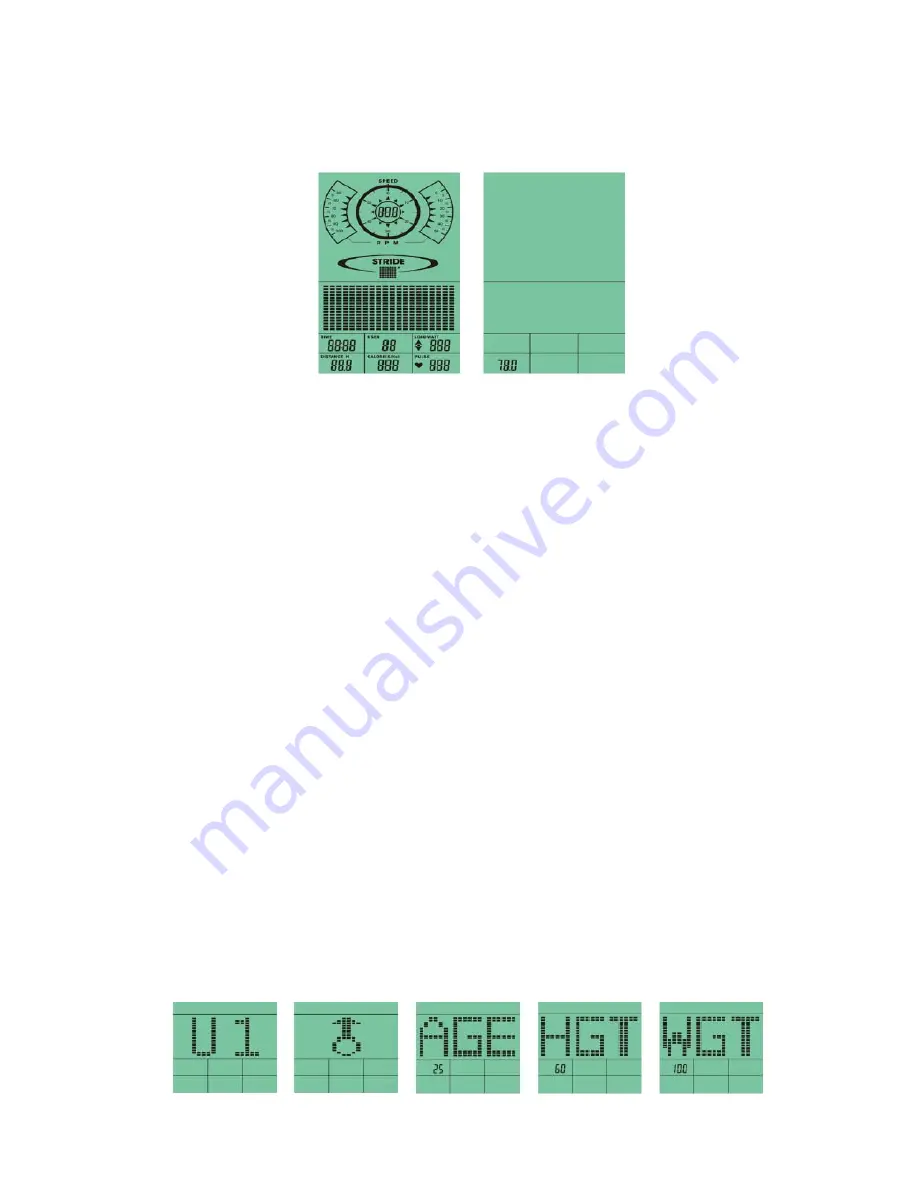
then display “78.0” on the distance data display; as showing in the figures below.
A.
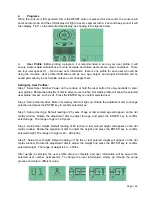
User Profile:
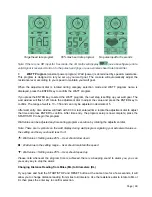
Before picking a program, it is recommended to set up your user profile. It will
ensure workout data calculations are more accurate and future workouts are more convenient. There
are four user spaces U1 – U4 to save user information, there is one profile for each user who will be
using the machine. User profile information such as sex, age, height, and weight information will be
saved permanently in each profile unless a user changes them.
Setting Up User Profiles:
Step 1: Select User Number: Power up the console or hold the reset button for a few seconds to enter
user profiles. Rotate the adjustment dial to select a user profile. Dot matrix profile will show the selected
user profile number, such as U1. Press the ENTER key to confirm selected user.
Step 2: Setup User Gender: Male or female symbol will light up. Rotate the adjustment dial to change
selection and press the ENTER key to confirm selected sex.
Step 3: Setup User Age: Default reading of 25 years of age or last entered age will appear on the dot
matrix window. Rotate the adjustment dial to adjust the age and press the ENTER key to confirm
selected age. The range of age is 1-99 years.
Step 4: Setup User Height: Default reading of 60 inches or last entered height will appear on the dot
matrix window. Rotate the adjustment dial to adjust the height and press the ENTER key to confirm
selected height. The range of height is 40 – 99 Inches.
Step 5: Setup User Weight: Default reading of 100 lbs or last entered weight will appear on the dot
matrix window. Rotate the adjustment dial to adjust the weight and press the ENTER key to confirm
selected weight. The range of weight is 40 – 350lbs.
After weight is selected, the user profile setup is complete and user information will be saved into
selected user number permanently. To change the user information, simply go through the setup
process and enter a different value.
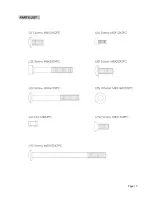
Summary of Contents for VST-V8
Page 1: ...User s Product Manual LifeCORE VST V8 Variable Stride Trainer...
Page 6: ...Page 5...
Page 25: ...Page 24...
Page 26: ...Page 25...


