2
2
35
Paper Installation
1. Remove the cover. (See battery
installation under section C.)
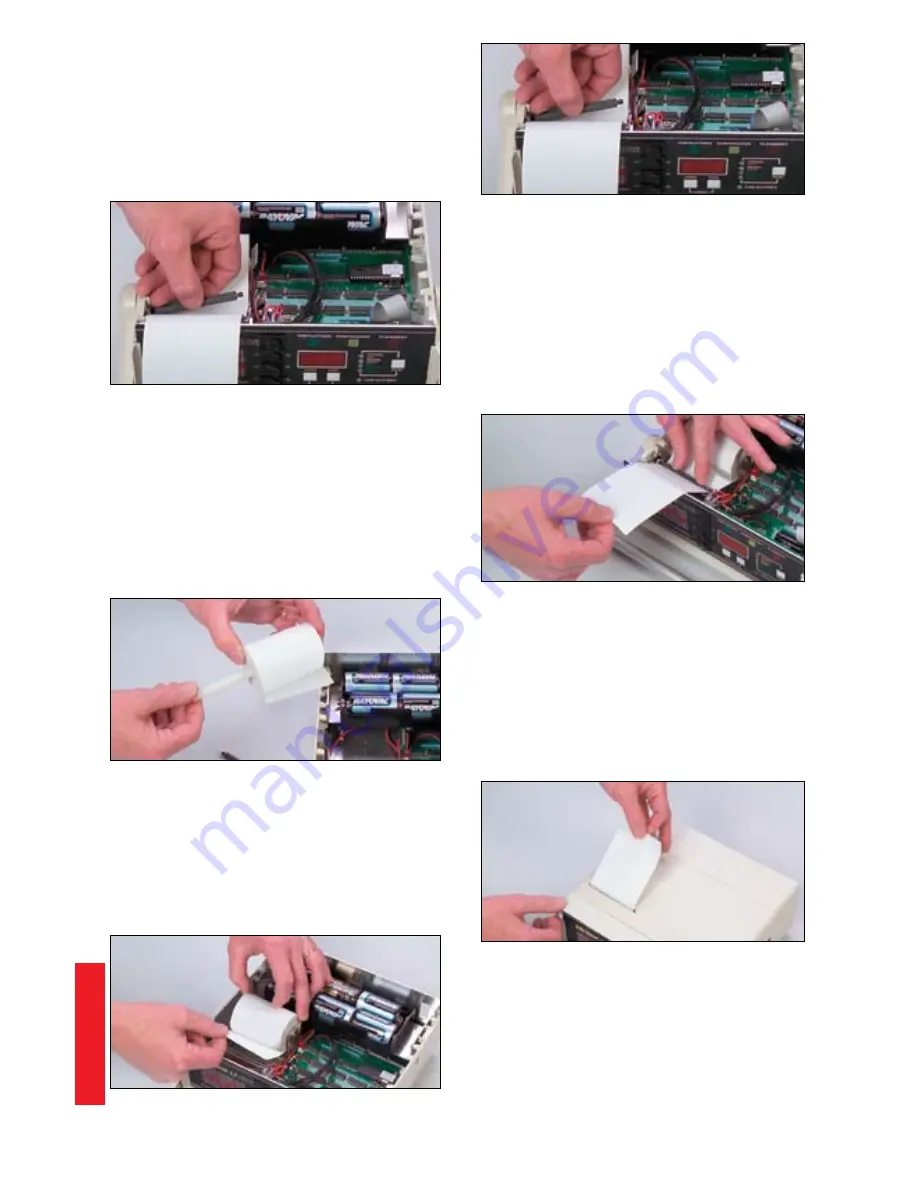
2. Remove platen from bracket by
gently pulling up on one end.
(See figure 8.)
3. Remove the plastic paper holder
rod from the paper holder bracket
by applying a slight outward pres-
sure to the bracket until the rod
can be removed. Care should be
taken not to bend too far or the
bracket may become deformed
and not hold paper securely.
4. Insert plastic rod through the center
of a new paper roll.
(See figure 9.)
Re-install into bracket so that the
paper feeds off the bottom of the
roll pointing towards the front of the
printer.
(See figure 10.)
5. While keeping paper taut, position
the paper within the guides of the
printer and re-install the platen
so that the gears of the platen
engage with the gears of the print-
er.
(See figure 11.)
Gently insert
platen in bracket until it snaps into
place.
(See figure 12.)
6. While continuing to keep paper
taut, press the Paper Feed switch
on the front panel until 7” to
8” have fed through the printer
to make sure paper is prop-
erly aligned and feeding straight.
Repeat step 5 if necessary.
7. Feed paper through paper guide
in the top cover and replace cover
by aligning the slots and tabs on
the unit and pushing down on the
cover to snap into place.
(See
figure 13.)
Figure 8
Figure 9
Figure 11
Figure 12
Figure 13
Figure 10
Procedure F


