B3.
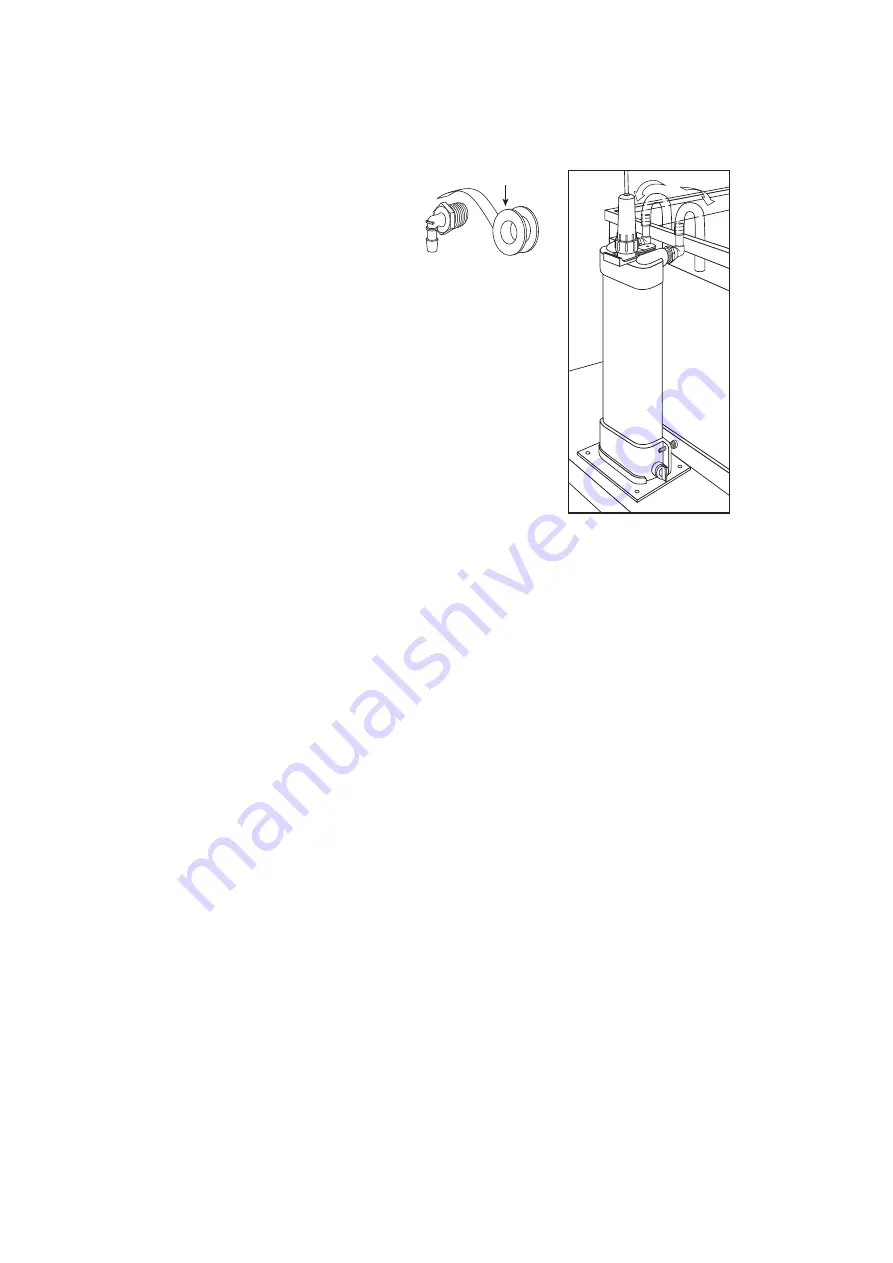
Wrap thread seal tape on the
male threads of the two 3/4”
MPT x 1/2” barb elbow fittings
provided. Wrap each fitting
5-7 times with the tape.
B4.
Screw one 3/4” MPT x 1/2” barb elbow fitting
into top inlet port. Screw in the elbow so that
the barb portion is pointing straight up vertically.
Screw in the other elbow fitting into the outlet
port located at the top of the unit and align the
barb portion straight up vertically.
B5.
Install the pump (not included with unit) inside
the aquarium in the desired location following
the instructions of the pump manufactur er.
B6.
Attach one end 1/2” ID x 11/16” OD flexible
tubing on the outlet side of the pump.
B7.
Attach the other end of the flexible tubing to the 3/4” MPT x barb elbow
located at the top inlet side of the AquaStep PRO. Cut the tubing to the
proper length. Attach a hose clamp and tighten accordingly.
B8.
Attach the rest of the tubing to the 3/4” MPT x 1/2” barb elbow located
at the top outlet side of the AquaStep PRO. Attach a hose clamp and
tighten accordingly.
B9.
Place the other end of the flexible tubing up and over the side or back
of the aquarium so that the water returns to the aquarium and agitates
the surface to aerate the system. In some cases it may be desirable to
connect the flexible tubing to a rigid plastic “U” or “J” tube (not
supplied in this unit) that hangs on the aquarium. Attach a hose clamp
to the rigid tube and tighten accordingly. We recommend using the
CustomFlo Water System in place of the “U” or “J” tube for professional
looking installlations.
C. Hanging on a Wet/Dry Filter Installation
C1.
Carefully follow all steps in section A (Side or Back of the Aquarium).
D. Underneath Aquarium with a Canister Filter
D1.
Place AquaStep PRO on base in desired location next to the canister filter.
Position the AquaStep PRO so that it can be plumbed on the outlet side
of the canister filter.
Threaded Seal Tape
3


