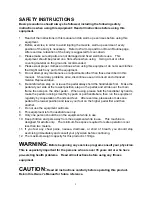
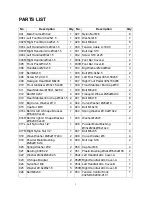
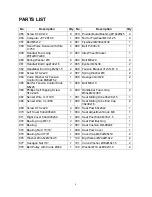
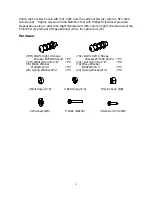
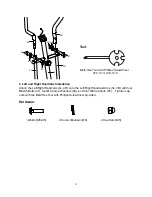
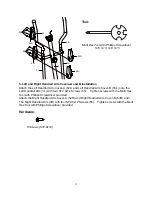
background image

CLASSIC 

II

,


2 in 1 ELLIPTICAL TRAINER 

ITEM NO.: 93266 


OWNER’S MANUAL


IMPORTANT: Read all instructions carefully before using this product.    Retain this 
owner’s manual for future reference. 

The specifications of this product may vary from this photo, subject to change without notice. 

2011, July 


Summary of Contents for 93266

Page 1: ...NO 93266 OWNER S MANUAL IMPORTANT Read all instructions carefully before using this product Retain this owner s manual for future reference The specifications of this product may vary from this photo...

Page 2: ...n installed and operated in accordance with LifeGear s Owner s Manual LifeGear s obligation under this warranty is limited to replacing or repairing free of charge any parts which may prove to be defe...

Page 3: ...edal at your side at the lowest position step on the pedal and stride over the main frame then step on the other pedal When using please hold the handlebar by hands make the pedals running smoothly by...

Page 4: ...039 Bolt M6x48 2 012 Bolt M10x57 4 040 Transport Wheel 23x 6x32 2 013 Rear Stabilizer End Cap 50x1 5 2 041 Bolt M8x16 8 014 Big Curve Washer 10 4 042 Curve Washer 20x 8 6 015 Cap Nut M10 4 043 Bolt M1...

Page 5: ...ut M6 2 065 Bolt for Tension Control Knob M5x25 1 089 Bolt M8x10 1 066 Phillips Self Tapping Screw ST4 2x25 4 090 Handlebar Foam Grip 33x 27x360 2 067 Sensor Wire I L 1100 1 091 Seat Sliding Tube 38x3...

Page 6: ...her 12 1 PC 16L Bolt for left U Shape Bracket 16x88 5xL23 1 PC 17L Left Nylon Nut 1 2 1 PC 18 Wave Washer 28x 17x0 3 1 PC 20 Spring Washer 12 1 PC 27 Nylon Nut M6 6 PCS 28 Washer 6 6 PCS 29 Bolt M6x40...

Page 7: ...6 TOOLS Multi Hex Tool S10 S13 S17 S19 1 PC Allen Wrench S6 1 PC Allen Wrench S8 1 PC Multi Hex Tool with Phillips Screwdriver S10 S13 S14 S15 1 PC...

Page 8: ...10 69 33L 33R 35 19 34 2L 12 14 15 14 15 19 37 19 23 25 24 20 69 47 50 48 19 19 33L 33R 81 80 80 82 88 86 87 85 27 28 50 48 8 7 28 84 84 34 35 21 55 53L 70 66 66 16L 79 25 24 17L 20 19 23 19 18 79 26...

Page 9: ...M10 Cap Nuts 15 Tighten cap nuts with the Multi Hex Tool provided Position the Rear Stabilizer 11 behind the Main Frame 1 and align bolt holes Attach the Rear Stabilizer 11 onto the rear curve of the...

Page 10: ...e Washer for Tension Control Knob 64 and M5x25 Bolt for Tension Control Knob 65 from the Tension Control Knob 54 Remove bolt and curve washer with the Multi Hex Tool with Phillips Screwdriver provided...

Page 11: ...ach the left U Shape Bracket 23 to the left Crank 78 with one 16x88 5xL23 Bolt for left U Shape Bracket 16L one 28x 17x0 3 Wave Washer 18 12 Spring Washer 20 and 1 2 Left Nylon Nut 17L Tighten bolt an...

Page 12: ...axis of the Front Post 5 and right U Shape Bracket 23 to the right Crank 78 Hardware 16R Bolt for right U Shape Bracket 16x88 5xL23 1 PC 17R Right Nylon Nut 1 2 1 PC 18 Wave Washer 28x 17x0 3 1 PC 20...

Page 13: ...Arms 3L 3R with four M6x35 Bolts 47 four 6 Curve Washers 48 and four M6 Cap Nuts 50 Tighten cap nuts with the Multi Hex Tool with Phillips Screwdriver provided Hardware 4R 3R 5 3L 4L 50 48 47 47 48 5...

Page 14: ...screws with the Multi Hex Tool with Phillips Screwdriver provided Attach the Right Handrail Arm Cover A 52R and Right Handrail Arm Cover B 53R onto The Right Handrail Arm 3R with four ST2 9x12 Screws...

Page 15: ...them out from the top end of the Front Post 5 Attach the Handlebar 6 onto the Front Post 5 with two M8x16 Bolts 41 and two 16x 8x1 5 Curve Washers 101 that were removed Tighten bolts and curve washer...

Page 16: ...emove nylon nuts and washers with the Multi Hex Tool with Phillips Screwdriver provided Guide bolts on underside of the Seat Cushion 97 through holes on top of the Seat Sliding Tube 91 attach with thr...

Page 17: ...s on handlebar grip sensors the screen will display your current heart rate figures and a heart symbol To ensure the pulse readout is more precise please always hold on to the handlebar grip sensors w...

Page 18: ...e position Lock the seat post in place by releasing the seat post knob and sliding the seat post up or down slightly until the seat post knob pops down into the locked position For added safety tighte...

Page 19: ...iner There is no display on the computer console 1 Remove the computer console and verify the wires that come from the computer console are properly connected to the wires that come from the front pos...

Page 20: ...of your entire exercise routine The WARM UP is an important part of any workout It should begin every session to prepare your body for more strenuous exercise by heating up and stretching your muscles...

Page 21: ...DRICEPS STRETCH With one hand against a wall for balance reach behind you and pull your right foot up Bring your heel as close to your buttocks as possible Hold for 15 counts and repeat with left foot...

Page 22: ...an against a wall with your left leg in front of the right and your arms forward Keep your right leg straight and the left foot on the floor then bend the left leg and lean forward by moving your hips...

Reviews: