background image

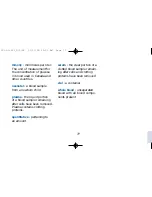
indicates a control solution
test result.

Press the M button again and 

- - - -

appears, indicating the end 
of the test result record (date,
time, and result).

Each time you press the M
button, the date, time, and
result of the previous tests 
will appear in sequence.

6.11.99

8 : 0 3 p m

1 1 6

- - - -

(example)

11.06.99

(11 June 1999 example)

will appear if you have
selected the day-month-year
format. For information, see
page 55.

If you wish to move quickly
through the results, press and
hold the M button. (To go back
to the most recent result, it
may be quicker to turn the
meter off, then on, and press
the M button.)

ONE TOUCH

®

Test Strips

include a log sheet that you
can use to keep a permanent
record of your test results,

along with information on 
diet and medication.

You can get a LifeScan
Logbook from your autho-
rized LifeScan distributor,
drugstore, or directly from
LifeScan Customer Services.

Setting Event Numbers

You may want to mark a
glucose reading with an event
number (1–9). This allows 
you or your healthcare profes-
sional to analyze the trends 
in your glucose readings more
easily. You can set up the
event categories to meet your
own needs.

65

LSI-99-221_9/2/99  11/11/99 11:02 AM  Page 65

Summary of Contents for ONETOUCH II

Page 1: ...OOD GLUCOSE MONITORING SYSTEM a company wner s Booklet OT2 manual OLD 11 12 99 9 44 AM Page 1...

Page 2: ...Department Blood glucose monitoring plays an important role in controlling your diabetes The results you get with the ONE TOUCH II System can help you and your healthcare professional monitor and adj...

Page 3: ...OL CHECKS AS DIRECTED AND CONSULT WITH A DIABETES HEALTHCARE PROFESSIONAL THESE RECOMMENDATIONS APPLY TO ALL BLOOD GLUCOSE MONITORING SYSTEMS AND ARE SUPPORTED BY THE AMERICAN ASSOCIATION OF DIABETES...

Page 4: ...ter 14 3 GETTING AND TESTING A DROP OF BLOOD 17 Using the PENLET II Automatic Blood Sampler 17 Testing Your Blood 22 Checking the Amount of Blood on the Test Strip 28 4 HELP Troubleshooting 30 Test Pr...

Page 5: ...Battery 47 6 SPECIAL FUNCTIONS 50 Setting the Clock 50 Setting Special Functions 54 Recalling Tests from the Meter Memory 63 Setting Event Numbers 65 7 QUESTIONS AND ANSWERS 68 8 SPECIFICATIONS 73 Pe...

Page 6: ...ucose for people who have been diagnosed with diabetes mellitus by conventional means This device is not to be used for the diagnosis of diabetes The ONE TOUCH II Blood Glucose Monitoring System is us...

Page 7: ...m and become familiar with all the parts of your ONE TOUCH II Meter 2 M Button C Button Battery Compartment on back Display On Off Button Data Port Test Area with Protective Coating Test Strip Holder...

Page 8: ...er on the label Use the C button to match the meter code with the code number on the test strip vial For information see page 14 TEST STRIP HOLDER The dark gray test strip holder keeps the test strip...

Page 9: ...ready to use them Do not carry loose test strips in your meter case Carefully read this owner s booklet and all other instructional material provided with your blood glucose monitoring system and test...

Page 10: ...test spot of a normal test strip is white or ivory colored Do not store test strips outside of the vial Never make significant changes to your medica tion program or ignore physical symptoms with out...

Page 11: ...monitoring neonatal whole blood samples Do not use ONE TOUCH Test Strips with plasma or serum samples Results will be inaccu rate ONE TOUCH Test Strips are intended for use with fresh whole blood or...

Page 12: ...omplications One complica tion which is of particular importance in diabetes man agement is a hyperglycemic hyperosmolar state with or without ketosis which may be life threatening if left untreated T...

Page 13: ...nely to make sure you get accurate results 1 Checking Your ONE TOUCH II System with Control Solution ONE TOUCH Normal Control Solution should be used to practice the test procedure and to make sure yo...

Page 14: ...your blood For information see page 22 Your control solution results will appear on the meter display as follows c 98 contrl example The acceptable range for ONE TOUCH Normal Control Solution is print...

Page 15: ...d to make sure your meter is work ing properly Before doing a check strip test make sure the test strip holder and the test area are clean dry and lint free For information see page 42 Make sure both...

Page 16: ...e will appear on the dis play The code num ber does not need to match the code number on the test strip vial to do a check strip test insert strip appears Slide the check strip into the test strip hol...

Page 17: ...notched end first Side 2 white facing up The meter counts down from 4 to 0 then A 70 A ok example appears if the number falls within the acceptable check strip range The meter auto matically tells you...

Page 18: ...call LifeScan Customer Services The next time you turn on your meter code 7 redo A example will appear indicating that your check strip test result was out of range at the last reading This message w...

Page 19: ...pened with water Dry completely Do not put blood alcohol control solution or any other fluid except water on the check strip Do not scratch the check strip Do not leave the check strip in sunlight for...

Page 20: ...the meter on code and a number code 7 example appears on the display for several seconds followed by insert strip The code numbers on test strip vials range from 1 to 16 If the number on the display...

Page 21: ...one Continue pressing until the number on the display matches the code number on your test strip vial code10 example The meter is now properly coded and you may proceed with the test From now on the...

Page 22: ...w sterile lancet into the lancet holder The lancet will slide into the lancet holder easier if you do not line up the ridges on the lancet with the slots in the lancet holder Note Inserting the lancet...

Page 23: ...s The cap that comes attached to the PENLET II Sampler has a single line on the flat side and works well for children and most adults The other cap has two lines on the flat side and works well for ve...

Page 24: ...oap and warm water and dry them thoroughly Warm water stimulates the flow of blood to the fingers Hanging your arm down at your side for 10 15 seconds before the fingerstick will make it easier too If...

Page 25: ...to obtain a large hanging drop of blood Proceed with the blood glucose test For information see page 22 Step 4 Remove the Lancet Always use caution when removing the lancet and PENLET II Cap Remove th...

Page 26: ...OSPITAL Manual CAUTION Never use a lancet that has been used by someone else To help avoid infection use a new sterile lancet every time you test If you share a PENLET II Sampler each person should al...

Page 27: ...test your blood glucose by following these three simple steps Step 1 Press power insert strip Step 2 Apply sample No wiping No timing Step 3 Accurate results in 45 seconds R R R 22 LSI 99 221_9 2 99...

Page 28: ...eter must be clean and lint free For informa tion see page 43 Check the expiration date on the test strip vial If the date has passed dis card the test strips and open a new vial Discard the test stri...

Page 29: ...s outside the vial Test for the quantitative Blood Blucose Meters For use with ONE TOUCH in whole blood measurement of glucose Instructions Read using this product package insert before For in vitro d...

Page 30: ...the white test spot Replace the vial cap immediately S T E S T S T R IP S 10 Code Do not store Test Strips outside the vial Test for the quantitative Blood Blucose Meters For use with ONE TOUCH in wh...

Page 31: ...ure you push the test strip all the way into the holder until it stops wait appears for a few moments Then apply sample appears for five minutes or until you apply blood to the test spot Step 2 Apply...

Page 32: ...he test strip from the meter to apply blood The meter will beep when the blood has been applied to the test spot Step 3 Accurate Results in 45 Seconds The meter then counts down from 45 to 0 seconds f...

Page 33: ...small smeared or the test strip was inserted only partway into the test strip holder Repeat the test with a new test strip and a larger drop of blood The meter cannot always tell if a sample is too sm...

Page 34: ...dark circle If there are any white patches or streaks the blood may have been smeared or the drop was too small In either case you may have an inaccurately low result Repeat the test with a new test...

Page 35: ...ng of the display messages what they mean and what to do if there is a problem Test Procedure Messages These messages appear during routine testing Just follow them carefully and they will guide you t...

Page 36: ...the meter apply sample wait insert strip MESSAGE APPEARS WHEN The meter is counting down from 45 seconds to 0 A blood test is com pleted This indicates a blood glucose result when the meter is set fo...

Page 37: ...ou are performing a check strip test Turn the check strip over and insert Side 2 insert side 2 c 98 contrl example MESSAGE APPEARS WHEN The check strip test result falls into the acceptable range high...

Page 38: ...but replace the battery as soon as possible When any message flashes continually it means the battery is getting low This may happen with any display message insert insert insert example 33 Error Mess...

Page 39: ...rea clean test area MESSAGE PROBLEM WHAT TO DO Repeat the test with a new test strip and a larger drop of blood If this message appears after a blood test your blood sample was too small smeared or an...

Page 40: ...ple was applied before apply sample appeared error1 retest MESSAGE PROBLEM WHAT TO DO 4 Repeat the test with a new test strip 4 There was not enough blood on the test strip 3 Repeat the test with a ne...

Page 41: ...sed in very bright light MESSAGE PROBLEM WHAT TO DO 2 Repeat the test push ing the test strip all the way into the test strip holder 2 The test strip was not inserted fully into the test strip holder...

Page 42: ...our meter may have an electronic problem not ok MESSAGE PROBLEM WHAT TO DO Remove the test strip Wait for the insert strip message The test strip was inserted before the meter was ready remove strip S...

Page 43: ...mportant information including the code number reset code MESSAGE WHAT IT MEANS You have entered the meter s memory by pushing the M button There are no test results stored in the memory nodata memory...

Page 44: ...ucose results in the memory or the results are more than 14 days old av av 107 example n 225 example MESSAGE WHAT IT MEANS A blood glucose test result marked with an event number A blood glucose test...

Page 45: ...oesn t match the code on the test strip vial For information see page 14 The test strips have expired Check the expiration date on the test strip vial and discard the test strips if out of date Repeat...

Page 46: ...fore the result This means you may have accidentally switched from mg dL to mmol L the unit of measure used in Canada and other countries For information see page 55 You may have a special physical co...

Page 47: ...he test strip holder is still securely in place and check the meter with the check strip before doing a blood glucose test use a new sterile lancet and a new or properly disinfected PENLET II Cap for...

Page 48: ...e meter apart will invalidate the meter warranty Doing a Daily Check Look through the small hole in the test strip holder to make sure there is no lint dirt or blood blocking any part of the hole If t...

Page 49: ...Strip Holder from the Meter Hold the meter and place your thumbs on the two raised dots on the test strip holder Slide the test strip holder toward you Remove the test strip holder to expose the test...

Page 50: ...Clean Test Area The following cleaning agents will damage the meter DO NOT USE Alcohol Cleansers with ammonia or phenol Windex or other glass cleaners Abrasive cleansers Check the clear protective co...

Page 51: ...ply full strength detergent to the test area Be careful not to scratch the test area Dry the test area with a soft dry tissue or cloth Remove any lint Step 4 Replace Test Strip Holder Hook the bottom...

Page 52: ...ced use only a Duracell brand alkaline battery J size 6 volts part 7K67 commonly available in drug and hardware stores This will ensure that you get the best performance from your ONE TOUCH II Meter T...

Page 53: ...d off before you remove the battery Turn the meter upside down With your thumb firmly press the left side of the battery door to the right until it releases from the clasp Remove the battery door BLOO...

Page 54: ...ry compartment Swing the left side of the door over the battery and insert the tab on the left side of the battery door into the slot by applying pressure with your thumb until it snaps shut BLOOD GLU...

Page 55: ...Call LifeScan Customer Services for information on other languages that may be available in the future Select the unit of measure for blood glucose results milligrams per deciliter mg dL or millimoles...

Page 56: ...set the clock Using the M and C buttons at the top of the meter follow the instructions in the chart page 52 to set the meter clock You may save your selection and exit at any time by turning the mete...

Page 57: ...14 6 11 99 example Press the M button to save the change and continue The month will flash 6 11 99 example Press the C button to change the month 8 11 99 example Press the M button to save and contin...

Page 58: ...5 38p m example Press the M button to save and continue The minutes will flash 5 38p m example Press the C button to change the minutes 5 58p m example Press the M button to save and cycle back to the...

Page 59: ...the beeps on or off follow the chart on page 57 Selecting the Display Language The ONE TOUCH II Meter can display messages in nine languages English engl Spanish espan French franc Italian itali Dutch...

Page 60: ...t Your meter is set at the factory to display the month day year of each test result stored in the meter memory for example September 23 1999 reads as 9 23 99 You can set the meter to display day mont...

Page 61: ...mode you may also select the baud rate the data communica tions rate for a specific application 300 1200 2400 or 9600 You may connect the ONE TOUCH II Meter to the Data Manager by LifeScan using the D...

Page 62: ...selection means you will hear a beep when each test result is displayed Press M to save and continue or Press C to turn the beeps off no beep displays There will be no sound when each test result is...

Page 63: ...re displayed in the follow ing order espan Spanish franc French itali Italian neder Dutch port Portuguese svens Swedish deuts German 0x00x0 Symbolic Language Continue to press C to cycle back to Engli...

Page 64: ...l displays Results will appear in millimoles per liter the unit of measure used in Canada and some European countries Continue pressing C to alter nate between the choices Press M to save and continue...

Page 65: ...e m d y displays The date will appear in this order month day year example 6 11 99 or June 11 1999 Press M to save and continue or Press C to select the day month year format d m y displays example 11...

Page 66: ...splays The clock is set in 24 hour time example 20 15 Continue pressing C to alter nate between the choices Press M to save and continue rs 232 displays The meter is set at the factory for the RS 232...

Page 67: ...mode the meter is set at the factory for a baud rate of 9600 Press M to save and continue or Press C to choose the correct baud rate for the data manage ment system you are using 300 1200 2400 Contin...

Page 68: ...data management system When you have done more than 250 tests the oldest test is dropped from the memory as a new one is added The most recent test result always appears first To recall test results P...

Page 69: ...C button n 225 example will appear This indicates the total number of results stored in the memory including check strip and control solu tion test results nodata will appear if no results are stored...

Page 70: ...ck to the most recent result it may be quicker to turn the meter off then on and press the M button ONE TOUCH Test Strips include a log sheet that you can use to keep a permanent record of your test r...

Page 71: ...ng hypoglycemia Event 9 Results during hyperglycemia or when urine ketones are present You may select an event number After doing a blood test While reviewing your results from the memory To enter an...

Page 72: ...e test result on the Meter display 112 event6 112 event6 example will alternate on the dis play Press the C button repeatedly until event9 is reached Press the C button again the next dis play is the...

Page 73: ...ur ONE TOUCH II System helps you check whether or not you are under control by monitor ing your blood glucose levels The test results provide a good picture of how diet exercise and medication are aff...

Page 74: ...are profes sional determine your own personal target blood glucose values as well as what an unusually high or low test result is for you In most cases your test results should stay within that range...

Page 75: ...a near normal amount of glucose in the blood Normal low and high blood glucose values for your individual treatment plan should be determined with your healthcare professional If your blood glucose t...

Page 76: ...s from the same blood sample at average hematocrit levels 41 45 To adjust for this difference divide the laboratory value by 112 or 1 12 7 Example Let s assume your lab plasma result is 150 mg dL 150...

Page 77: ...163 174 4 Skyler JS et al Diabetes Care 1981 4 311 318 5 Clarke WL et al Diabetes Care 1987 10 622 628 6 Gadsen RH Challenges in Diabetes Management Milpitas CA LifeScan Inc 1988 63 66 7 Caraway WT C...

Page 78: ...Display Type Alphanumeric 6 character 14 segment LCD Dimensions Length 43 4 Width 23 8 Height 11 16 Weight Approx 4 76 oz including battery Operating Temperature Range 59 95 F 15 35 C Operating Humid...

Page 79: ...r obvious abuse LifeScan will replace it with a new meter or equiva lent product free of charge The warranty policy applies only to the original purchaser of this meter and does not include the batter...

Page 80: ...an ONE TOUCH Test Strips or when the ONE TOUCH II Meter or ONE TOUCH Test Strips are changed or modified in any way This warranty is in lieu of all other warranties express or implied including any im...

Page 81: ...manufacturer after which the product should not be used fasting blood glucose glucose reading when no food has been eaten since midnight the night before glucose sugar in the blood hematocrit the perc...

Page 82: ...liquid portion of a blood sample remaining after cells have been removed Plasma contains clotting proteins quantitative pertaining to an amount serum the clear portion of a clotted blood sample remain...

Page 83: ...Coding the Meter 14 Glossary 76 Control Solution 8 32 Hematocrit 6 71 76 Infection Control Information 42 Laboratory Comparison Information 70 Memory Average Blood Glucose 63 Recalling Tests 63 Number...

Page 84: ...or 24 Hour Time 50 55 61 Data Management Interface Information 50 55 61 Specifications 73 Testing Your Blood 22 27 Test Procedure Messages Clean Test Area Message 34 44 Error 1 Message 35 Error 2 Mess...

Page 85: ...H II se encuentra disponible en espa ol Para recibir su copia gratuita favor del llamar al n mero gratis 1 800 381 7226 The ONE TOUCH II instructional materials are available in Spanish To receive you...

Reviews: