background image


20 


ROWER 305


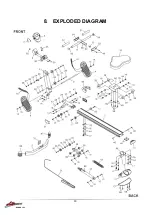
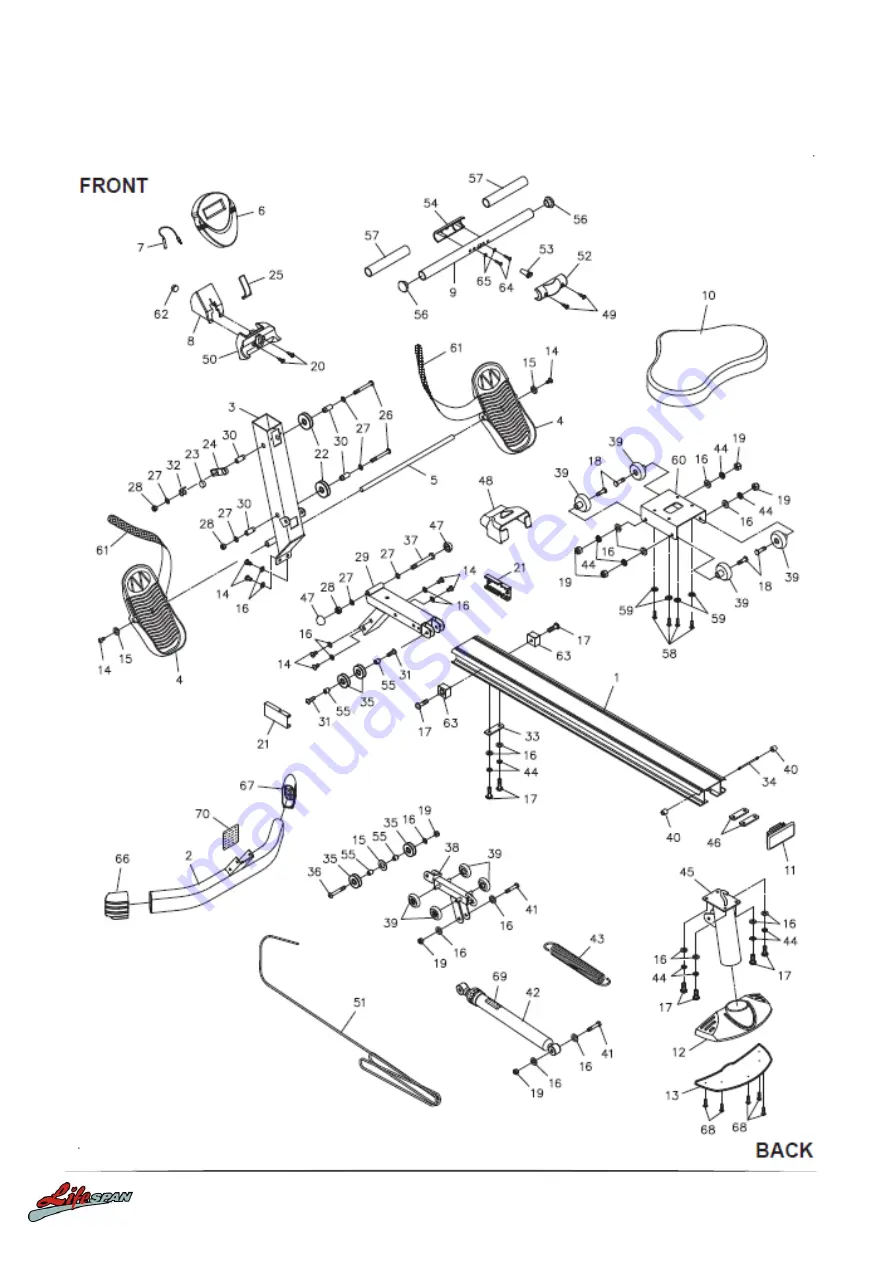
8.  EXPLODED DIAGRAM 

Summary of Contents for rower 305

Page 1: ...roduct may vary slightly from the item pictured due to model upgrades Read all instructions carefully before using this product Retain this owner s manual for future reference ROWER 305 OWNER S MANUAL...

Page 2: ...OF CONTENTS 1 IMPORTANT SAFETY INSTRUCTIONS 3 2 BEFORE YOU BEGIN 4 3 ASSEMBLY INSTRUCTIONS 5 4 OPERATION GUIDE 12 5 STORAGE 13 6 MAINTENANCE 14 7 EXERCISE GUIDE 16 8 EXPLODED DIAGRAM 20 9 PARTS LIST...

Page 3: ...dren away from the Rower 305 Do not allow children to use or play on the Rower 305 4 Keep children and pets away from the Rower 305 when it is in use 5 It is recommended that you place this exercise e...

Page 4: ...se in public or semipublic facilities 2 BEFORE YOU BEGIN Thank you for choosing the Rower 305 We take great pride in producing this quality product and hope it will provide many hours of quality exerc...

Page 5: ...5 ROWER 305 3 ASSEMBLY INSTRUCTIONS HARDWARE IDENTIFICATION CHART...

Page 6: ...e Beam Assembly on the floor as shown in the illustration Now refer to the drawing 2 Make sure the Key Rib in the STABILIZER CAP 12 aligns with the slot in the REAR SUPPORT 45 then press the STABILIZE...

Page 7: ...ap the HANDLEBAR 9 to the UPRIGHT 3 after cutting off the Cable Tie 1 Turn the Centre Beam Assembly to the normal upright position 2 Insert the Bracket on FRONT STABILIZER 2 into the FRONT SUPPORT 29...

Page 8: ...8 ROWER 305 STEP 4 1 Attach the UPRIGHT 3 to the FRONT STABILIZER 2 with BUTTON HEAD BOLTS M8x1 25x15mm 14 and WASHERS M8 16 2 Tighten all the bolts from Step 2...

Page 9: ...IGHT 3 2 Slide the PEDAL CAPS 4 onto both ends of the PEDAL SHAFT 5 and secure with BUTTON HEAD BOLTS M8x1 25x15mm 14 and LARGE WASHERS M8 15 NOTE You need to use two Allen Wrenches to tighten the BUT...

Page 10: ...ND HEAD BOLTS M6x1x15mm 58 and WASHERS M6 59 1 Press the CENTER BEAM CAP 11 into the back end of the CENTER BEAM 1 1 Slide the SEAT ASSEMBLY 10 60 onto the CENTER BEAM 1 2 Insert the SCREW ROD 34 thro...

Page 11: ...TEP 8 1 Install one AA battery into the METER 6 the battery is not included See below for detailed battery installation instructions 2 Insert the SENSOR WIRE 7 into the METER 6 Slide the METER 6 onto...

Page 12: ...12 ROWER 305 4 OPERATION GUIDE...

Page 13: ...the batteries before storing the easy glide rower for one year or more 3 Grasp the Front and Rear Stabilizers to move the easy glide rower Do not use the Seat to move the easy glide rower The Seat wil...

Page 14: ...he CENTER BEAM 1 with an absorbent cloth 3 Verify that all nuts and bolts are present and properly tightened Replace missing nuts and bolts Tighten loose nuts and bolts 4 It is the sole responsibility...

Page 15: ...by unscrewing the SCREWS M4x15mm 49 Loosen the BOLTS M6x1x20mm 64 but do not remove them Pull the ROPE 51 until there is a 3 8 inch of gap on the shaft of the SHOCK 42 refer to illustration A Then ent...

Page 16: ...tensity of your maximum heart rate zone Start at the lower intensity and build up to higher intensity as you become more aerobically fit If you feel dizzy or lightheaded you should slow down or stop e...

Page 17: ...is 140 beats per minute A six second count is used because your heart rate will drop rapidly when you stop exercising Adjust the intensity of your exercise until your heart rate is at the proper level...

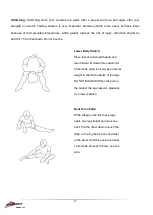
Page 18: ...Do not bounce Lower Body Stretch Place feet shoulder width apart and lean forward Maintain this position for 30 seconds using the body as a natural weight to stretch the backs of the legs DO NOT BOUN...

Page 19: ...your legs as wide as possible Stretch the upper body toward the knee on the right leg by using your arms to pull your chest to your thighs Hold this stretch 10 to 30 seconds DO NOT BOUNCE Do this str...

Page 20: ...20 ROWER 305 8 EXPLODED DIAGRAM...

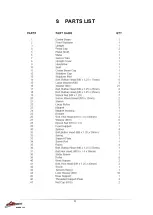
Page 21: ...21 ROWER 305 9 PARTS LIST...

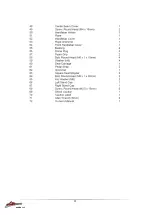
Page 22: ...22 ROWER 305...

Page 23: ...ment or refund for a major failure and compensation for any other reasonably foreseeable loss or damage You are entitled to have the goods repaired or replaced if the goods fail to be of acceptable qu...

Reviews: