background image


3

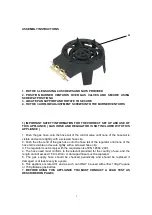
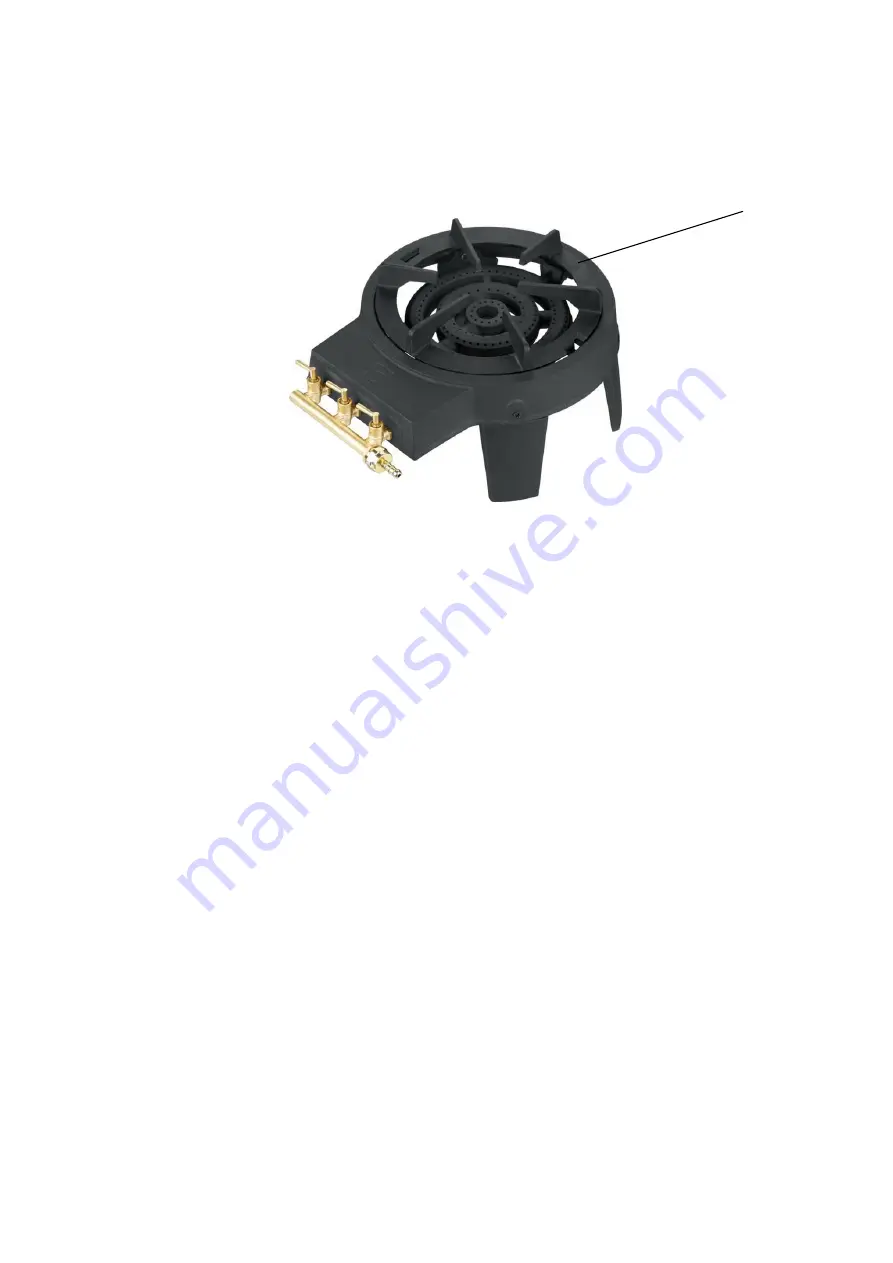
ASSEMBLY INSTRUCTIONS 


1. FIX THE 4 LEGS USING 4 X SCREWS AND NUTS PROVIDED 
2.  POSITION  BURNER  VENTURI'S  OVER  GAS  VALVES  AND  SECURE  USING 
SCREW AT POSITION A 
3. LOCATE PAN SUPPORT AND ROTATE TO SECURE 
4. FIX THE 3 AIRFLOW ADJUSTMENT SCREWS INTO THE BURNER VENTURI’S 


1) IMPORTANT SAFETY INFORMATION FOR THE CORRECT SET UP AND USE OF 
THIS  APPLIANCE.  (  GAS  HOSE  AND  REGULATOR  IS NOT INCLUDED WITH THIS 
APPLIANCE )   

 
1. Push the gas hose onto the hose tail of the control valve until none of the hose tail is 
visible and secure tightly with a screwed hose clip. 
2. Push the other end of the gas hose onto the hose tail of the regulator until none of the 
hose tail is visible and secure tightly with a screwed hose clip 
3. The regulator must comply with the requirements of EN 12684 :2001, 
4. The hose used must conform to the relevant standard for the country of use, and the 
length cannot exceed 1.50m. Worn or damaged hose must be replaced. 
5.  The  gas  supply  hose  should  be  checked  periodically  and  should  be  replaced  if 
damaged or at least every two years. 
6. This appliance is rated I3+ and as such can ONLY be used with either 13Kg Propane 
or 15Kg Butane gas bottles. 
7. 

BEFORE  USING  THIS  APPLIANCE  YOU  MUST  CONDUCT  A  LEAK  TEST  AS 

DESCRIBED ON PAGE 4 


Summary of Contents for CA-GB17

Page 1: ...1 INSTRUCTIONS MANUAL CAST IRON STOVE CA GB17 Warning Use outdoors only Read the instructions before using the appliance and retain for future reference ...

Page 2: ...be used outdoors This gas appliance should be used on a flat and non flammable surface Do not move the appliance during use Turn off the gas supply at the gas bottle after use Any modification of the appliance may be dangerous and is not permitted MODEL GAS STOVE CA GB19 Category Gas Type And Pressure Countries I3 28 30 37 G30 Butane at 28 30 mbar G31 Propane at 37 mbar BE CH CY CZ DE ES FR GB IE ...

Page 3: ...e tightly with a screwed hose clip 2 Push the other end of the gas hose onto the hose tail of the regulator until none of the hose tail is visible and secure tightly with a screwed hose clip 3 The regulator must comply with the requirements of EN 12684 2001 4 The hose used must conform to the relevant standard for the country of use and the length cannot exceed 1 50m Worn or damaged hose must be r...

Page 4: ...mixing one part washing up liquid with 3 parts water 2 Make sure that all the control knobs are in OFF position 3 Connect the regulator to the gas bottle 4 After you are sure of the safe connection completely open the gas bottle valve or turn your gas regulator to the on position 5 Brush the following parts with soapy water gas tank valve regulator hose and hose connections valves welds or seams o...

Page 5: ... it must be carried out away from any source of ignition 7 In order to protect the surface the temperature of the surface on which the stove is placed cannot exceed 50k WARNING Move away any combustible material from more than 1 2 meters of the ignited stove or a stove you want to turn on Move away any flammable liquid or vapours from more than 7 6 meters of the turned on stove or a stove you want...

Page 6: ... lead to fire burn serious injuries or death Never use kitchenware that is unsuitable for the stove especially the pan support convex or concave bottom some enamelled kitchwares etc The use of unsuitable kitchenware may lead to the instability of the stove It could fall over and lead to fire burns serious injuries or death The part sealed by the manufacture or his agent cannot be altered by the us...

Page 7: ...7 ...

Reviews: