15
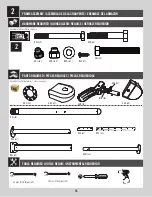
TOOLS AND HARDWARE REQUIRED /
OUTILS ET QUINCAILLERIE REQUIS
/
INSTRUMENTAL Y HERRAJE REQUERIDOS
1
X
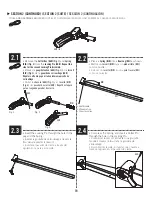
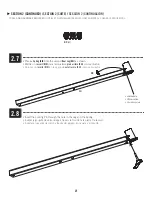
SECTION 1 (CONTINUED) /
SECTION 1 (SUITE)
/
SECCIÓN 1 (CONTINUACIÓN)
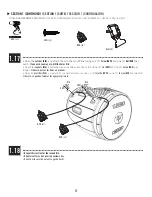
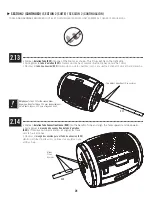
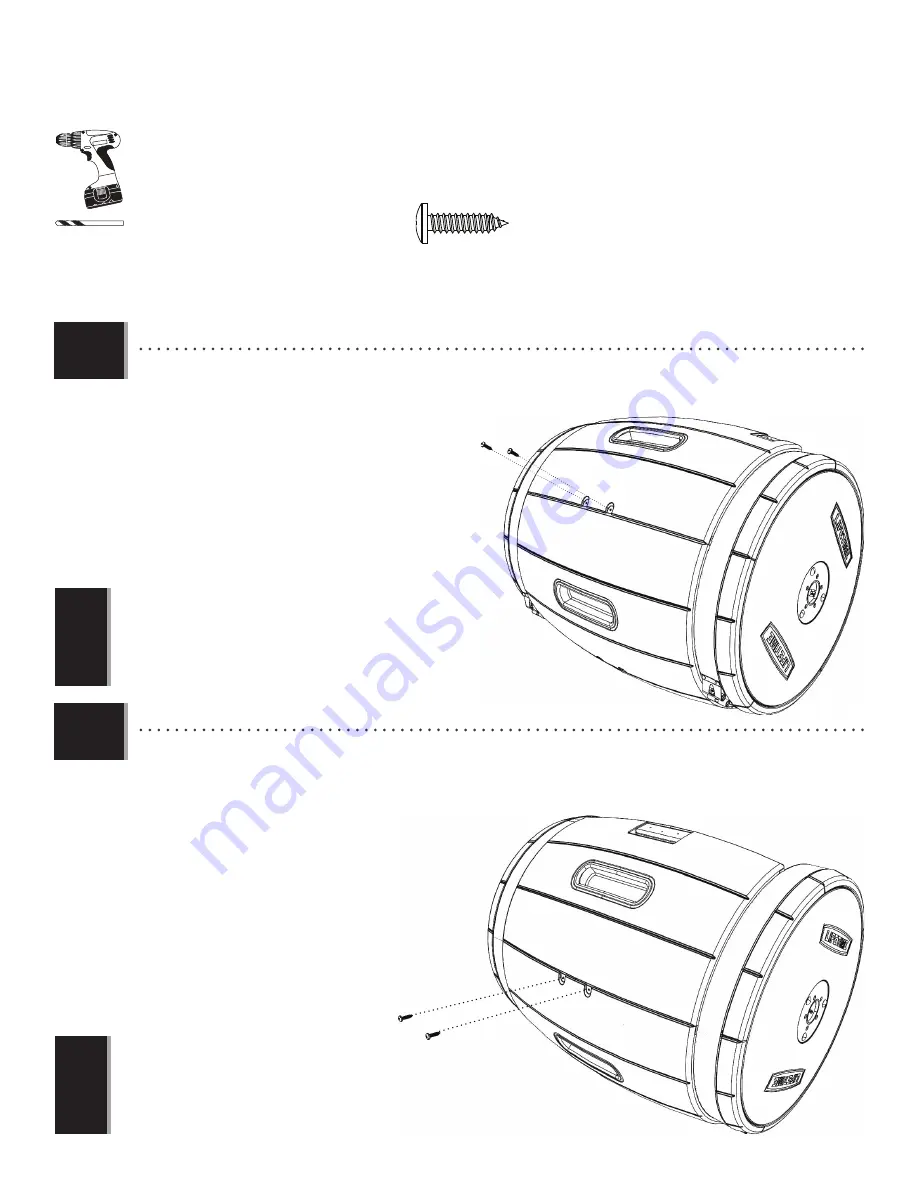
1.13
1.14
ADW (x8)
• Use an electric drill to insert two (2)
Screws (ADW)
to secure the Bottom and Front Panels together.
If you wish, you
may pre-drill the holes first.
• Utiliser un perceuse électrique pour insérer deux (2)
vis (ADW)
pour attacher les panneaux inférieur et avant l’un
à l’autre.
Si besoin, percer les trous en premier.
• Usar un taladro eléctrico para insertar dos (2)
tornillos (ADW)
para sujetar los paneles inferior y
delantero el uno al otro.
Si es necesario, se pueden
taladrar los agujeros primero.
• Use an electric drill to insert two (2)
Screws (ADW)
to secure the Bottom and Rear Panels together.
If you wish, you
may pre-drill the holes first.
• Utiliser une perceuse électrique pour insérer deux (2)
vis (ADW)
pour attacher les panneaux inférieur et arrière
l’un à l’autre.
Si besoin, percer les trous en premier.
• Usar un taladro eléctrico para
insertar dos (2)
tornillos (ADW)
para
sujetar los paneles inferior y trasero
el uno al otro.
Si es necesario, se
pueden taladrar los agujeros primero.
Note: Continue inserting the Screws until
flush with the Panel.
Remarque : Insérer les vis jusqu’à ce
qu’elles soient au ras du panneau.
Nota: Seguir insertando los tornillos hasta
que estén a ras del panel.
Note: Continue inserting the Screws until
flush with the Panel.
Remarque : Insérer les vis jusqu’à ce
qu’elles soient au ras du panneau.
Nota: Seguir insertando los tornillos hasta
que estén a ras del Panel.
!
!
ADW
ADW
ADW
ADW
ARA (x1)
Summary of Contents for 60309
Page 35: ...35 NOTES REMARQUES NOTAS ...
Page 36: ...36 NOTES REMARQUES NOTAS ...
Page 37: ...37 NOTES REMARQUES NOTAS ...


