


16
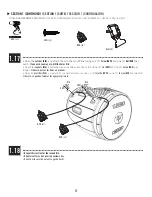
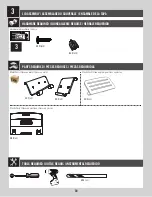
TOOLS AND HARDWARE REQUIRED /
OUTILS ET QUINCAILLERIE REQUIS
/
INSTRUMENTAL Y HERRAJE REQUERIDOS
1
X
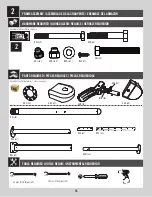
SECTION 1 (CONTINUED) /
SECTION 1 (SUITE)
/
SECCIÓN 1 (CONTINUACIÓN)
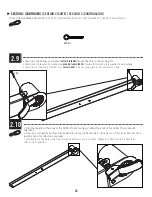
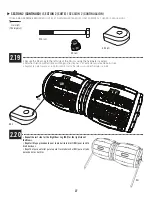
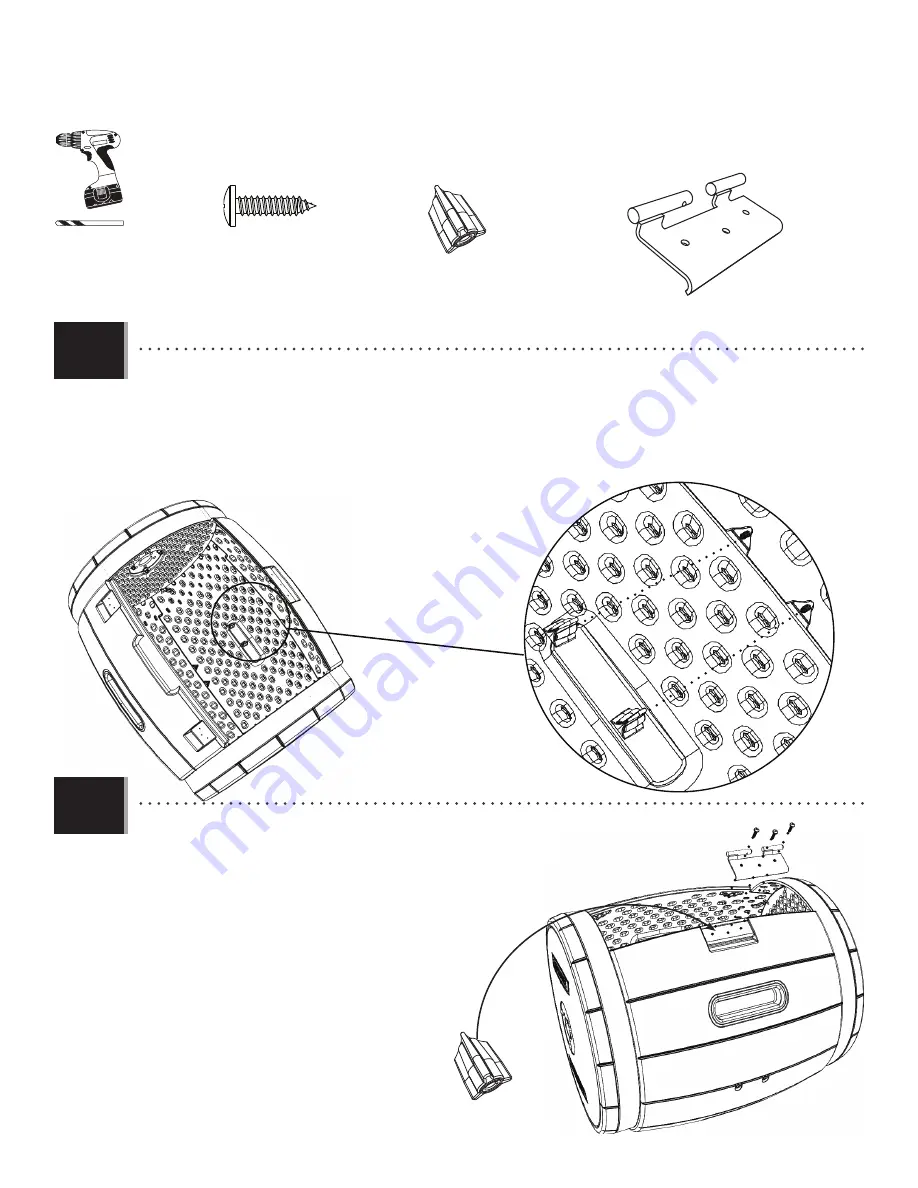
1.15
BHK (x18)
BHK (x3)
EHB (x2)
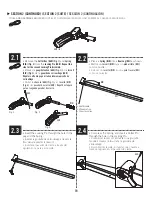
• After inserting the Screws, place a
Nut (BHK)
onto a Screw and turn the Screw until the Nut is flush with the Panel.
It’s easier
to do this step with an electric drill, but do not overtighten. Repeat this step to join remaining Panels.
• Après avoir inséré les vis, mettre un écrou sur la vis, et tourner-la jusqu’à ce que l’écrou soient au ras du panneau.
C’est
plus facile de faire cette étape à l’aide d’une perceuse électrique, mais ne pas serrer excessivement. Répéter cette étape pour joindre les
panneaux restants.
• Después de insertar los tornillos, colocar una
tuerca (BHK)
en un tornillo, y girarlo hasta que la tuerca esté a ras del panel.
Es más fácil hacer este paso usando un taladro eléctrico, mas no apretar demasiado. Repetir este paso para juntar los paneles restantes.
BHK
BHK
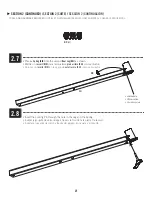
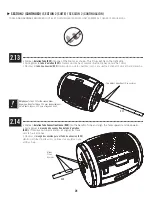
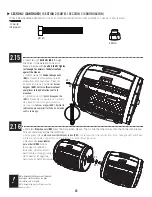
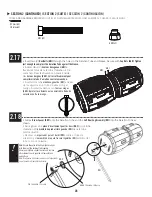
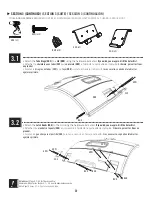
1.16
ADW (x6)
• Attach the
Pinned Hinge (EHB)
to the Rear Panel with
three (3)
Screws (ADW)
and three (3)
Nuts (BHK)
.
If you wish,
you may pre-drill the holes first.
• Attacher la
charnière avec goupilles (EHB)
au panneau
arrière à l’aide de trois (3)
vis (ADW)
et trois (3)
écrous
(BHK)
.
Si besoin, percer les trous en premier.
• Sujetar la
bisagra con ejes (EHB)
al panel trasero usando
tres (3)
tornillos (ADW)
y tres (3)
tuercas (BHK)
.
Si es
necesario, se pueden taladrar los agujeros primero.
EHB
ADW
ARA (x1)
Summary of Contents for 60309
Page 35: ...35 NOTES REMARQUES NOTAS ...
Page 36: ...36 NOTES REMARQUES NOTAS ...
Page 37: ...37 NOTES REMARQUES NOTAS ...


