background image

3.


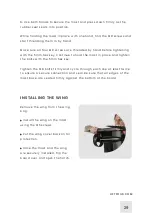
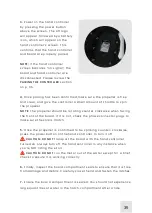
Use both hands to secure the mast and press down firmly as the 

rubber seal seats into position.

While holding the mast in place with one hand, find the M8 screws and 
start threading them in by hand.

Make sure all four M8 screws are threaded by hand before tightening 
with the 5mm hex key. Continue to hold the mast in place and tighten 
the bolts with the 5mm hex key.

Tighten the M8 bolts firmly and cycle through each one at least twice 
to ensure a secure connection and seal. Be sure that all edges of the 
mast base are seated firmly against the bottom of the board.

LIFTFOILS.COM

INSTALLING THE WING

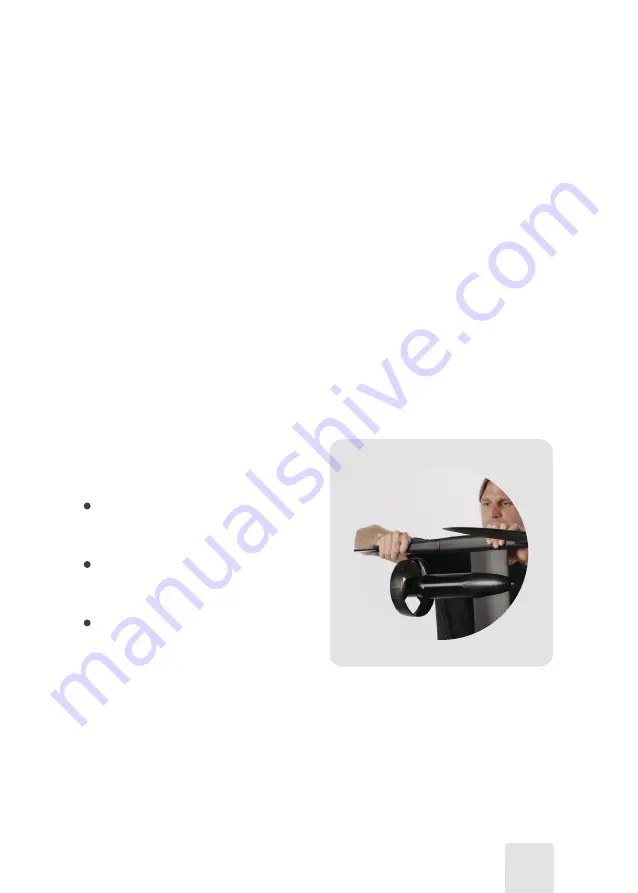
Remove the wing from the wing 
bag.

• Install the wing on the mast 
using the M6 screws.

• Put the wing cover back on for 
protection.

• Once the mast and the wing 
are securely installed, flip the 
board over and open the hatch.

29

Summary of Contents for LIFT eFOIL

Page 1: ...Instruction Manual LIFT eFOIL...

Page 2: ...2021 Instruction Manual...

Page 3: ......

Page 4: ......

Page 5: ...Lift eFoil 1 6 How the Lift eFoil arrives Components Charging the Battery Assembly Getting Ready to Ride 3 2 Installing the Battery Booting Up the System Riding the eFoil 38 Post Ride 40 Powering Dow...

Page 6: ...in foiling The first is the early advocates the ones who have been on the edge of the sport for years who are going to achieve levels of mastery that are simply beyond what we can even comprehend toda...

Page 7: ...st once again in the ancient art of riding the wind What s most exciting is that non surfers will learn to wing foil and surf open ocean swells in a matter of a few lessons something that traditional...

Page 8: ...eFOIL OVERVIEW Hatch Compartment Mast Propeller Board 1 3 4 2 08 2 1 4 3 5 Bluetooth Antenna 5...

Page 9: ...eBox Tail Wing Battery Motor 7 8 9 6 09 8 10 6 7 9 Front Wing 10...

Page 10: ...the Lift board without advance notice The most current information can be found on the Lift Foils website www liftfoils com WARRANTY The Lift eFoil is subject to a two year manufacturer s limited war...

Page 11: ...ing order and that the product is otherwise fit for use NEVER USE A DAMAGED PRODUCT Do not allow others to operate the craft without making them fully aware of the proper procedures and risks of the c...

Page 12: ...CAUSE SERIOUS INJURY OR DEATH KEEP BODY FINGERS AND TOES COMPLETELY AWAY FROM THE PROPELLER NEVER HANDLE THE PROPELLER WHILE THE BATTERY IS CONNECTED TO THE LIFT EFOIL Disconnect the power source bef...

Page 13: ...this unit in accordance with all applicable laws DO NOT dispose of this unit Recycling or disposal of lithium ion batteries requires specialized facilities Only charge using the unit provided DO NOT l...

Page 14: ...racks seam of the lid not closing down with the rest of the case The battery experienced significant drop or shock The battery becomes irregularly hot to the touch The battery is at a significant leve...

Page 15: ...place heavy objects on the battery or charger DO NOT walk or stand on your battery DO NOT use a battery different than the lithium ion Lift Foils battery If damage results from a non Lift Foils batter...

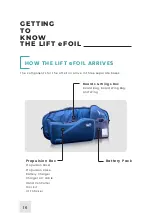
Page 16: ...rate boxes Battery Pack Boards Wings Box Board Bag Board Wing Bag and Wing Propulsion Box Propulsion Mast Propulsion Case Battery Charger Charger AC cable Hand Controller Tool Kit LIFT Sticker GETTING...

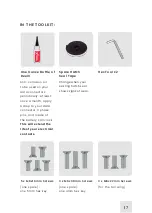
Page 17: ...ase pins and inside of the battery cam lock This will extend the life of your electrical contacts One Ounce Bottle of ReelX one spare one 5mm hex key 5 x M8x16mm Screws Change when your existing hatch...

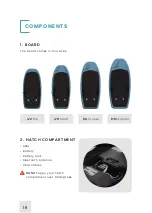
Page 18: ...HATCH COMPARTMENT eBox Battery Battery Lock Bluetooth Antenna Data Cables 4 2 Pro 4 9 Sport 5 4 Cruiser 5 9 Explorer COMPONENTS 18 DO NOT open your hatch comparment over 90 degrees The board comes in...

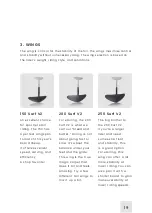
Page 19: ...e 200 Surf V2 For eFoiling the 200 Surf V2 is what we call our bread and butter Foiling is not about going fast or slow It s about the balance under your feet and the glide This wing is the true magic...

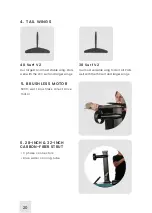
Page 20: ...2 INCH CARBON FIBER STRUT 3 phase connectors Blue water cooling tube 20 4 TAIL WINGS 48 Surf V2 Our largest and most stable wing Pairs well with the 200 surf and larger wings 38 Surf V2 Our most versa...

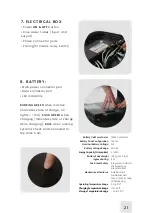
Page 21: ...check and connected to the drive train 8 BATTERY 21 Battery Cell Form Factor Battery Pack Configuration Nominal Battery Voltage Battery Voltage Range Battery Pack Weight Ingress Rating OperatingTemper...

Page 22: ...about 50 hours of ride time Use a 2mm hex key to remove the remote s end cap 22 Data Cables The data cables sends sensitive communication from the battery to the electrical box and can be damaged by c...

Page 23: ...The power button is above the screen Click to turn the controller ON and OFF POWER BUTTON HOME SCREEN Under the screen GOVERNOR SET BUTTON 23...

Page 24: ...CHARGING THE BATTERY 1 Identify the main power connector port on the battery 2 Identify the data connector port and remove cap 24...

Page 25: ...e the connection which can damage the power connector panel of the battery 5 Plug the data connector into the data port by matching the red dots on both connectors and make sure to feel the connector...

Page 26: ...wall outlet AFTER both the main power connector and data connector have been connected NOTE This is a high energy charger and should not share a power receptacle with other appliances Make sure that t...

Page 27: ...rger from wall outlet Disconnect the data plug from the battery Disconnect the power connector cam lock from the battery DISCONNECTING THE BATTERY 27 The charger fan will come on automatically if and...

Page 28: ...al on the surface with three phase connectors and one blue water tube with connector 2 Locate the four threaded inserts on the bottom of the board This is where the mast will connect Steady the mast a...

Page 29: ...mast in place and tighten the bolts with the 5mm hex key Tighten the M8 bolts firmly and cycle through each one at least twice to ensure a secure connection and seal Be sure that all edges of the mas...

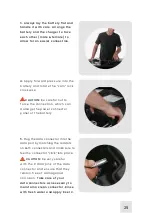
Page 30: ...atch compartment when opening 2 Connect the three phase connectors to the eBox and both ends of the water cooling tube NOTE There is a distinct feeling and sound when the blue water cables connect Thi...

Page 31: ...rproof seal Ensure that the orange o ring is fully inserted CAUTION If the phase connectors are not fully seated into the ESC Box and water enters the hatch compartment it may result in an electrical...

Page 32: ...d and place the fully charged battery inside with the stickers facing up Secure the battery using the battery lock cam Make sure the electrical box is turned off by viewing the POWER BUTTON button on...

Page 33: ...ery receptacle for signs of corrosion Clean it with an electrical contact cleaner spray if needed and once dry apply a drop of Reel X 3 Remove the protective cover from the data port on the battery an...

Page 34: ...e an audible click inside the battery as the battery turns on This is the internal battery contact closing the circuit and applying voltage to the system After a few seconds there will be a chime from...

Page 35: ...Foil CAUTION DO NOT run the motor out of the water except for a brief check to ensure it is working correctly 6 Finally inspect the board compartment seals to ensure that it is free from damage and de...

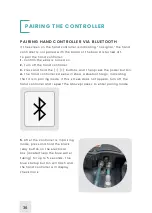
Page 36: ...process to enter pairing mode PAIRING HAND CONTROLLER VIA BLUETOOTH If the screen on the hand controller is indicating no signal the hand controller is not paired with the board or the board is turned...

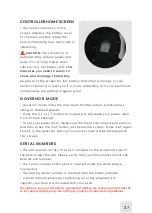
Page 37: ...ommend all boards to be registered properly according to your local rules and regulations Governor mode limits the maximum throttle output which allows riding at reduced speeds Press the or button to...

Page 38: ...the trigger fully or quickly Beginners should use the governor feature in the hand controller Select governor setting one and start learning the basics and getting comfortable handling the eFoil LEARN...

Page 39: ...with a partner for added safety Bailing is a critical part of learning to foil There s a big difference between purposefully bailing out which puts distance between the rider and the eFoil and uncontr...

Page 40: ...a cup 3 Disconnect the data cable from the battery by pulling back on the metal housing 4 Disconnect the main power connector from the battery by twisting the cam lock counter clockwise and releasing...

Page 41: ...eFoil When storing your eFoil make sure to use the provided bags and cases and don t store them in direct sunlight UV and excessive heat exposure can cause permanent damage Don t leave the hand contr...

Page 42: ...ith the latest software download the Lift Quickstart App CONNECT UPDATE YOUR PRODUCTS To connect your board and or hand controller simply open the App and navigate to the My Products section There you...

Page 43: ...it a service ticket to our customer support team You can contact us at help liftfoils com By providing the necessary information it will ensure our team can provide quick and detailed responses to add...

Page 44: ...underwater Excess water inside the battery compartment Inspect the gasket seal to determine if there s anywhere allowing water to flow in Tighten your latches as shown on our Youtube video Maintenanc...

Page 45: ...charge The controller isn t connecting to the board If the screen on the hand controller is indicating no signal the hand controller isn t paired with the board or the board is turned off Ensure that...

Page 46: ...t and confirm that the data connector is clean and free of debris and or corrosion Check that all connectors are properly mated Dropped the battery DO NOT USE THE BATTERY AND CONTACT LIFT Damage to El...

Page 47: ...NOTES LIFTFOILS COM 47...

Page 48: ...LIF TFO ILS COM info liftfoils com Phone 1 787 609 6198 LiftFoils...

Reviews: