background image

USER MANUAL 

 HDN 

 EN VERSION 02.01


Liftup A/S

 | Hagensvej 21 | DK-9530 Støvring | Denmark | 

T:

 +45 96 86 30 20 | 

M:

 support@liftup.dk | www.liftup.dk | CVR DK-1015 3964  


18 

13.2


Wireless call station and receiver 2,4 GHz 

The transmitter and receiver must always be paired in order to work. This is normally done at 
the factory or, by


an authorised* service technician. The receiver will not react to a transmitter 

which is not paired with it. A receiver can be paired with up to 20 transmitters. A transmitter 
can be paired with several receivers, if required.  
 

*Has completed a Liftup product and service course.


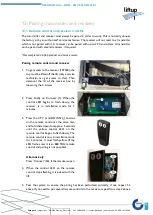
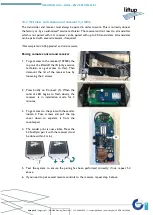
Pairing remote control and receiver 

 
1.


To get access to the receiver (107500), the 
top must be lifted off the lift (only a service 
technician  can  get  access  to  this).  Then 
demount  the  lid  of  the  receiver  box  by 
loosening the 4 screws. 


2.


Press briefly on 

’Connect’ (1). When

 the 

control  LED  begins  to  flash  slowly,  the 
receiver  is  in  installation  mode  for  2 
minutes. 


3.


To get access to the print with the sender, 
loosen  2  Torx  screws  and  pull  the  top 
cover  down  to  separate  it  from  the 
counterpart.  

 
4.


The sender print is now visible. Press the 
S4 briefly to pair it with the receiver (must 
be done within 2 min.). 


5.


Test  the  system,  to  ensure  the pairing  has been performed  correctly;  if  not, repeat  1-4 
above. 

6.


If you need to pair several remote controls to the receiver, repeat step 2 above. 


Summary of Contents for HDN

Page 1: ...Liftup A S Hagensvej 21 DK 9530 St vring Denmark T 45 96 86 30 20 M support liftup dk www liftup dk User manual HDN USER MANUAL HDN EN VERSION 02 01...

Page 2: ...9 6 6 Anti crushing 10 6 7 Avoid personal injury 10 6 8 Safety barriers 10 6 9 Automatic door 11 6 10 Unlocking the door in case of emergency 11 6 11 Handling 11 7 Functioning 12 8 Assembly 12 9 Star...

Page 3: ...30 20 M support liftup dk www liftup dk CVR DK 1015 3964 3 14 Installation and handover 20 15 Maintenance checklist 21 16 Service logbook 23 17 Online service log only certain countries 24 18 Spare pa...

Page 4: ...correct assembly Improper assembly can lead to unintended danger elements The HDN lift is an innovative lifting platform for wheelchair users The solution sees elegant design combined with a robust c...

Page 5: ...t is in compliance with relevant safety and health requirements in EMC Directive 2014 30 EU RoHS Directive 2011 65 EU Radio Equipment Directive 2014 53 EU RED Relevant parts of the following were for...

Page 6: ...USER MANUAL HDN EN VERSION 02 01 Liftup A S Hagensvej 21 DK 9530 St vring Denmark T 45 96 86 30 20 M support liftup dk www liftup dk CVR DK 1015 3964 6 3 Factory Acceptance Test FAT...

Page 7: ...must NOT be used for goods transport including loaded pallets or other types of heavy loads IMPORTANT The owner of this lift is obliged to maintain it according to the Maintenance Guide in section 12...

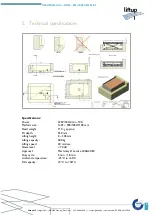
Page 8: ...chnical specifications Specifications Power 230V 50 Hz min 10A Platform size 1400 x 900 1000 1100 mm Dead weight 110 kg approx Pit depth 350 mm Lifting height 0 500 mm Lifting capacity 400 kg Lifting...

Page 9: ...for approx 5 seconds If the problem continues call technical assistance 6 3 Lift movements The space under the lifting platform must be kept free of all objects that may impair the platform s downward...

Page 10: ...lar It is important that the operator ensures that the platform can move without putting anyone or anything at risk Be extra careful when there are small children and disabled on or near the lifting p...

Page 11: ...n Demount the glass 6 11 Handling The HDN lift is normally supplied by your dealer who also takes care of installation Do not try to move the lifting platform manually as this can lead to permanent in...

Page 12: ...bly and installation are not performed by an authorised service technician For more information or materials on assembly contact your dealer https www liftup dk en distributors Has completed a Liftup...

Page 13: ...for the entire time since the platform will automatically stop when the button is released The lifting platform starts by raising the safety plates and then moves up to the upper level The platform st...

Page 14: ...the platform stops To lower the platform press the arrow button and hold it down until the platform stops and the safety plates are completely down 11 Operation Under normal operating conditions the...

Page 15: ...ken in connection with the regular service inspection This is to be undertaken by an authorised service technician several times a year depending on whether the platform is indoors or outdoors cf sect...

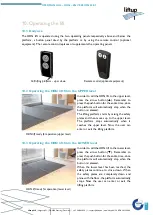
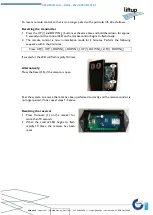
Page 16: ...he lift only a service technician can get access to this Then demount the lid of the receiver box by loosening the 4 screws 2 Press briefly on Connect 1 When the control LED begins to flash slowly the...

Page 17: ...te control begins to flash slowly 2 The remote control is now in installation mode for 2 minutes Perform the following sequence within the 2 minutes Press UP UP DOWN DOWN UP DOWN UP DOWN If successful...

Page 18: ...e course Pairing remote control and receiver 1 To get access to the receiver 107500 the top must be lifted off the lift only a service technician can get access to this Then demount the lid of the rec...

Page 19: ...longer paired with a particular lift do as follows Resetting the transmitter 1 Press the S4 on the transmitter for more than 10 seconds 2 When the control LED begins to flash rapidly the transmitter h...

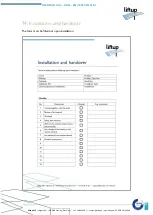
Page 20: ...N EN VERSION 02 01 Liftup A S Hagensvej 21 DK 9530 St vring Denmark T 45 96 86 30 20 M support liftup dk www liftup dk CVR DK 1015 3964 20 14 Installation and handover The form must be filled out upon...

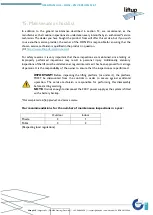
Page 21: ...t that these inspections are maintained since lacking or improperly performed inspections may result in personal injury Additionally statutory inspections of the lift must be undertaken at regular int...

Page 22: ...EN VERSION 02 01 Liftup A S Hagensvej 21 DK 9530 St vring Denmark T 45 96 86 30 20 M support liftup dk www liftup dk CVR DK 1015 3964 22 A check form like the one below shall be filled out at each in...

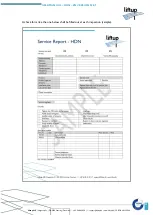
Page 23: ...HDN EN VERSION 02 01 Liftup A S Hagensvej 21 DK 9530 St vring Denmark T 45 96 86 30 20 M support liftup dk www liftup dk CVR DK 1015 3964 23 16 Service logbook The logbook shall be filled out at each...

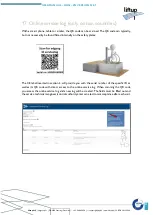
Page 24: ...de can typically but not necessarily be found fitted internally on the safety plates The CE label inserted in section 3 will provide you with the serial number of the specific lift as well as its QR c...

Page 25: ...disassembly for any re use in another installation we recommend using an authorised service technician Contact your dealer for disassembly help Note that a crushing risk may exist when the HDN lift i...

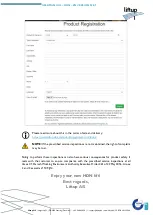
Page 26: ...l conditions NOTE If the prescribed service inspections are not maintained the right of complaint may be lost Failing to perform these inspections can also have serious consequences for product safety...

Page 27: ...___________________________________________________________ _____________________________________________________________________________ ______________________________________________________________...

Page 28: ...USER MANUAL HDN EN VERSION 02 01 Liftup A S Hagensvej 21 DK 9530 St vring Denmark T 45 96 86 30 20 M support liftup dk www liftup dk CVR DK 1015 3964 28...

Reviews: