4. Operation of MX2-8x8-HDMI20-Audio
MX2-8x8-HDMI20 series – User's Manual
16
4.3. Front Panel LCD Menu Operations
The company logo is displayed on the screen during the boot-up. The
main menu is displayed after about 30 seconds later and the device
is ready to use.
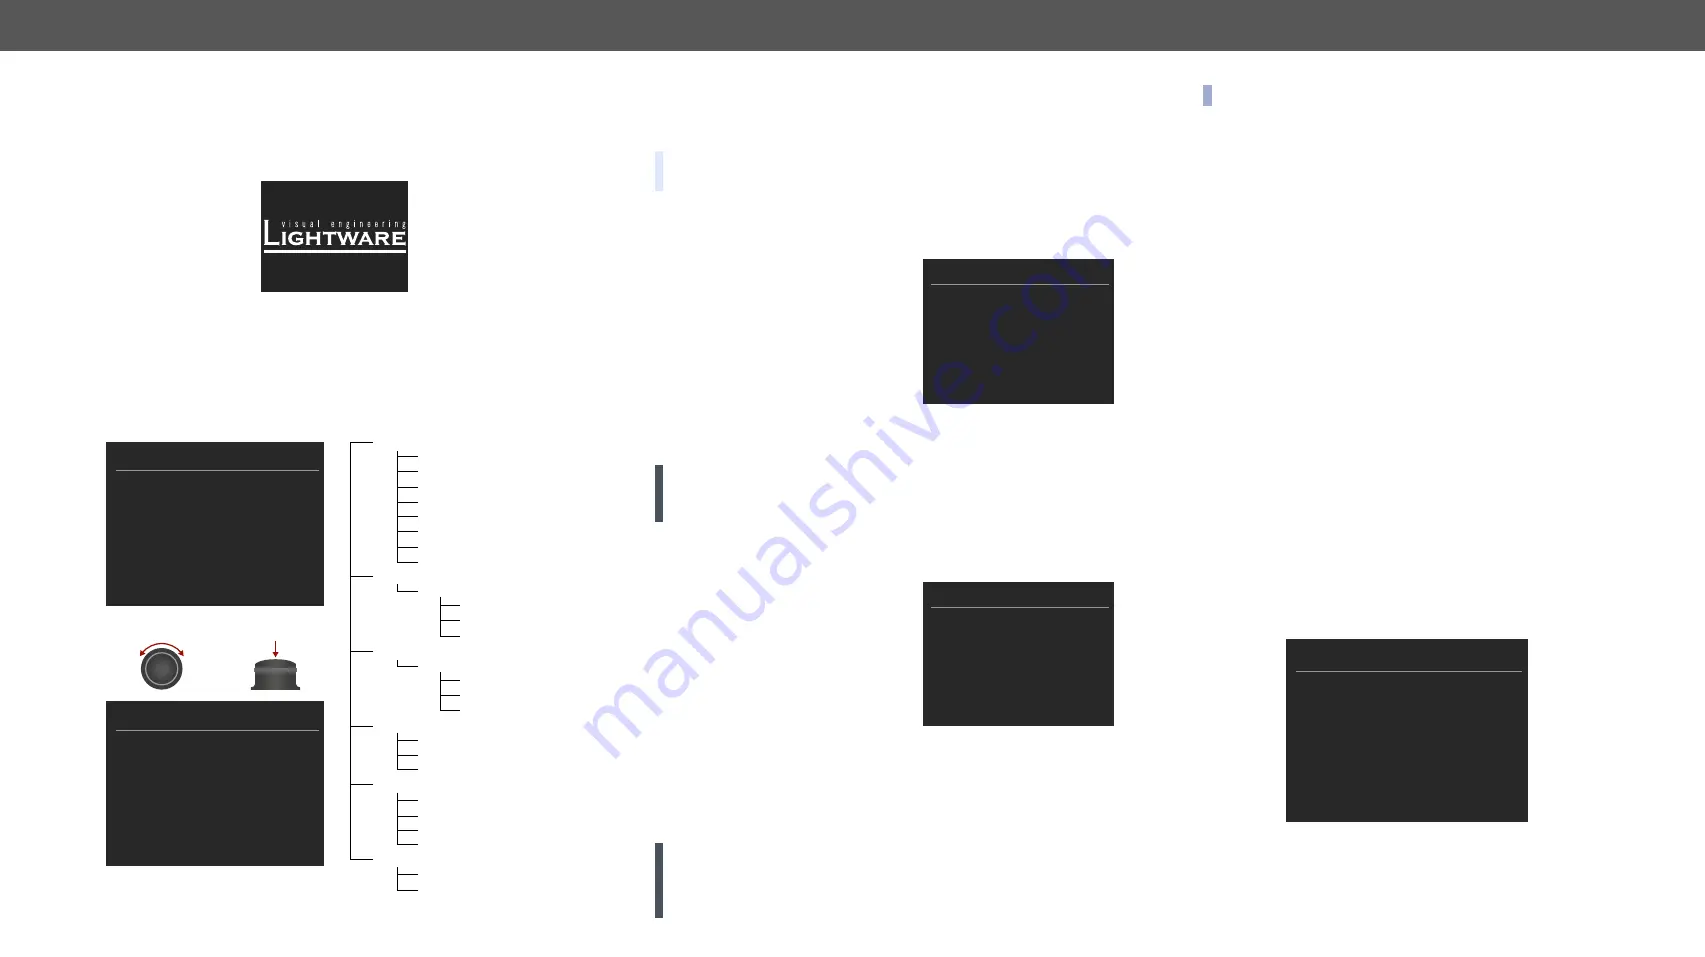
Menu Structure
The front panel has a color LCD that shows the most important
settings and parameters structured in a menu. The jog dial control
knob can be used to navigate between the menu items or change the
value of a parameter. The knob can be pressed to enter a menu or
edit/set a parameter.
OUTPUT MODE
Auto
HDMI
DVI
○
«
Back
Up
Down
Menu navigation
& change parameter
Menu selection
& set parameter
Press
MAIN MENU
System Settings
Input Ports
Output Ports
EDID
Health
Presets
System Settings
Network
RS-232
Time and Date
Display
Brightness
Buzzer
Device
Info
Enter Standby Mode
Restore Factory Defaults
Input Ports
Port
1..8
Video
Status
Video
Settings
Audio
Output Ports
Port
1..8
Video
Status
Video
Settings
Audio
EDID
View
Switch
Save
Health
Uptime
Control
Panel
Motherboard
IO
ports
Presets
Load
Preset
Save
Preset
Parameter Selection
The
blue
colored line means the selected menu/parameter, the
green
one means the current setting.
TIPS AND TRICKS: The faster you rotate the jog dial, the faster the
parameter list is scrolled.
4.3.1.
System Settings Menu
Network Submenu
The parameters of the network
connection can be set in this submenu.
The first three lines (IP, Subnet, and
Gateway parameters) show the
current settings. If the DHCP option is
disabled, three more parameters are
listed which can be set for a static IP
address:
▪
Static IP,
▪
Static Subnet,
▪
Static Gateway.
ATTENTION!
If you change the network settings, always press the
Save option under Network menu (not only in the submenu of the
parameter) to apply the new settings.
RS-232 Submenu
Adjustable parameters of the local RS-232 port:
▪
Control
(enable/disable the
device control),
▪
Baud Rate
(9600, 19200, 38400,
57600, 115200),
▪
Protocol
(LW2, LW3 or P#2
protocol).
Time and Date
The internal clock and date can be set in this submenu which is used
for logging events.
Display Brightness
The brightness of the LCD can be set from 1 to 10 on a scale.
ATTENTION!
The lowest value of the brightness parameter is 1 when
setting via the front panel. The setting is available in Lightware Device
Controller software as well, but in that case, the lowest value is 0,
which means the display is switched off; see
section.
NETWORK
IP
Subnet
Gateway
DHCP
Link Status
MAC
192.168.0.97
255.255.255.0
192.168.0.1
Enabled
100 Mbps full-duplex
00:14:2d:2b:43:89
«
Back
Save
RS-232
Control
Baud Rate
Protocol
Enabled
57600
LW3
«
Back
INFO: When the matrix is in Standby mode, the display is switched off.
Buzzer
There is a buzzer in the matrix which sounds in certain cases (during
booting, network or parameter change, etc.). It can be enabled/
disabled in this submenu.
Device Info
The following information is available in the submenu:
▪
Frame Serial Number
,
▪
Hardware Versions
of the PCB components,
▪
Firmware Versions
of the installed boards.
Enter Standby Mode
The device can be switched to standby mode. In this case, the
video transmission is disabled and the LCD is switched off. Remote
connections (LAN, RS-232) remain enabled. Press the jog dial button
on the front panel to wake up the matrix (or see the related settings in
section).
Restore Factory Defaults
The default settings can be reloaded in this submenu, for deails see
.
4.3.2. Input Ports Menu
When entering the menu the available video input ports are listed. The
icons display information about the port and the incoming signal (see
below table). Select the desired input port and enter to see the
submenu.
INPUT PORTS
Port 1
Port 2
Port 3
Port 4
Port 5
Port 6
«
Back


