background image

Ultra Series IP Camera Start Guide   


Page14


Alarm Interval 


Profiles: choose from 6 different profiles 


VBR: variable bit rate, an encoding mode that reduces the use of bandwidth; CBR: constant bit rate, 

an encoding mode that consumes more bandwidth 


Bit rate: the maximum bit rate available for your network connection 


Output frame rate: the frame rate of the video 


GOP: the number of I-frames to be displayed in one second 


TV Out: NTSC/PAL video systems 

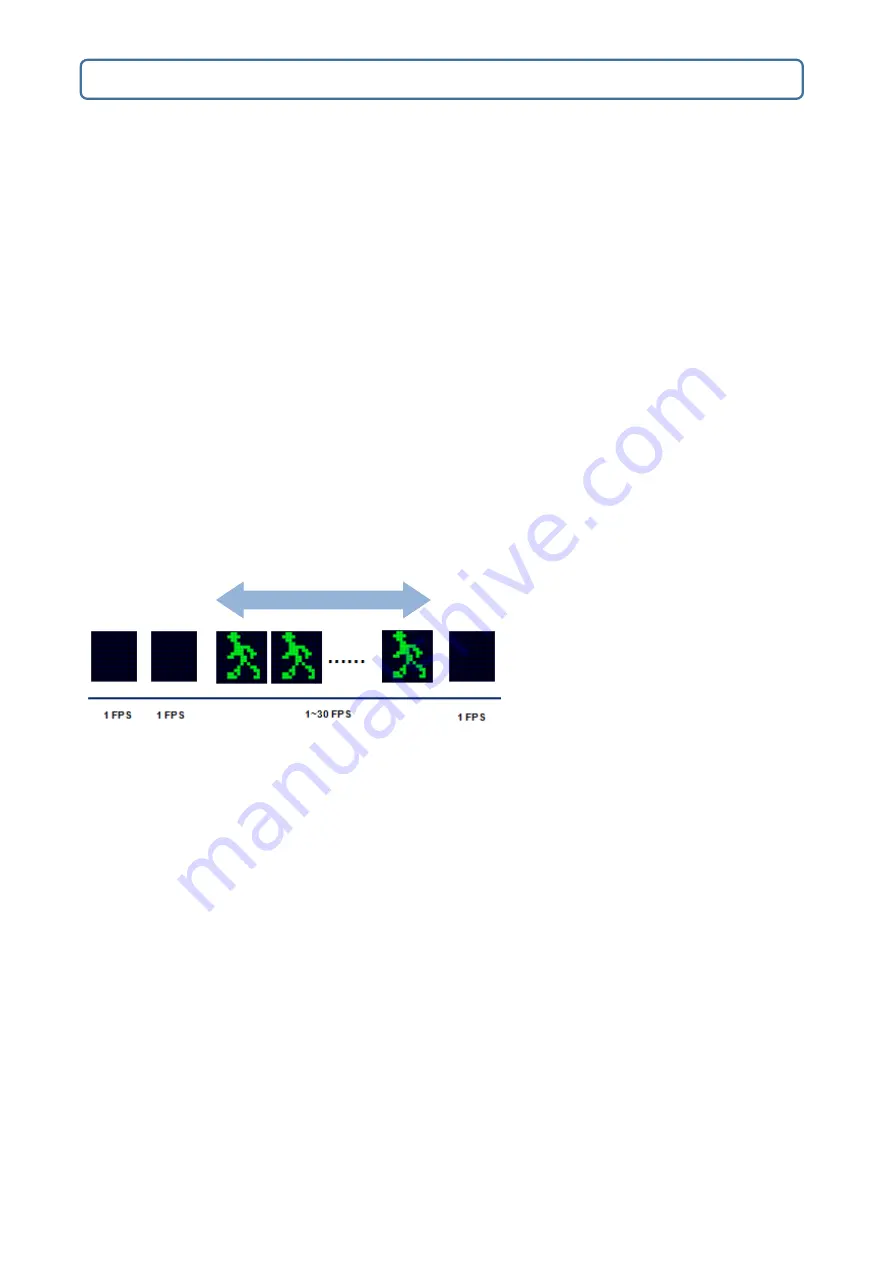
Chapter 4-4-1 Alarm Weighted Mode 

Weighted mode is activated when an alarm is triggered, and the stream rate will increase to the maximum rate, 

i.e. 30 FPS. If there is no alarm activity, the streaming remains at 1 FPS to save bandwidth and storage.     


Chapter 4-5 Quality Basic 

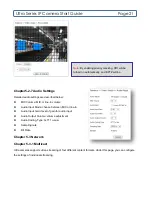
This menu allows you to adjust brightness, contrast, hue, saturation, and sharpness both for Day Mode and 

Night Mode. The IP camera can be set to day and/or night for optimum video quality.     

Chapter 4-6 Network Settings 

Network settings are the basic settings that connect H.264 4K Ultra HD IP cameras to the network. The default 

IP address of our IP cameras is 192.168.0.200. Enter this IP address into your web browser to verify the 

network connection between a local PC and the H.264 4K Ultra HD IP camera.     

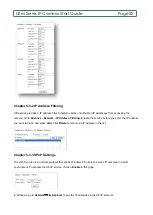
To set up a local area network, enter the IP address, subnet mask, gateway, and DNS. Click 

Submit

 to update 

the settings. 

Summary of Contents for UFG1122

Page 1: ...4K Ultra HD IP Camera Start Guide ...

Page 2: ...rt Wide Dynamic Range WDR 3D noise reduction Backlight Compensation BLC adjustable shutter speed and privacy masking features The built in intelligent video analytics engine enables audio and motion detection Other useful features include two way audio SD card recording mobile device live access email notification with JPEG snapshots and JPEG to FTP upload The Ultra series cameras with their lates...

Page 3: ...ista Windows 7 ActiveX and Internet Explorer are registered trademarks of Microsoft Corporation in the U S and or other countries Java and all Java based trademarks and logos are trademarks or registered trademarks of Sun Microsystems Inc in the United States and other countries Flash Macromedia and Macromedia Flash Player are either trademarks or registered trademarks of Adobe Systems Incorporate...

Page 4: ...nt Do not install the equipment near fire or heat sources Keep the equipment from rain moisture smoke or dust Do not cover the opening of the cabinet with cloth and or plastic or install the unit in poorly ventilated places Allow 10cm between this unit and its surroundings Do not continue to operate the unit under abnormal conditions such as smoke odor or loss of signal whilst power is turned on D...

Page 5: ... power and network bandwidth for video streaming The following sections specify the system requirements for using a 4K Ultra HD H 264 IP camera Chapter 1 2 Software Requirements Merit LILIN Universal ActiveX software components or QuickTime are required for a web browser to display JPEG or H 264 4K Ultra HD video When you first log in to our IP camera you may see a prompt box Click Install and fol...

Page 6: ...he installation CD directly To change the IP address subnet mask gateway or HTTP port of your cameras follow the steps below Run the IPScan utility Click Refresh All available devices will be listed on the screen Select the device item from the device list To edit or modify IP address subnet mask gateway or HTTP port use the box Click Apply for the changes to take effect Click Refresh again to ver...

Page 7: ...et this in Internet Explorer Tools Internet Options Security Custom Settings Once completed you can access the IP camera s live video by entering the default IP address into your web browser A security warning dialog box will appear Click OK to download the ActiveX directly from the IP camera Chapter 2 4 Login You can log in to the camera as administrator or guest Default usernames and passwords a...

Page 8: ...ions Chapter 3 1 IP Camera Operations 1 Profile switching menu Switching from one profile to another 2 ActiveX display screen Display RTSP H 264 or JPEG network video 3 Quick control panel IP camera control panel 4 Setup menu IP camera setup menu The ActiveX control provides an ePTZ electronic Pan Tilt and Zoom feature To perform an ePTZ operation hold and drag your mouse across the screen 2 4 3 1...

Page 9: ... 3 2 IP Camera Main Controls The quick control panel buttons are described below Chapter 3 2 1 Two way Audio For models supporting two way audio click the microphone icon to speak to a remote site Click the icon again to turn the microphone off Snapshot Take a snapshot of the video Recording Start recording Speaker on off for audio models only Microphone on off for audio model only Alarm output on...

Page 10: ...lick the icon again to turn the speaker off Chapter 3 2 2 Record to a Local PC To record to a local PC right click anywhere on the screen Choose Setting to specify the recording paths and recording sizes and choose Recording On to start recording Note Only audio ready IP camera models support this feature ...

Page 11: ...ee server system information such as MAC address firmware version user settings and system time settings To change or use these options follow the below instructions Firmware Version Here you can see the firmware version of your camera To update the firmware remotely see Chapter 4 10 Maintenance Device Name The device name can be found using the IPscan utility which allows you to identify IP camer...

Page 12: ...for access rights To add edit a user click Add Edit User To access an IP camera without authentication set Bypass Logon option to ON To make changes to account name or password simply enter the strings you want to use To delete a user click Remove User Click Submit to update the settings Chapter 4 3 Time The H 264 4K Ultra HD IP camera allows you to change the system time via a standard HTML web p...

Page 13: ...4K Ultra HD IP camera will synchronize its system time with a time server every hour Chapter 4 4 Video Audio Settings To transmit H 264 4K Ultra HD video over a low bandwidth network such as the Internet set the bit rate close to the actual upload bandwidth The camera will encode frames based on the bit rate setting Note NTP servers require Internet connection ...

Page 14: ... to the maximum rate i e 30 FPS If there is no alarm activity the streaming remains at 1 FPS to save bandwidth and storage Chapter 4 5 Quality Basic This menu allows you to adjust brightness contrast hue saturation and sharpness both for Day Mode and Night Mode The IP camera can be set to day and or night for optimum video quality Chapter 4 6 Network Settings Network settings are the basic setting...

Page 15: ... IP camera There is no need to manually configure the IP address subnet mask and gateway However every time the DHCP service is rebooted the IP address of the IP camera may vary You may need to use IPscan to search for the IP camera To enable DHCP click the DHCP option and click Submit Chapter 4 7 HTTP RTSP Service HTTP and RTSP are two reliable protocol for video streaming With correct port forwa...

Page 16: ...u use the first one in the drop down menu Click Submit for the changes to take effect To activate DDNS go to www ddnsipcam com If the IP camera is on Internet with a global IP address use the last 6 digits of the MAC address as the host name with default account and the default password The IP camera will automatically register to www ddnsipcam com Note The DDNS feature requires Internet connectio...

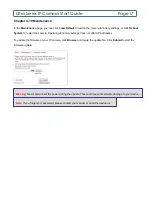
Page 17: ...restart the camera Restoring to factory settings does not affect IP addresses To update the firmware of your IP camera click Browse and locate the update file Click Submit to start the firmware update Warning Never disconnect the power during the update This could cause irreversible damage to your device Note If you forget your password please contact your vendor or send the device us ...

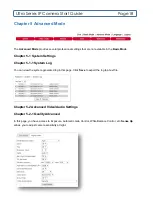
Page 18: ...hapter 5 1 System Settings Chapter 5 1 1 System Log You can view the system generated log in this page Click Save to export the log to a text file Chapter 5 2 Advanced Video Audio Settings Chapter 5 2 1 Quality Advanced In this page you have access to Exposure Automatic Gain Control White Balance Control etc Sense Up allows you to adjust camera sensitivity at night ...

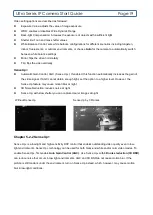
Page 19: ...cally increases the gain of the video signal If AGC cannot obtain enough light set the option to a higher level However the Sense Up feature may cause motion blur at night 3D Noise Reduction reduces noise at night Sense Up with slow shutter you can capture clearer images at night Without Sense Up Sense Up by 3 Frames Chapter 5 2 2 Sense Up Sense Up is a low light and high sensitivity DSP control t...

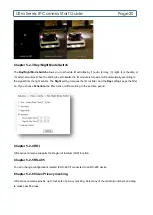
Page 20: ...sor The Night setting removes the IR cut filter and the Day setting keeps the filter on If you choose Schedule the filter turns on off according to the set time period Chapter 5 2 4 ROI Ultra series cameras supports the Region of Interest ROI function Chapter 5 2 5 RS 485 You can change configurations related to RS 485 if connected to an RS 485 device Chapter 5 2 6 Video Privacy masking Ultra seri...

Page 21: ...Gain level of gain for audio input Audio Output Volume volume adjustment Audio Coding Type G 711 u Law Sampling rate Bit Rate Chapter 5 3 Network Chapter 5 3 1 Multicast Ultra cameras supports video streaming of four different content formats Under this page you can configure the settings of individual streaming Note By enabling privacy masking ROI will be turned on automatically and EPTZ will be ...

Page 22: ...ss Filtering Enable the service before you enter the IP address you want to block and press Add Click Delete to remove an IP address in the list Chapter 5 3 3 UPnP Settings The UPnP service is a network protocol that allows Windows PC users to access IP cameras in a LAN environment To activate the UPnP service choose Enable in this page In Windows go to Network File Explorer to see the IP cameras ...

Page 23: ... to activate this service Chapter 5 3 4 SDDP Heartbeat With SDDP Heartbeat support you can connect to any compatible devices Enable the service before you make the connection Chapter 5 4 Event Here you can configure the detection settings for motion tamper sound alarm and network failure Choose an event type in the drop down menu then click Edit Event ...

Page 24: ...le and highlight the time periods you want the camera to detect events Click Submit for the changes to take effect Chapter 5 4 2 Motion Detection Once the above configurations are set click Motion Detection to determine the areas to monitor Simply double click or drag across the areas you want to monitor and cancel your selection by double click again or drag across the areas you don t want to mon...

Page 25: ...4 Alarm Input Detection Event If you connect an external alarm digital input to the IP camera enable Alarm Notification and switch between NO normally open and NC normally closed for the input Chapter 5 4 5 Network Detection Enable this option to send a notification upon network failure Chapter 5 5 Notification To configure alarm notification follow the instructions below ...

Page 26: ...account name to log in to the FTP server Password password of the account Directory file path for storing the JPEG snapshots Prefix prefix of the JPEG filename Date format date string for the JPEG filename Postfix postfix of the JPEG filename Chapter 5 5 2 Email SMTP Service If an alarm is triggered you can send a snapshot to the email account s you designate Enter the required information to enab...

Page 27: ... Event Triggering SD Card Recording Ensure an SD card is properly installed to the camera before you enable the SD recording option The camera will start recording videos when an alarm occurs Chapter 5 5 5 SD Card Backup To download a specific clip right click the file you want to download and save the AVI file to a local PC Warning Ensure to click Unmount before removing the SD card or the system...

Reviews: